


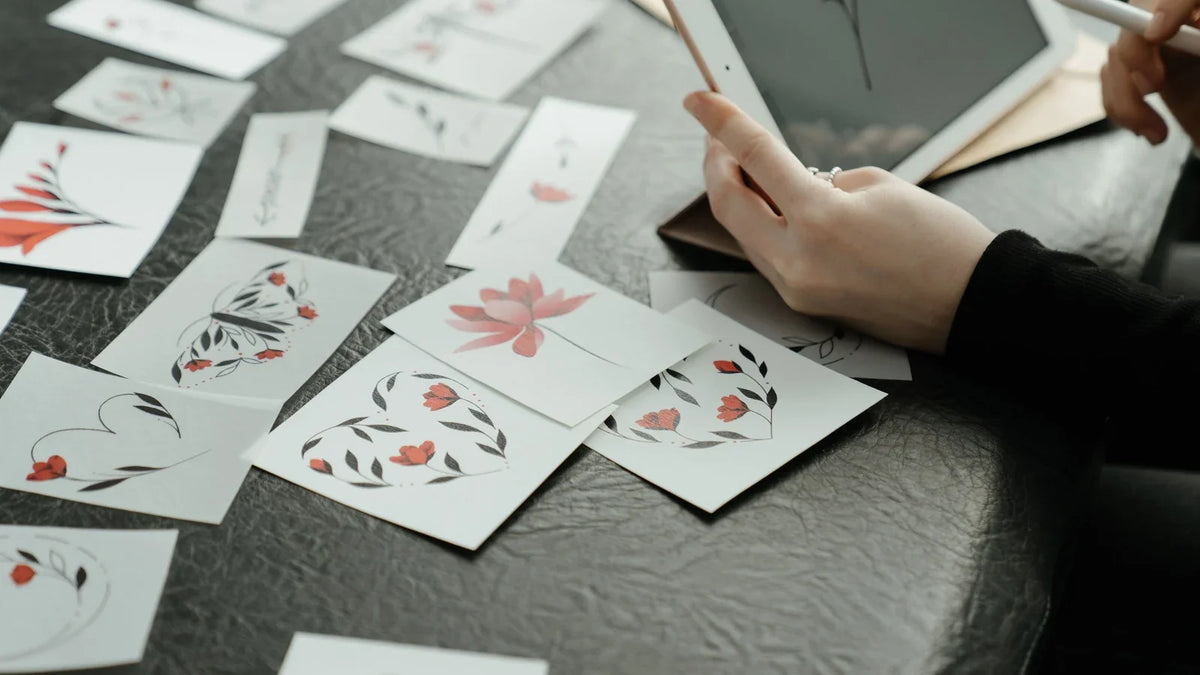
You can make stickers at home using drawings on sticker paper, prints of your designs through compatible sticker paper, or a printer and cutter combination machine which does both tasks for you. In case of a small number of stickers to make, take out your scissors and pen or other material that allows you to create stickers. If you have a compatible printer at home already, use it for your purpose.
A little flower doodle, a name label, or a “made for you” sticker is plenty for a first project. Here’s how to turn it into something you can peel and stick.
The Quick Answer: Choose One of Three Methods
| Method | What you need | Good first project | Basic steps | Main limitation |
|---|---|---|---|---|
| Hand drawing | Writable sticker paper, pens, scissors | Doodles and handwritten gift labels | Draw, dry, cut, peel | Each sticker is made by hand |
| Home printer | Compatible printer and sticker paper, scissors or a cutter | Illustrated stickers and repeat labels | Design, test, print, finish if needed, cut | You handle cutting and any separate finishing |
| All-in-one printer and cutter | Machine, its compatible supplies, design app | Custom-shaped stickers on a shared backing sheet | Import, arrange, preview, print and cut | Sheet size and material choices depend on the machine |
What You Need Before You Start
Pick one simple design, then gather the supplies for your method:
- Artwork: a picture that is either drawn by yourself or with the authorization to use an art piece.
- Adhesive material: writable paper for drawing by hand, printer-friendly sticker paper for printing at home, or supplies required for the all-in-one machine.
- A predetermined size: decide on the location of the sticker. Avoid keeping text and significant information near the cut edge, leaving space between designs.
- Cutting materials: scissors for simple shapes, a paper trimmer for straight lines, or an appropriate machine for repeating outlines.
Try a bold shape and a short word or two. Tiny lettering and intricate outlines are harder to print and cut neatly.
Method 1: Hand-Drawn Stickers and Manual Cutting
The following method does not necessitate the use of a printer. This is a cute way to make a few personal stickers if you like to draw.
Choose matte sticker paper labeled as being compatible for writing/drawing. Test your pen in a spare corner; some shiny surfaces may not absorb the ink well.

- Sketch your idea. Work it out on ordinary paper, then draw on the sticker sheet. Leave space around each design for your scissors.
- Add color and lettering. Use pens or pencils suited to the paper. Let any ink dry before handling it.
- Cut around the design. Cut through the sticker paper and its backing together, leaving a small, even border. Round off sharp corners if they’re awkward to trim.
- Peel and try it. Start on a clean, dry notebook cover or gift envelope. Smooth the sticker down from the center outward.
You’ll have individual stickers, each with its own backing. A slightly wobbly flower still makes a sweet gift label.
Method 2: A Home Printer and Sticker Paper
To print stickers at home with your existing printer, check its media specifications first. Many inkjet and laser printers can print compatible adhesive sheets.
Match the Paper to Inkjet or Laser Printing
Select paper that is suitable for inkjet, laser, or both and check what size and weight of paper your printer can handle. The term “Printable” on the package does not necessarily mean that the paper will work on all printers. Here’s why Avery printer and label instructions show this matching importance.
Using full sheet sticker paper allows you to cut your own stickers. When using pre-cut labels, you will have to use the appropriate template.
Print a Test, Add Finishing if Needed, and Cut
- Arrange your designs. Use the correct page size or label template. Leave margins and enough space to cut comfortably.
- Test on ordinary paper. Print at 100% or Actual Size rather than Fit to Page, following these test-sheet tips. Check dimensions and text. For pre-cut labels, hold the test print against the label sheet to check alignment.
- Print only one sticker sheet using correct loading and set the printer according to the manufacturer's specifications. Check the color and clarity of the print before printing any further because plain paper will not show the actual finish.
- Allow the sheet to dry completely according to the instructions for that material. For added protection of your project, you can use self-adhesive laminate.
- Cut and peel. Scissors work well for simple outlines. Use a trimmer for rectangles, or peel pre-cut labels straight from the sheet.

A separate cutter can help with detailed shapes and repeated batches. Our sticker printer vs. cutting machine guide explains those setups if hand cutting takes too much time.
Method 3: An All-in-One Sticker Printer and Cutter
An all-in-one sticker printer and cutter handles the print and cut stages in one device. With our Liene PixCut S1, you can make custom-shaped stickers that stay together on a backing sheet until you peel them off.

Here’s how to do it in the Liene Photo app:
- Prepare the machine. Install the compatible ribbon cartridge and load PixCut S1 4 × 7-inch sticker paper as shown in the quick start guide. Use the specified sticker supplies for this project.
- Design importation or creation is the next step. Introduce your art into a sticker project. In case of photo usage, delete its background in order to get your subject isolated and carefully check the outcome, focusing on such details as hair and fur.
- Arrange the sheet. Resize and duplicate your designs, leaving space between them. Keep everything within the printable area shown in the app.
- Review the cutting preview to make sure that all outlines follow your desired shape and leave room for the lettering. Customize the border and design before you print. The PixCut S1 help center has information about these tools.
- Move to printing, finishing, and cutting. The printer will print, apply an overcoat, and kiss-cut the sticker layer. Once done, remove the sticker carefully from the backing.

A kiss-cut leaves the backing sheet intact, which keeps small stickers together for storage or gifting. Our die-cut vs. kiss-cut guide shows the difference.

Fix the First-Sheet Problems
One test sheet can tell you what to change before you make a batch.
| What you notice | What to try |
|---|---|
| The cut sits off to one side | Check your preview. With a separate cutter, confirm print scale and registration marks; use its calibration guide if needed. PixCut S1 also has a cutting calibration guide. |
| The white border feels too wide | Adjust the border or cut outline. Keep a little breathing room around fine details. |
| Text is hard to read | Increase its size, use a simple font style, or increase contrast. Evaluate your image in its final size. |
| The artwork is framed by a white rectangle. | For an outline of the subject only, erase the background or export the image as a PNG with a transparent background. |
| The sticker lifts or won’t stick well | Clean and dry the surface. Check that the adhesive suits it; textured or flexible surfaces may need a different material. |
How to Keep Homemade Stickers Looking Good
The type of finish should match where the sticker will be used. Paper stickers are ideal for use on journals and envelopes. However, if the object is a bottle, or anything else that will be frequently handled, then a durable sticker finish should be considered.
Durability of printed stickers will depend on the combination of paper or film, ink or toner, adhesive, and laminate, among others. While a laminate may improve durability, it doesn't necessarily make all combinations waterproof.
PixCut S1 applies its overcoat automatically, and Liene rates the finished stickers as waterproof in the sticker paper details. That rating doesn’t establish dishwasher safety or long-term outdoor suitability. Hand-wash decorated items gently and avoid scrubbing the sticker edges.
Frequently Asked Questions
How Do I Make Stickers at Home Without a Printer?
Draw directly on writable sticker paper using suitable pens or pencils. Let any ink dry, cut around each design with scissors, then peel off the backing and apply your sticker to a clean, dry surface.
Can I Make Stickers Without a Cutting Machine?
Yes. Draw or print on suitable sticker paper and cut with scissors. Pre-cut adhesive labels are another option if their shapes fit your project.
Can I Use a Regular Printer?
Often, yes. Check that your printer supports the adhesive material’s type, size, and thickness, then use paper labeled for that printer technology.
What Paper Do I Need?
Use writable sticker paper for hand drawing, compatible printable sticker paper for an inkjet or laser printer, and model-specific supplies for an all-in-one. Ordinary photo paper needs an adhesive backing to work as a sticker.
Are Homemade Stickers Waterproof?
Some are. Check the finished material’s rating, including the printing method and any protective coating. Adding laminate alone doesn’t guarantee a waterproof sticker.
Do I Need to Laminate Homemade Stickers?
Not always. For a journal or gift envelope, unlaminated paper stickers may be enough. For items that get handled often or splashed, choose a suitable finished material and add compatible laminate if needed. PixCut S1 applies its protective overcoat automatically.
What Does One Sheet Cost?
For PixCut S1, the US 72-sheet sticker refill with two cartridges is listed at $42.99 as of October 12, 2026: about $0.60 per sheet, or $0.10 each if your layout produces six usable stickers. That excludes equipment, labor, shipping, tax, and wasted sheets. For a home printer, add paper, ink or toner, and any laminate, then divide by the number of usable stickers.
Make Your First Sheet
Try six small gift labels with one flower and the words “made for you.” Use two colors, leave room around the lettering, and make one sheet. Peel a label, stick it on an envelope, and see what you’d change next time.
If you’d like the printing and custom cutting handled together, explore the Liene PixCut S1 and its compatible sticker supplies. Your little flower can be the first design.

Leave a comment
This site is protected by hCaptcha and the hCaptcha Privacy Policy and Terms of Service apply.