


Photo Stickers at Home: What a Photo Sticker Printer Does (and What to Look For)
A photo printed on sticker paper isn't a sticker yet. Here's how to make photo stickers at home, and what a photo sticker printer does that a photo printer can't.
Explore blogs about photo printers topics for the latest tech, creative ideas, and printing tips. Elevate your printing experience and capture moments.
A photo printed on sticker paper isn't a sticker yet. Here's how to make photo stickers at home, and what a photo sticker printer does that a photo printer can't.

Somewhere between the first "can I buy that?" at a market table and the fiftieth online order, sticker making stops being a hobby with byproducts and turns into a business with costs. The machine question changes at that point too. A hobbyist can shrug off a wasted sheet or a fussy workflow. A business feels both, week after week, in margin and in evenings. So this guide works through the choice the way a seller has to: what one sticker costs to make, what the consumables add up to over a season, how much desk the setup claims, and where each route stops making sense. What Changes When You Start Selling Three things, mainly. Volume goes up, so the cost of a single sticker matters in a way it never did when you were decorating your own planner. Consistency starts to matter, because a customer who reorders expects the second batch to match the first. And waste turns into a line item: a crooked cut or a smudged sheet used to be a shrug, and now it is materials you paid for producing nothing you can sell. None of that requires industrial equipment. Most sticker businesses at the market-table and online-shop stage run on the same desktop machines hobbyists use. It just means the buying decision leans harder on the numbers, so that is where to start. Most sticker businesses start exactly here: a planner, a pile of designs, and the first sheets other people ask to buy. Price One Sticker Before You Price Any Machine On the Liene PixCut S1, the math is short. Refills run $42.99 for 72 sheets with the ink cartridges in the pack, which lands near $0.60 a sheet, laminated and cut. How many stickers a sheet becomes depends on how densely you pack it, and packing sheets densely is a skill sellers pick up fast. The two-machine route prices out as a stack instead: sticker paper at $23.99 to $29.99 for 50 sheets at Cricut's own prices, inkjet ink on top, laminate sheets where waterproofing matters, and $9.99 a month for Cricut Access if you want its sticker tool doing layout. None of those numbers is scary on its own. The bookkeeping is the difference: one route is a single refill SKU you reorder when the box runs low, the other is four or five supplies that run out on their own schedules. At tax time, or just on a Sunday night when you are counting what a fair paid you after supplies, the single line item is worth something. There is a third route, and a business post should say so: ordering from a print shop. When we ran the numbers on it, home printing stayed cheaper up to roughly 2,200 sheets in a single order. Below that line, which is where nearly every market-table and small-shop seller lives, printing your own wins. Past it, you have outgrown this article and should be negotiating with a print shop. One refill box against the four-supply stack: the reorder list is the difference your bookkeeping feels. Count the Machines on the Desk A sticker machine for a small business earns its desk space or it doesn't, and most sellers are working from a corner of a room rather than a studio. The PixCut S1 is one box about the size of a shoebox: it prints at 300 DPI in dye-sublimation, seals the sheet under a four-layer laminate, and kiss cuts around each design in the same pass. Design happens in the free app, which carries more than 50,000 templates plus AI background removal, and the machine holds a Bluetooth connection with up to three devices. The alternative is a chain: an inkjet to print, a cutting machine to cut, laminate applied by hand or by a laminator in between. It produces sellable stickers, and plenty of shops run this way. What changes at business volume is the cost of the seams. Every handoff between machines is a place where alignment can drift, and a drifted cut at hobby scale is an annoyance, while at business scale it is scrap you paid for. The one-machine route removes the handoffs rather than managing them, which is most of its pitch to a seller. One shoebox-sized machine, one workflow: sheets, strips and a phone case's worth of stickers between orders. What Your Customers End Up Holding Sticker buyers have held a lot of stickers, and they can tell. Two things read as quality in the hand. The first is the laminate: PixCut sheets come out under a four-layer coat that stands up to water, scratches and fading, so the laptop sticker survives the commute and fingerprints wipe clean instead of wearing in. The second is the printing itself. Dye-sublimation lays color down in continuous tone rather than sprayed dots, which is why photo designs keep looking like photos, and why smooth gradients stay smooth on the finished product. Kiss-cut sheets also hand you a small merchandising bonus, since the backing stays whole and a mixed sheet reads like the ones in a stationery shop, with your designs on it. Make: magazine's review made the seller case directly, calling the machine a strong fit for sellers customizing stickers for customers at in-person events. Printing a buyer's name onto a design while they browse the rest of the table is the kind of trick that gets remembered. Where sold stickers end up living: a laptop that leaves the house every day. Printing to Order Instead of Holding Stock The quiet advantage of making stickers in-house is what it does to inventory. A shop that orders 500 of a design is betting the design sells. A shop that prints its own can run 20, watch what happens, and let the market vote before committing a full box of anything. Slow designs die cheaply. Strong ones get printed the night before the next fair, in whatever quantity the last fair suggested. The same logic covers custom work. Personalized orders, name variants, one-off requests: when a full printed sheet costs about $0.60, there is room to say yes to small custom jobs that a print-shop minimum would turn into a loss. And on the durability side, the machine is rated for the long haul, tested through 5,000+ continuous prints, which at small-business volume is a lot of market days. Print twenty, see what sells: small runs make every design a cheap experiment. Where This Setup Stops An honest edge map, because a machine bought for the wrong business is dead weight. If your product line runs past stickers into vinyl decals, iron-on shirts or cardstock, a cutting machine belongs in the plan, since the PixCut only makes its own sticker and photo sheets. If your orders are heading toward true bulk, hundreds of identical sheets at a time, a print shop's pricing eventually beats any desktop machine, ours included. And if you are still deciding what kind of maker business you are, the full buying guide compares every route without the business framing. For the selling side itself, pricing, listings and where the first customers come from, our guide to selling stickers online picks up where the hardware question ends. Organizer and label sheets are a product line of their own, and a steady one at market tables. FAQ What is the best sticker printer for a small business? For a business that is mostly stickers, an all-in-one sticker printer and cutter, and the PixCut S1 specifically: about $0.60 a sheet in supplies from a single refill SKU, laminated output customers can tell apart from paper stickers, and one machine's worth of desk space. Businesses whose product line runs past stickers are better served adding a cutting machine. How much does it cost to make stickers to sell? About $0.60 per printed sheet on the PixCut S1, from refill packs at $42.99 for 72 sheets with ink included. That covers printing, lamination and cutting, and your per-sticker cost is that sheet divided by however many designs you fit on it. Is the print quality good enough to charge money for? Laminated dye-sub output is the same category of printing photo labs use, and the kiss-cut sheets handle like store-bought ones. Quality complaints in this hobby usually trace to unlaminated inkjet prints meeting water, which is the failure the built-in laminate exists to prevent. Do I need a cutting machine to start a sticker business? Not for stickers themselves, since an all-in-one sticker printer and cutter does its own cutting. A cutting machine earns its place when the product line grows into vinyl, iron-on or cardstock, and some shops eventually run both machines side by side for different products. How many stickers does one refill box produce? A box is 72 sheets, and the count depends on how you lay them out. Small designs pack twenty or more to a 4x7" sheet, big die-cut-style designs run four to six, so a single box covers anywhere from a few hundred stickers to well past a thousand. Start With One Market Day Skip the hypothetical business plan and price a real day instead: one fair table, or one week of shop orders. Count the sheets it would take, multiply by $0.60, compare that against what you charge, and the right sticker machine for your small business mostly picks itself. The PixCut S1 starts at $279.99 with 18 sticker sheets and 18 photo sheets in the box, which is enough paper to find out what your customers reach for before the first refill order. Shop PixCut S1

Three machines crafters cross-shop, three different jobs. How the Maker 5, the SELPHY CP1500 and the PixCut S1 compare for making stickers.

Halloween is the stickiest holiday on the calendar, and that is meant literally. Candy bags need sealing, costume pieces need names on them, pumpkins need faces, and the planner wants a countdown. One 4x7" sheet covers a surprising amount of that, at about $0.20 a sticker when you print your own. Here are 40 Halloween sticker ideas, sorted by where they end up, from the front door to the school notebook. The house rule matters double in October: stick to art and photos you made yourself. Halloween is crowded with characters that belong to movie studios, and not one idea below needs them. Ghosts, bats, pumpkins and black cats have been public property for centuries, and a wobbly hand-drawn ghost beats a licensed one on a kid's lunchbox every time. Sketching October sticker designs, on paper and on the tablet. Costume and Prop Labels Costumes come with a lot of loose parts, and the parts start wandering off the moment the season begins. 1. Name labels for costume pieces. Put a small name sticker inside the hat, the cape and anything else that detaches before the school party. Costume pieces turn up in lost-and-found bins, and a name inside is what gets them home. 2. Left shoe, right shoe dots. Useful for little kids whose boots look identical from above. A pumpkin in the left one and a bat in the right settles the question without any reading involved. 3. Prop bin labels. One printed label per storage tub for wigs, makeup and capes. Add the year in small type and next October you will know which wig has already done two Halloweens. 4. A "this is part of a costume" tag. For the week when the living room fills with strange objects nobody is allowed to throw away, and a tag on each one saves the explaining. 5. Costume care notes. A small sticker on the hanger: hand wash, do not tumble, glue is still drying. Candy Bag Seals The candy side of the holiday runs on small round stickers. One sheet prints a party's worth, and a circle seals a paper fold no matter how crooked the fold is. 6. Treat bag seals. A pumpkin or ghost to close each paper treat bag. It holds the fold shut on the walk home, and it looks better than tape. 7. "Boo!" delivery stickers. For the neighbourhood boo-basket tradition, a seal for the note that says you have been booed. The custom says anonymous, so homemade fits the assignment better than store-bought. 8. Allergy-aware markers. A clear nut-free or no-gelatin dot for treat bags headed to school parties. Parents of allergic kids read these first, so keep the text large and the design plain. 9. Guess-the-count jar seal. One large sticker sealing the candy jar for the guessing game, with a blank line for the winner's name. 10. Leftover candy dater. A small date sticker for the post-Halloween stash, mostly so future-you knows which year's candy corn this is. Halloween candy already comes in circles, and seal stickers print the same way. Party and Table Decor A Halloween party looks expensive or homemade depending on the small stuff, and the small stuff is mostly labels. Print the table set the night before and decorating takes one pass around the room. 11. Cup markers. Small spooky designs so guests can tell their cups apart, for less than themed party cups cost. 12. Napkin wraps. A printed strip wrapped around each rolled napkin dresses up a plain stack. Fifteen minutes of wrapping covers a full table. 13. Food tent labels. Witch fingers, monster eyes, swamp punch. Spooky menu names carry a lot of the atmosphere, and a printed label reads better in dim party lighting than marker on a sticky note. 14. Photo-corner stickers. Bats and webs for the corners of a DIY photo wall, which is what makes a bedsheet backdrop look intentional. 15. Game prize seals. A gold-ish pumpkin on the winner's bag from each party game. Kids take prize stickers seriously, so print more than you think you need. One evening of designing turns into a counter's worth of October stickers. Pumpkins and the Front Door Outdoor stickers have to deal with actual weather. Sheets from the PixCut S1 come out under a four-layer laminate, which handles porch drizzle and damp pumpkin skin, and candy fingerprints wipe off the surface. 16. No-carve pumpkin faces. Printed eyes, mouths and eyebrows that get arranged and moved around until the pumpkin looks right. Small kids build the face themselves, and no carving tools come out of the drawer. 17. Door numbers, haunted edition. Your house number in a spooky style near the doorbell, so trick-or-treaters and their parents find the right porch. 18. A "take one please" bowl sign. A big sticker for the unattended candy bowl. It enforces nothing, but the bowl looks more official. 19. Window silhouettes. Bats and cats along a window edge, printed in plain black. With a lamp behind them at dusk, they read from the street surprisingly well. 20. Countdown door dots. Ten numbered dots by the door, one peeled off each morning starting on the 22nd. Like an advent calendar, only shorter and with more bats. Decorated pumpkins without any carving: lettering and doodles do the work. Notebooks, Planners and the October Spread The planner crowd owns October. Orange and black is the one colour scheme that makes a weekly spread look decorated instead of busy. 21. A countdown strip for the weekly spread. Thirty-one small marks across the top of the October spread, filled in or peeled off one day at a time. 22. Party planning icons. A cauldron for the shopping list, a mask for costume errands. Once the icons exist in the app they come back every October without redrawing. 23. Spooky movie night log. One ticket-shaped sticker for each spooky movie watched this season, with the title written in by hand. 24. Trick-or-treat route markers. For families who take the route seriously, small dots on a hand-drawn map of the streets with the good candy. 25. A November 1st recovery sticker. One sticker for the day after, marking out couch time and leftover candy. Water Bottles, Laptops and Everything Else Seasonal stickers work best on the things you carry every day, because those get seen by everyone and swapped out without guilt. Smooth surfaces hold them best, so glass, steel and painted plastic all work. 26. Seasonal bottle swap. A ghost or pumpkin on the school water bottle for October, peeled clean in November. Our water bottle sticker ideas covers the year-round version of this habit. 27. Laptop pumpkin, October only. A single small pumpkin on the corner of the laptop, gone again in early November. Easier to commit to than a permanent one on a work machine. 28. Teacher treat tags. A small printed tag for whatever goes to the teacher this season, with space left for a handwritten line. 29. Pet photo, Halloween frame. Your own pet's photo with bat wings or a witch hat added in the app. The sticker version of a pet costume stays on all night. 30. Candy-grade thank you stickers. For the houses handing out full-size bars, a thank-you sticker on a note through the mail slot. Those neighbours earned it. Glass takes a laminated sticker well, which makes the party glassware fair game. Spooky Mail and Treat Deliveries Not every treat gets handed over in person. The mailable side of the holiday has its own sticker needs, and most of them are small, round and printed twenty at a time. 31. Envelope seals for Halloween cards. A bat or web on the back flap of each card you send. Most mail is bills, so a sealed orange envelope tends to get opened first. 32. Treat jar gift tags. A printed to-and-from tag for jars of candy going to neighbours and coworkers. Write the names in by hand and the jar needs no card. 33. Wax-seal-look stickers. A printed circle designed to look like a pressed wax seal, in deep orange or black. Ceremony without the melted wax. 34. College care-package stickers. For the box of candy heading to a student too far away to trick-or-treat. A few stickers inside the flap make a cardboard box read as a package from home. 35. Party invitation seals. Small stickers closing paper invitations for whatever gathering October brings. Paper invitations are rare enough now that people hold onto them. The Classroom Party Teachers and room parents run a parallel Halloween, usually on a tight budget and a tighter schedule. Printed stickers cover a lot of that ground cheaply, and a design can be run again the week it runs out. 36. October reward stickers. A teacher's own reward designs for the month, with ghosts standing in for gold stars. A sheet of fifty costs about as much as one coffee. 37. Class party cup and pencil tags. Name stickers for cups and pencils at the class party, printed from the roster ahead of time. Twenty-five names fit on one sheet with room to spare. 38. Goodie-bag assembly stickers. Matching seals for the class goodie bags, printed in one batch and split between room parents. 39. Pumpkin contest badges. Small award stickers for a classroom pumpkin-decorating contest, with enough categories that most entries win something. Spookiest, silliest, most glitter. 40. Reading month bookmarks. October bookmark stickers for the classroom library corner, on cardstock cut from whatever is in the supply cupboard. How to Print Them at Home The workflow is short. Design in the free Liene app, which carries more than 50,000 templates alongside your own photos and art, then tap print. The PixCut S1 prints at 300 DPI, laminates and kiss cuts the sheet in one pass, with the print itself running 59 seconds. Kiss cut means each sticker peels off while the backing stays whole, so a mixed sheet survives being carried to a party and handed around. Original designs can start anywhere, and a tablet sketch imports straight into the app. Two practical notes for October. Mixing sizes on one sheet works fine, so a big bowl sign can share space with twenty candy seals, and the cost stays around $0.20 per finished sticker either way. Over-print the small round designs, since seals and dots disappear fastest once a party starts. The lamination is also what lets these live outdoors on damp pumpkins, with no separate sealing step to remember. If this list puts you in a seasonal mood, the same approach runs all year: our back to school sticker ideas covers September, and planner stickers for the school year keeps the notebook side going through June. FAQ What are good Halloween stickers to make at home? The ones that get used up fastest are a good start, meaning candy bag seals, cup markers and name labels for costumes. They print by the dozen on a single sheet. Are printed Halloween stickers waterproof? Laminated ones handle October fine. PixCut S1 sheets come out under a four-layer laminate, which covers porch weather, damp pumpkin skin and sticky fingers. For anything outdoors all month, press firmly onto a clean dry surface. Can I use Halloween movie characters on my stickers? For stickers you sell or share widely, no, those characters belong to studios. For the home crowd, original ghosts, witches, bats and pumpkins are safer, and they come out looking like yours. Do Halloween stickers work on pumpkins? Real pumpkin skin is smooth enough for a good press, and laminated stickers hold on well for the season. Wipe the surface dry first, and expect the pumpkin to give out before the sticker does. How much does a sheet of Halloween stickers cost to print? About $0.20 per finished sticker on the PixCut S1, from refill packs at $42.99 for 72 sheets with the cartridges included. A single sheet covers a party's worth of candy seals with room left over. Print the October Sheet Pick a handful of ideas that match your actual October plans and print one mixed sheet this week. The season is short, a sheet costs a few dollars, and whichever stickers get peeled first will tell you what to print more of next year. The PixCut S1 handles the printing, laminating and cutting, and October takes care of the rest of the calendar. Shop PixCut S1
All blog articles could not be loaded. Only this blog is shown.

Have you ever noticed that people like a product in nice or premium packaging way more than the same product in the same old brown cover? A study shows that nice packaging can actually make people think something's worth way more – like up to 45% more! That's crazy, right? Even little things like a personalized gift tag can totally change the perceived value of an item. And instead of grabbing those boring ones from the store, why not just make your own exactly how you want them? DIY gift tags don't just look way better – they make everything feel so much more intentional. They make each present feel special, you'll save money in the long run (always nice), and they actually show off your personality. Whether it's birthdays, holidays, or you're trying to make your products look amazing, custom tags just hit different. Here's how to design, print, and cut your own gift tags using the Liene PixCut S1. You just need a couple things and some creativity, and you can make tags that look like they came from some fancy boutique but feel way more thoughtful than anything you could buy. Benefits of Making Your Own Gift Tags Making your own gift tags isn't just something to keep your hands busy—it's actually a really smart way to make your packaging look intentional and polished. Whether you're wrapping something for someone you love or getting orders ready for your business, custom tags just make everything feel more special. Here's why I'm convinced making your own is totally worth it: They feel more personal: A handwritten note or someone's name on a custom tag just hits different. It's like saying "I actually put thought into this" without having to say it. You get to control everything: The design, colors, what it says, the whole vibe, you can match whatever theme you're going for or really show off your creativity. They are cheaper: Those fancy gift tags from stores or getting them printed somewhere can be expensive. Making your own with something like the PixCut S1 ends up saving you money, especially if you do this regularly. If you've got a small business, branded tags are honestly like having a tiny billboard on every package. Slap your logo on there, maybe a QR code, or a little note that makes people want to come back. People notice when you put in that extra effort, and tags are such an easy way to do it. The really nice part? With the Liene PixCut S1, you don't need to be some design genius or have a bunch of fancy equipment. It's quick, clean, and you get results that look way more expensive than they were to make. What You’ll Need to Get Started Okay, so before we actually start making anything, you'll want to grab your stuff first. The cool thing is, you don't need much to make really nice DIY gift tags – just a handful of things. Here's what you need: Your Liene PixCut S1: This little guy does both the printing and cutting for you. Sticker or photo paper: Pick whatever PixCut S1 material makes sense for what you're doing. Like 4x7" glossy sticker paper if you want them to actually stick to things, or 4x6" photo paper if you just want to tie them on with string. Something to print: Either make a design in the Liene App, or you can also import a design from platforms such as Canva. The Liene App: You'll need this on your phone to design stuff, arrange everything, and tell the machine what to do. If you want to go an extra mile, you might also grab the following: Some twine, ribbon, or little decorations to jazz things up A hole punch if you need somewhere to thread the string through Having everything ready just makes the whole thing go way smoother. The PixCut S1 does most of the work anyway, so once your design and paper are sorted, the rest is pretty straightforward. Step-by-Step Guide to Making DIY Gift Tags with PixCut S1 Making your own tags with the PixCut S1 is honestly pretty simple. Here's how to do it: Step 1: Choose or Create Your Design Jump into the Liene App and either grab one of their templates or start from scratch. Throw in some text, shapes, little icons, whatever you want. Already made something in Canva? Just upload it straight into the app. Tips: Go with bold fonts so people can actually read the names or messages. Keep your designs around 2"–3" – that's the sweet spot for gift tags. Little touches like dotted borders or tiny icons make everything look way cuter. Step 2: Load Your Sticker Paper Slide your tag paper or sticker sheet into the PixCut S1 tray. Make sure it's lined up right so you don't end up with crooked or faulty prints. Pick your paper type in the app if it asks. Step 3: Print at 300dpi Set it to 300dpi for really nice colors and sharp details. It's really important if you've got small text or detailed designs. This setting just makes everything look way more professional. Step 4: Let PixCut S1 Do Its Thing After it prints, the PixCut S1 scans your design and starts cutting with that smart AI feature. Rectangle, circle, unique custom shape – doesn't matter, it cuts exactly where it should without you having to do anything. Step 5: Peel and Stick (or Mount on Cardstock) Once they're cut, you can either peel and stick them right onto your gifts, or stick them onto some colored cardstock to make them sturdier and more interesting. Want to tie them on? Just punch a hole for string or ribbon. Step 6: Make Them Even Better This is where you can get creative – add some handwriting, maybe a little glitter, tiny stickers, or stamp something on there. These little extras can go a long way. Creative Gift Tag Ideas to Try Need some inspiration? Here are some fun gift tag styles that work really well with the Liene PixCut S1: Birthday Name Tags: Go crazy with bright colors, fun fonts, and little icons like balloons or birthday cake. Put each person's name and maybe their age on there – kids especially love seeing their name on things. Simple Holiday Tags: Keep it clean with little snowflakes or leaves and short phrases like "Joy" or "Warm Wishes." You could even throw in a QR code that links to a holiday video or message if you're feeling fancy. Thank-You Tags for Your Stuff: Perfect if you're selling handmade jewelry, or any other product. Throw your logo on there, write something like "Thanks for the purchase" and add your Instagram so they can see what else you're up to. Baby Shower or Wedding Tags: Just match the party vibes – maybe those soft dusty rose colors everyone's obsessed with, or sage green if they're going earthy. Write something sweet like "Made with love" or "Can't wait to meet you, little one." Business Tags: Stick to your brand's aesthetic. Maybe toss in a discount code or just your website. People actually use those discount codes way more than you'd think. It's a sneaky way to get people to come back and buy more stuff. You can make all of these in different shapes with the PixCut S1. Try layered tags or go with Liene’s glossy sticker paper for a polished, professional look. If you don't have time to design from scratch, you can also design stickers fast with free templates to save time and effort. These little touches turn boring wrapping or packaging into something that actually feels special and thoughtful. Why PixCut S1 Is Perfect for DIY Tag Projects When it comes to creating high-quality DIY gift tags, not all tools are made equal. The Liene PixCut S1 is designed for simplicity, creativity, and precision—making it ideal for beginners, hobbyists, and small business owners alike. Here’s why it stands out: 300dpi high-resolution printing ensures sharp, colorful designs that look store-bought. AI-powered cutting delivers precise shapes, whether you want classic rectangles or unique custom styles. Wireless app control means you can design, print, and cut directly from your phone or tablet. Material compatibility includes Liene’s official glossy sticker paper, giving your tags a professional look. Quiet and compact design fits easily into any workspace, whether you're crafting from home or running a small shop. PixCut S1 simplifies the full process, from app design to cutting, so you can focus on creativity, not setup. It’s especially helpful for small business owners who want to add a professional touch to packaging without outsourcing. What makes it even better is its ability to support various Kiss-Cut shapes—rounded corners, simple custom outlines, or small stickers are all achievable with minimal effort. If gift tags are something you’ll use regularly—at holidays, craft fairs, or for customer orders—PixCut S1 is a powerful, affordable tool to have in your creative corner. Conclusion DIY gift tags are more than decoration. They add a thoughtful, personal touch to any gift or product. Whether it’s for a birthday, an order, or a holiday, custom tags show you care. With the Liene PixCut S1, creating tags is quick, polished, and entirely app-controlled. Just design, print at 300dpi, and let the machine cut perfect shapes with AI precision. You can also use it to create a personalized photo album, complete with captions, dates, or custom stickers. Ready to start? Add style to every package or project—make your own tags today with PixCut S1. FAQs 1.What paper should I use for sticker gift tags? Use Liene’s official 4×7″ glossy sticker paper, which is specially designed for the PixCut S1 to ensure the best printing and cutting quality. Third-party papers are not compatible and may cause issues with printing or cutting. 2.Can PixCut S1 cut gift tags into different shapes? Yes! The AI-powered cutting function allows for a variety of tag shapes—circles, rounded rectangles, and even custom outlines. 3.Do I need any design experience to use PixCut S1? Not at all. The Liene App includes beginner-friendly templates, drag-and-drop tools, and wireless control for easy design and printing. 4.Can I make tags for my small business packaging? Absolutely. Many small businesses use PixCut S1 to print and cut branded tags for product packaging, customer gifts, and thank-you notes. 5.Are PixCut S1 gift tags peel-and-stick? If you're using sticker paper, yes! The tags are peel-and-stick, making them easy to apply to boxes, bags, or cards.

Handmade candles make beautiful gifts—but let's be honest, without a label, even the most fragrant blend can feel unfinished. A custom label tells your story, adds charm, and transforms a simple jar into something truly memorable. Labels do way more than just look pretty; they give homemade candles their personality, help people know what they're burning, and make everything look like it came from a fancy boutique. So, whether you're making special gifts for loved ones or trying to get your own candle business off the ground, thoughtful labels really make your creations shine. In this guide, we'll walk you through labeling your homemade candles from start to finish and share some fun design ideas that might just spark something. The cherry on top? You can print and cut every label right at home using the Liene PixCut S1—a neat little device that gives your DIY projects that store-bought look without leaving the house. Why Candle Labels Matter (Even for Small Batches) Even a single handmade candle deserves a great label. Beyond style, labels serve multiple functions: they help customers identify the scent, outline safety instructions, and give the product a cohesive, professional feel. For hobbyists, a label adds a thoughtful touch that makes gifts more personal and meaningful. For sellers, they’re a branding tool—conveying your style, values, and product information all in one small space. In fact, many countries and marketplaces (like Etsy or Shopify) expect specific details on candle labels, including: Scent or fragrance name Burn time or weight Warning symbols or instructions Brand name or logo Even if you’re selling in small batches or just starting out, a well-designed label can help increase trust and drive repeat sales. Imagine receiving two similar candles, one with a clear label and scent story, and another left blank. The labeled one feels more thoughtful and trustworthy. The good news? You don’t need to outsource label printing or buy bulk supplies. With tools like the PixCut S1, you can create polished, personalized labels that adhere cleanly to glass, metal, or tin containers, all from your workspace, at your own pace. Creative Candle Label Ideas to Inspire Your Design Okay, so you're thinking about candle labels, right? The style you pick says so much about your brand, whether you're going for sleek and modern or cozy and rustic. Here are some ideas I've been loving lately: Minimalist Monochrome Text: Just clean, black text on white or clear backgrounds. Perfect for luxury, spa, or organic brands that want that effortless, classy look. Seasonal Themes: Go with what feels right for the season. Autumn leaves for cozy fall scents, snowflakes for winter vibes, pretty florals for spring and summer blends. Handwritten or Script Fonts: Hand-drawn or flowing script fonts just scream "crafted with love." Great for gifts or that homey, rustic feeling. Geometric Patterns: Simple lines and shapes make your candles look current and put-together without being too busy. The Liene PixCut S1 handles all these ideas really well. The smart cutting gives you clean, custom shapes, and you can either mess around in the Liene App or upload whatever you've already made. You're in control of how everything turns out. Beyond candles, these same techniques can be applied to other projects—using labels to maximize home organization, decorate gift packaging, or add branding to jars and containers around the house. What You’ll Need to Get Started Making nice-looking candle labels at home isn't complicated. You just need to grab a few things: Essentials: Liene PixCut S1: This little machine handles both printing and cutting your labels. Candle-safe containers: Good old glass jars, metal tins, or whatever unique containers you can find. Label artwork or a template: Make something in the Liene App or use whatever design program you already know. The Liene App: Download it on your phone to control everything from printing to cutting. Optional Extras: Heat-resistant label material: Consider this option if your candles tend to get quite warm. Twine, ribbon, or belly bands: Fun little touches that make everything feel more handmade. Kraft paper wraps or gift boxes: Great for when you want the whole package to look cohesive. How to Label Your Candles Using Liene PixCut S1: Step-by-Step Whether it's your very first label or you've done this a bunch of times, here's how to get your candles looking really good. Step 1: Pick Your Container & Give it a Quick Clean Grab the jar or tin you're using for your candle. Just wipe it down with a dry cloth or an alcohol wipe to get rid of any dust or fingerprints. A clean surface means labels that actually stay put. Step 2: Design Your Label in the Liene App Jump into the Liene App to make your label. You can: Upload your own artwork Add text like the scent name, your logo, or those safety warnings Pick exactly what shape and size you want. Already made something in Canva or Illustrator? No worries—just save your file and bring it into the Liene App. Step 3: Print at 300dpi Using PixCut S1 Load the official Liene 4x7'' PET sticker paper into the PixCut S1. In the app, make sure you select 300dpi so everything looks sharp. Quick check that your design fits your container before you print. Step 4: Let the AI-Guided Tool Cut Your Label After it prints, just turn on the PixCut S1's cutting mode. The smart cutting system performs precise kiss-cutting, leaving the backing sheet intact while shaping your labels accurately—even with custom curved designs. Step 5: Apply Your Label Carefully & Evenly Peel the label off its backing and press it onto the container, starting from the middle and working outward. Use a clean cloth to smooth out any air bubbles that pop up. pro Tip: For curved jars, smaller labels or ones with rounded edges usually work way better. Step 6: Add Those Final Decorative Touches! Want to make it even nicer? Tie some twine or ribbon around the lid. Throw on a little hang tag or write a quick thank-you note if you're giving it as a gift or selling it. Belly bands or small stickers can make everything look more put-together too. And there you have it! A candle that looks like it came from a fancy shop, all made right from your own space. Top Reasons to Use PixCut S1 for Homemade Candle Labels Why choose the Liene PixCut S1 over any other label maker for candle jars? Here’s what makes it a standout tool for candle crafters: 300dpi Printing Resolution Delivers clean, high-resolution results ideal for intricate designs and tiny text. AI-Powered Cutting Forget scissors or die cuts. The PixCut S1 cuts any shape with precision, whether it's a square, a circle, or a custom design. Wireless Control with the Liene App Use your phone or tablet to handle everything—no need for separate software. Material Compatibility Supports Liene’s official 4x7'' PET sticker paper, which is optimized for high-quality printing and precise kiss-cutting. Compact & Beginner-Friendly No steep learning curve. Setup is fast, and results are reliable, even for first-time users. For small-batch sellers or gifting enthusiasts, this tool streamlines the process while letting your creativity shine. It’s like having a mini print shop at home. Conclusion You don’t need industrial printers or expensive design services to make candles that look store-ready. With just a bit of creativity and the PixCut S1, even small batches can achieve a high-end feel. This compact machine brings pro-level precision into your home studio, making label design fast, fun, and customizable. Whether you're crafting gifts for loved ones or launching your candle line, the right label sets the tone for your brand. And since PixCut S1 also lets you print photos at home, it’s a versatile tool for both crafting and memory-making. Start simple or explore bold designs—with PixCut S1, the possibilities are endless. Start crafting your own candle labels today—explore the Liene PixCut S1 now. FAQs 1.Do I need special paper for candle labels? The PixCut S1 is designed to work exclusively with Liene’s official 4x6-inch photo paper and 4x7-inch PET sticker paper, which are specifically optimized for high-quality thermal dye-sublimation printing and precise kiss-cutting. Currently, only the white glossy PET sticker paper is available, while transparent and metallic finishes are expected to launch in about 6 months. 2.Can I make cool shapes like circles or fancy curves? Totally! The PixCut S1's smart cutting lets you do circles, arches, or whatever weird shape you dream up. Way more fun than boring rectangles, and it makes your candles look way more custom. 3.Why do my labels keep peeling off my round jars? Make sure your jar is actually clean first – no dust, no fingerprints. Then use labels that bend well, and go smaller or pick designs with rounded edges. They just stick better to curvy surfaces. 4.What should I actually put on my labels? The scent name for sure, your name or brand, how long it burns for, or how much it weighs, and those safety warning things. You could also throw in a QR code if you want to link to care tips or your website. 5.Is this thing hard to figure out if I've never done this before? No, it's pretty straightforward. You just download the app, connect it wirelessly, and you're good to go. Even if you've never made labels before, you can get professional-looking results in like 2 minutes.

Want to create custom stickers—but don’t have the time (or tools) to design them from scratch? You’re not alone. Stickers are everywhere right now—on laptops, gift boxes, journals, and packaging, and everyone wants in. Whether for planners, packaging, or just for fun, stickers are everywhere, but making them from a blank canvas can feel overwhelming, especially for beginners. That’s where free sticker templates come in. These ready-made layouts help you create beautiful, functional designs in minutes, no design skills required. In this guide, you’ll learn how to find, customize, and print stickers quickly using templates from popular platforms. We’ll also introduce you to the Liene PixCut S1—a compact, wireless printer and cutter that makes the entire sticker-making process fast and professional. With 300dpi high-resolution printing, AI-powered cutting, and seamless app control, PixCut S1 is the perfect match for sticker creators who want speed and style. Benefits of Using Sticker Templates Instead of Designing from Scratch Designing stickers can be fun, but it’s not always fast. Free templates are a game changer for anyone short on time, new to design, or just wanting polished results with minimal effort. With templates, you can go from concept to cut in under 30 minutes, making them ideal for planners, packaging, gifts, and more. Here’s why templates are the way to go: Speed: Templates in the Liene App are pre-designed and perfectly sized for PixCut S1. There’s no need to adjust dimensions—just add your text or images and get ready to print and cut. Precision: Templates in the Liene App are often built to fit standard sticker sizes, which makes them a perfect match for cutters like the PixCut S1. Beginner-Friendly: No fancy design skills? No problem! With Canva and the Liene App, just drag, drop, tweak, and boom, you’ve got a custom sticker. Where to Find Free Sticker Templates There’s no shortage of free sticker templates online—you just need to know where to look. Below are three great places to start, each with its own strengths depending on your style and project. Whether you're creating planner layouts, labels, or want to make your own scrapbook stickers, these platforms have you covered: Liene App Designed to work seamlessly with the PixCut S1, the Liene App offers simple, functional templates you can use right away. They’re pre-sized for perfect print-and-cut alignment and ideal for small projects, gift tags, or personal labels. Canva If you’re into social-themed designs, soft colors, or playful fonts, Canva is a fantastic choice. With thousands of free layouts for labels, name tags, and branding stickers, Canva makes it easy to personalize any design, even if you’re brand new to it. Creative Fabrica For planner lovers and crafters, Creative Fabrica is a treasure trove. You’ll find seasonal bundles, icon sheets, decorative borders, and more, many of which are free with an account. These templates are especially great for mood trackers, journaling stickers, or event planning. Pro Tip: When searching for templates, use terms like “free planner sticker templates”, “aesthetic label template”, or “Canva sticker sheet” to find layouts that match your vision and purpose. How to Customize, Print, and Cut Stickers with the Liene PixCut S1 Using free templates with your Liene PixCut S1 is pretty straightforward! With just a few steps, you can go from a downloaded file to ready-to-peel stickers, no fancy equipment or design degree needed. Here's how it works: Step 1: Pick Your Template Download a template from places like Canva or Creative Fabrica, or grab one from the Liene App. Just make sure it matches what you're making. Step 2: Import or Edit in the Liene App Downloaded from somewhere else? No problem—upload it as an image or PDF. You can move it around, resize it, or tweak the cut lines in the app. Step 3: Customize Your Design This is the fun part: add your own text, quotes, icons, or whatever you want. Change colors and fonts until they look right. Birthday labels, business stickers, random stuff—whatever you need! Step 4: Load Your Sticker Paper Insert Liene’s official 4×7″ sticker paper — available in white, transparent, or metallic finishes — for the best results. Align the paper properly in the PixCut S1 following the app’s on-screen instructions. Step 5: Print at 300dpi Hit 300dpi in the app settings for crisp prints. Trust me on this one—especially if you've got small text or detailed stuff. Step 6: Cut with PixCut S1’s AI-Powered System Turn on auto-cut and watch the PixCut S1 figure out your design's edges and cut around them. Circles, weird shapes, whatever—it handles it. Step 7: Peel and Stick Done! Peel them off and stick them wherever—notebooks, packages, your laptop, whatever needs a personal touch. Quick idea: These work great for labeling homemade stuff like candles, tracking habits in journals, or making event invites look less generic. Who Can Benefit from Using Free Sticker Templates? Sticker templates aren't just for arts and crafts anymore—they're lifesavers for all kinds of people who need stuff done yesterday. Here's who gets the most out of them: Teachers: Need reward stickers for that kid who finally turned in homework? Or subject labels that don't look like you made them at 11 PM? Free sticker templates have your back. Etsy Sellers & Small Business Owners: Stop spending hours designing thank-you stickers. Grab a template, add your logo, and boom—your packages look professional without the designer price tag. Planner Enthusiasts & Bullet Journalers: We know you love your spreads, but who has time to design mood trackers from scratch every month? Templates keep your layouts looking good without the stress. Parents & Kids: Name labels for school stuff, chore charts that might actually motivate the kids, or just fun shapes for rainy-day crafting. Free templates make parents' lives a little easier. Event Organizers: Wedding favors, birthday party bags, baby shower labels—templates help you pull together cohesive details without hiring a designer or losing your mind. Students: Free Sticker templates allow you to personalize your laptop without spending a fortune on fancy sticker designs that cost more than your textbooks. Crafters & Hobbyists: Try new styles and seasonal themes without starting from a blank page every single time. Tidy Up Your Stickers: Storage Solutions Let's be real—once you start making stickers with your PixCut S1, they multiply fast. One day, you're making a few labels, next thing you know, you've got sticker sheets everywhere and can't find the one you actually need. Here's how to keep your sticker collection under control without going overboard. For finished stickers, clear binder sleeves work great—you can flip through them like a catalog, and everything stays protected. Small tackle boxes or drawer organizers are perfect for individual stickers sorted by theme or project. Don't forget your supplies either. Keep your Liene sticker paper flat in a drawer or folder, and give your PixCut S1 a dedicated spot on your desk or craft area. Create project bins so all your materials for one design stay together. The key is simple systems that actually work for how you create. No fancy organization required—just enough structure, so you're not digging through chaos every time you want to make something. Conclusion With free sticker templates and the Liene PixCut S1, creating professional-quality stickers at home is easier than ever. This all-in-one device combines high-resolution printing, built-in lamination, and AI-powered precision cutting, making the process fast and beginner-friendly. Whether you’re customizing planners, decorating gifts, or designing labels for a small business, the PixCut S1 and its user-friendly app help you turn ideas into vibrant, durable stickers — all from the comfort of home. FAQs 1.Can I use templates from other platforms with the Liene App? Yes. You can upload templates from Canva, Creative Fabrica, or other design tools into the Liene App as images. 2.Do I need design experience to use sticker templates? Not at all! Templates are beginner-friendly. Just edit the text, colors, or layout, and you're good to go. 3.What types of sticker paper work with PixCut S1? PixCut S1 only supports Liene-branded 4×7″ sticker paper, available in white, transparent, and metallic finishes. For best results, use the official Liene materials—third-party paper is not compatible. 4.Can PixCut S1 cut around custom shapes or outlines? Yes! It uses AI to detect edges and cut any shape—circles, hearts, arches, or full custom outlines. 5.Is the Liene App free to use with PixCut S1? Yes, the Liene App is free to download and use. It connects wirelessly to your PixCut S1 and handles design, printing, and cutting.

Creating professional-quality stickers or prints isn’t just about the design—it starts with the right material. The Liene PixCut S1 photo sticker printer and cutter is built for speed, precision, and stunning results. But to unlock its full potential, you need to pair it with official Liene materials. The 4×7″ sticker paper and 4×6″ photo paper from Liene are specifically designed for use with the PixCut S1. Optimised for 300 dpi dye-sublimation printing, automatic lamination, and AI-assisted cutting, these materials ensure every print is clean, durable, and vivid. Whether the goal is to create custom labels, enhance planners, or produce high-resolution photos, using the correct paper guarantees waterproof, fade-resistant results that stand the test of time. In this guide, we’ll cover exactly which materials are supported, why your choice matters, and how to select the perfect one based on your creative or business project. What Materials Work with Liene PixCut S1? The PixCut S1 is designed to work exclusively with official Liene sticker and photo paper, and does not support third-party materials, ensuring flawless printing and cutting every time. These materials are carefully developed to match the printer’s thermal dye-sublimation and lamination processes, offering smooth operation and consistently high-quality output. Here are the two types supported: 4×7″ sticker paper This is the go-to material for labels, branding, and custom stickers. It features enhanced adhesive for secure sticking and supports automatic lamination for a glossy, scratch-resistant finish. Great for planners, gift tags, packaging, and more. 4×6″ photo paper Best suited for high-quality photo printing, this paper is designed for true-to-life color accuracy and rich detail. It prints at 300 dpi and delivers smooth results ideal for albums, ID photos, framed keepsakes, or personal gifts. Both paper types are optimised for the PixCut S1’s four-layer dye-sublimation technology, creating prints that are waterproof, fade-resistant, and scratch-resistant—perfect for everything from hobby crafts to small business needs. Why Choosing the Right Material Matters Using the correct material for your PixCut S1 isn't just about print quality—it’s essential for proper function, long-term durability, and overall ease of use. Every part of the PixCut S1, from its thermal dye-sublimation printer to its AI-powered cutting system, is fine-tuned to work with Liene-branded stickers and photo paper. These materials are engineered for smooth feeding, accurate detection, and high-resolution output. By contrast, generic printer paper or non-Liene sticker sheets may seem like cost-effective alternatives, but they introduce major risks. They aren't designed to withstand the high heat of sublimation, may lack the proper coating for color retention, and can easily misalign during cutting. Here’s what can go wrong with the wrong materials: Sticker peeling due to low-quality or incompatible adhesive Ink smudging or bleeding with paper not built for thermal printing Cutting misalignment from paper sizes or edges not recognized by the AI Faded prints or warping over time due to missing UV or lamination layers With Liene's 4-layer dye-sublimation process, each layer serves a purpose—bringing together vivid color, sharp detail, surface protection, and a polished finish. Only the official Liene materials are made to fully support this system. Whether you're making stickers to sell, organizing your space, or gifting photo prints to loved ones, using PixCut-compatible paper ensures everything looks clean, sticks properly, and lasts. It’s the small detail that makes a big difference in the final result. How to Pick the Right Material Based on Your Project Choosing between sticker paper and photo paper depends on the purpose of your project. Here’s a quick breakdown of which material to use based on your creative or business goals: Labels & Organization Use: 4×7″ Sticker Paper If you're making custom labels for spice jars, pantry bins, school supplies, or storage containers, this is your best bet. Liene’s enhanced-adhesion sticker paper sticks securely on smooth surfaces and resists moisture, making it ideal for kitchens, bathrooms, and kids’ gear. Finish Tips: Let the sticker go through the lamination process to make it glossy, waterproof, and scratch-resistant. Great for both personal use and selling handmade goods. 2.Stickers & Crafts Use: 4×7″ Sticker Paper Planning to create planner stickers, scrapbooking accessories, or branding tags? The PixCut S1’s sticker paper handles small cuts with ease. Whether you go for die-cut shapes or simple kiss-cut sticker sheets, the app allows precise cuts with minimal effort. Finish Options: Glossy finish – Let the lamination complete for a professional polish. Common Use Cases: Etsy shop orders Event favors and gift tags Business promo stickers 3. Photos & Personalized Gifts Use: 4×6″ Photo Paper Showcase your cherished memories with Liene’s 4×6″ photo paper—perfect for everything from family snapshots to passport photos. Designed for vibrant colors and crisp detail, it delivers quality that rivals lab-developed prints, making it ideal for albums, gifts, and more. Ideal for: Albums and collages Framed gifts School or ID cards Holiday prints or greeting cards Pro Tip: Let the ink dry completely before handling or framing to avoid smudges or distortions. By matching the material to your project, you’ll not only get the best look but also ensure long-lasting durability. Don’t forget to check the in-app settings to select the right paper size and cut mode before you start. Material Tips for Best Results with PixCut S1 To get clean, professional results every time, follow these proven tips when working with Liene’s sticker and photo paper: Run a test print and cut before committing to a batch. This helps avoid waste and lets you double-check placement, size, and clarity. Let ink dry fully before cutting. The PixCut S1 includes a built-in lamination step, but prints should still cool before handling—especially if you're removing them early for a matte finish. Store sheets flat in a cool, dry place to prevent warping or curling. Avoid humid storage or placing heavy objects on the paper. Stick to recommended paper sizes. 4×6″ and 4×7″ are the only formats the PixCut S1 can scan and cut accurately. Avoid touching the surface of glossy paper before printing to reduce fingerprints or oil spots that can affect ink transfer. Following these small but important steps ensures clean edges, accurate cuts, and vivid prints every time. Where to Buy PixCut-Compatible Materials For the best results, always use official Liene materials sold via their store or trusted partners. The PixCut S1 supports: 4×7″ sticker paper (sold in 20–60 sheet packs) 4×6″ photo paper (available in gloss finish) Starter kits with both materials included, ideal for beginners Buying from Liene ensures you're getting media that’s been tested and calibrated for 300 dpi dye-sublimation and AI-assisted cutting. While third-party vinyl or generic inkjet sticker sheets may be tempting due to low cost, they are not supported and can lead to: Print quality issues Failed cuts Adhesive residue damaging the machine Visit liene-life.com to browse materials, get bundle discounts, and stay updated with the latest PixCut-compatible releases. Conclusion To make the most of the Liene PixCut S1, choosing the right material is just as important as the design itself. Whether you're printing waterproof labels, crafting Etsy shop stickers, or preserving cherished memories on photo paper, using Liene’s branded media ensures durability, quality, and professional results that truly stand out. Avoid the risks of third-party materials—such as poor adhesion, smudging, or misaligned cuts—and always use official Liene sticker and photo paper to streamline your workflow. The right paper not only saves time but also enhances every print and cut you create. With the right setup, printing and cutting becomes fast, fun, and frustration-free. Whether you’re a creative hobbyist or a small business owner, you’ll enjoy professional results with minimal effort. Ready to create? Visit Liene pixcut s1 material page to stock up and start bringing your ideas to life with confidence. FAQs What’s the best sticker paper for PixCut S1? The 4×7″ Liene sticker paper with enhanced adhesion and lamination support. Can I use third-party vinyl? No. Vinyl or generic sticker sheets are not supported and may damage the machine. Is the output waterproof and fade-resistant? Yes. The 4-layer dye-sublimation process ensures waterproof, smudge-proof, and UV-resistant prints. How do I avoid smudges on glossy prints? Let the lamination step finish and allow prints to cool before handling. What’s the difference between the photo and sticker paper? Photo paper (4×6″) is for image prints; sticker paper (4×7″) has adhesive backing for labeling and crafts.

Crafting your own picture frames offers a personal, imaginative, and cost-effective method to display your cherished photos. The journey of discovering "how to make your own picture frame without using professional tools" attracts many because it sidesteps the need for specialized equipment and complex skills, opening up the craft to almost everyone. This guide delves into three unique DIY framing methods that make the most of everyday items you probably already have at home. Approach 1 - Using Household Materials Making a picture frame using items found around your home is an excellent method to add a personal touch to your photos without breaking the bank. Follow this guide to craft a stunning DIY frame with materials you likely already have on hand. Materials Needed: Cardboard Scissors Glue (PVA or a strong adhesive) Decorative paper or fabric Clear plastic (from packaging or a document sleeve) Step-by-Step Guide: 1. Measure and cut the cardboard The very first step is to decide the size of your frame. Here we take 4x3" photos as an example. For a 4x3" photo, you might want a border of about 1 inch, so you'll cut a 6x5" rectangle for the frame's outer dimensions.Measure and mark your cardboard accordingly. Then, draw an inner rectangle for the photo, leaving an even border around it. This inner rectangle should be slightly smaller than your photo's dimensions to hold it in place.Carefully cut out the outer rectangle first, then the inner rectangle to create your frame shape. 2. Decorate the frame Choose decorative paper or fabric that complements your photo. Trace the outer dimensions of your frame onto your chosen material, including the inner rectangle.Cut out the traced design and apply glue to the cardboard frame. Attach your decorative paper or fabric smoothly, ensuring no air bubbles or wrinkles. 3. Assembly the frame Prepare the Protective Cover: Measure and cut a clear plastic sheet to match the frame's outer dimensions. This will serve as a protective layer for your photo. Attach the Plastic Cover: Apply glue to the back edges of the frame and carefully position the clear plastic sheet to cover the opening entirely. Ensure it's firmly in place to protect the photo. Insert the Photo: From the back of the frame, place your photo against the clear plastic cover. Secure the Backing: Cut another piece of cardboard to fit as the frame's backing. Glue it around the edges, pressing it onto the back of the frame to encase and secure the photo. Tips and Tricks: Customization: Use washi tape, stickers, or draw directly on the frame for more personalization. Decoration: Mix and match fabrics or papers for a collage effect. Enhancements: Add a stand made from a folded piece of cardboard or attach a ribbon to hang your frame. This approach not only recycles materials but also allows for a high degree of creativity and personalization, turning a simple photo into a centerpiece of home decor. Approach 2 - Upcycling Objects Did you know how to make your own picture frame with unused object? Turning old items into unique picture frames is an eco-friendly way to repurpose and beautify objects that might otherwise be discarded. This approach can breathe new life into your decor and add a story to your space. Materials Needed Old books, unused frames, or wooden pallets Glue (suitable for the material you're working with) Basic hand tools (screwdriver, hammer) Step-by-Step Guide 1. Select and Prepare Your Object Choose an object that resonates with your aesthetic or has a particular sentimental value. Old hardcover books, unused frames, or sections of wooden pallets are great starting points.Clean your chosen item thoroughly, removing any dust, dirt, or debris. If you're using a wooden pallet, you may need to sand rough edges to prevent splinters. 2. Adapt the Object to Hold a Picture For Old Books: Carefully remove a rectangle from the center of the book pages to create a space for your photo. The cut should be slightly smaller than your picture size to hold it snugly. For Unused Frames: If the frame is too large or the wrong shape, consider cutting and rejoining the corners to fit your photo. Alternatively, use the existing frame as a quirky border for a smaller picture. For Wooden Pallets: Cut a section to the desired size of your frame. You can create a slot or shelf within the pallet where the photo can rest or attach a clip to hold the picture in place. 3. Add a Stand or Wall Mount: Choose how you'd like to display your frame—either standing or hanging. For a standing display, create an easel back from cardboard or wood and affix it to the frame using glue or screws. If you prefer to hang the frame, attach a picture hanger to its back with screws or nails, ensuring it's securely in place for wall display. Tips and Tricks Painting: Give your upcycled frame a fresh look with paint. Consider using chalk paint for a rustic finish or metallic spray paint for a modern touch. Decorative Elements: Embellish your frame with items like buttons, beads, or fabric to add texture and color. Decoupage using cutouts from magazines or wrapping paper can also create an eye-catching effect. Personalization: Add personal touches that reflect the photo's theme or the room's decor. For a beach vacation photo, for example, you might decorate a wooden pallet frame with small shells or sand. Upcycling objects into picture frames not only provides a creative outlet but also contributes to sustainability by repurposing materials. Each piece becomes a unique testament to both your style and your commitment to eco-friendly practices. Approach 3 - Crafting with Natural Materials Before reading this blog on how to make your own picture frame without using professional tools, you might not have imagined that you could use natural materials. Did you? Crafting a picture frame from natural materials not only connects you with nature but also creates a unique, rustic piece that adds warmth and character to any room. This approach leverages the beauty of the outdoors to frame your cherished memories. Materials Needed Twigs, branches Leaves, flowers (optional for decoration) Glue (a strong adhesive or hot glue gun is recommended) Twine or string Step-by-Step Guide 1. Gather and Prepare Natural Materials Take a walk in your garden, a park, or a wooded area to collect twigs and branches. Look for pieces with a bit of straightness for the frame's edges, though slight curves can add character. Choose twigs that are roughly the same thickness for a uniform frame or mix thicknesses for a varied texture. Once collected, clean your materials by gently wiping them down to remove dirt and debris. Allow them to dry completely if damp. 2. Constructing the Frame Measure and cut your twigs to the desired frame size. For a 4x3" photo, you'll need two twigs cut to 4" and two to 3", considering a little extra length for the joints. Lay out your twigs in a rectangle shape on a flat surface, arranging them to form the frame's outline. Use twine or string to bind the corners together. Apply glue to the joints before wrapping with twine for extra stability. The twine not only secures the twigs but also adds a decorative, rustic touch. If you want to add a back to the frame, cut a piece of cardboard or use a thin wooden panel, and glue it to the back of the frame. Make sure it's sized appropriately to hold your photo and secure it in place. 3. Decorating the Frame With the frame's structure ready, it's time to add some decorative flair using natural elements such as leaves and flowers. Affix these items onto the frame's surface with glue for a touch of nature's beauty. Opting for dried flowers or leaves is a smart choice, as they offer longevity and maintain their appearance without wilting. Tips and Tricks Preserving Natural Materials: To ensure your frame lasts, consider sealing the twigs with a clear varnish or spray sealer. This step is especially important if you're using flowers or leaves as decoration. Durability: Use a hot glue gun for stronger adhesion when attaching twigs and decorations. This will help keep the frame intact and durable. Display: Add a string loop to the top of the frame for hanging or create a stand from additional twigs or branches for a freestanding frame. This eco-friendly method of crafting picture frames celebrates the simplistic allure of nature while offering a delightful creative experience. Each frame you make is truly unique, capturing the essence of the natural world and beautifully presenting your cherished memories in a rustic and enchanting manner. How to Make Your Frame a Reflection of You Learning how to make your own picture frame unique is a key skill for personalizing your living space. This DIY endeavor is more than just framing a picture; it's about infusing your personal touch and memories into your decor, making each frame a testament to your individual style and journey. By customizing your creations, you turn simple photos into reflections of your personal narrative or the essence of captured moments. Here's how you can make each picture frame you create a distinctive piece that echoes your personal story or the spirit of the photographed scenes. 1. Tailoring to Your Unique Style When crafting your own picture frames, it's essential to think about how the design can reflect your personal aesthetic or the essence of the photograph it encases. Whether capturing the serenity of nature, the dynamism of city life, or the warmth of intimate moments, your frame can serve as an extension of the story you wish to tell. Consider the palette, textures, and materials that resonate with you or the mood of the photo. A frame crafted from driftwood, for instance, can perfectly accentuate a beachside family snapshot, adding depth and narrative to its display. 2. Incorporating Mementos and Themes Embedding personal tokens or themed embellishments into your frame can elevate a simple photo border into a vessel of cherished memories. This method not only personalizes the frame but also enhances the emotional value of the photograph. Adorning the frame with small keepsakes from a journey or event can evoke nostalgia, bringing the encapsulated moments to life with rich, personal context. 3. Adding Personal Messages Personalizing your DIY frame with messages, dates, or meaningful quotes adds an intimate dimension to your handiwork. Whether it's a brief handwritten note on the back or an elegantly integrated quote within the frame's design, these personal touches transform the frame from a mere photo holder into a conduit of stories and memories. Through these customizations, your DIY frame becomes not just an object, but a narrative piece that resonates with personal significance and artistic expression. Summing up Wrapping up, crafting your own picture frames without needing pro tools is a creative, cost-saving, and super personal way to jazz up your space. Whether you're repurposing, upcycling, or going natural, there's a world of possibilities out there. Dive in, experiment with these fun approaches to “how to make your own picture frame creatively”, and don't forget to share your unique creations. Your DIY adventure might just spark a trend!
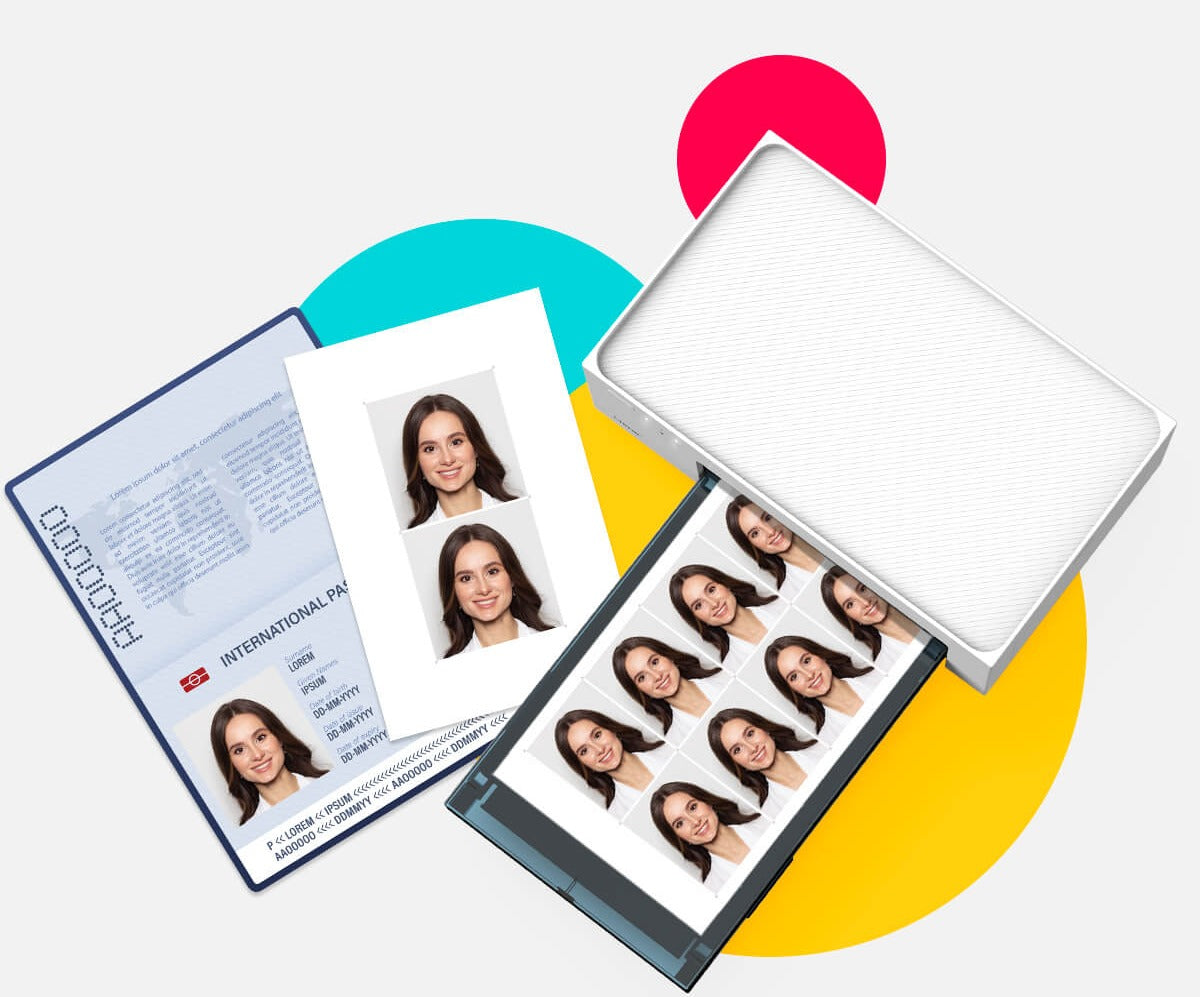
Gone are the days when printing passport size photos required a trip to the photo studio, waiting in line, and shelling out more cash than you'd like. In this DIY era, learning how to print passport size photo at home is not just possible; it's also incredibly easy. Whether you need them for travel, job applications, or any official documents, this guide will walk you through the entire process, step-by-step. And for those looking for the ultimate convenience, we'll introduce you to portable instant photo printers – a compact, user-friendly solution that’s revolutionizing home photo printing. The Basics: What You'll Need Digital Camera or Smartphone: High-resolution images are key. Most modern devices will do the trick. Photo Editing Software: Free tools like GIMP or paid ones like Adobe Photoshop can help you adjust the photo to meet passport standards. Quality Photo Paper: Opt for glossy or semi-gloss finish for best results. A Reliable Printer: Ensure your printer can handle photo quality printing. For an upgrade, consider a portable instant photo printer. A White Background: A plain wall or a white sheet hung flat will work perfectly. For your convenience, here are photo requirements for U.S. passports. How to print passport size photo step by step Without further ado, let’s see how you prepare and print passport size photos without going to the photo studio. 1. Capture the perfect shot The first step on how to print passport size photo is capturing a perfect shot. Capturing the perfect passport photo at home starts with paying attention to several key details that ensure your picture meets the strict requirements for official documents. Getting this right saves you time and hassle in the long run, as adhering to these guidelines will prevent potential rejections of your passport application. Here's how to nail the shot on the first try: Dress Code: Choose your outfit wisely. Stick to solid colors that contrast well with a white background; avoid wearing uniforms, camouflage, or clothes that resemble too closely the backdrop. This helps define your silhouette clearly against the background. Lighting: Aim for soft, natural light to illuminate your face evenly. Position yourself in a way that avoids harsh shadows across your face or on the background. Morning or late afternoon light is often the most flattering, reducing the risk of overexposure or underexposure in your photo. Pose: Stand straight, facing the camera directly with your shoulders level. Maintain a neutral expression with both eyes open and mouth closed. This straightforward pose is crucial for creating an acceptable passport photo. Background: The background should be white and plain, without any patterns, textures, or objects that can distract from your face. Ensure it's evenly lit to avoid shadows or gradients. A simple, unadorned wall or a hung white sheet can serve well for this purpose. By focusing on these elements, you'll be well on your way to capturing a passport photo that not only meets official standards but also presents you in the best light. 2. Edit your photo To ensure your passport photo meets the strict criteria set by authorities, editing your photo like a pro is crucial. While the process may sound daunting, it's quite straightforward with the right approach. Here's how to refine your image for that perfect passport photo: Cropping: Begin by cropping your photo to the specific dimensions required, typically 2x2 inches (51x51 mm) for U.S. passports. This step is vital to frame your face correctly within the photo, keeping in mind the head must occupy 50-69% of the image's height. Adjust Lighting and Contrast: Proper lighting and contrast are essential for making your features stand out clearly. Adjust the brightness and contrast levels to ensure your face is evenly lit without any harsh shadows. The goal is to achieve a balanced exposure where your facial features are distinctly visible against the background. Maintain Natural Appearance: It may be appealing to apply filters or use editing tools for improvements, but these alterations could result in the rejection of your application. Presenting a true likeness is crucial. Refrain from making significant modifications, like smoothing skin texture or altering your hair color, as these can distort the authenticity of your representation. By focusing on these key editing steps, you can create a passport photo that not only meets the official requirements but also represents you accurately. Remember, the aim is to produce a clear, compliant photo that ensures a smooth passport application process. 3. Selecting the Right Paper and Printer Settings The final step in printing your passport photos at home involves selecting the appropriate paper and configuring your printer settings correctly. This phase is crucial for achieving a professional and compliant result that mirrors the quality of photos produced by commercial services. Choosing High-Quality Photo Paper: Opt for premium photo paper with a glossy or semi-gloss finish. These types of paper best replicate the appearance of professional passport photos, ensuring durability and clarity. The right paper can make a significant difference in how colors and details are rendered. Adjust Printer for Optimal Quality: Prior to initiating the print job, fine-tune your printer for peak performance. Opt for the 'Photo Printing' mode to access the highest quality settings, selecting the maximum DPI (dots per inch) to guarantee sharp, detailed images. Verify the ink levels in your cartridges are sufficient and perform a printer head alignment if necessary to prevent any streaking or inconsistent ink spread. Paper Alignment and Test Print: Carefully align the photo paper in the printer tray to avoid any cropping or misalignment issues. It's a good practice to run a test print on regular paper before using your photo paper to ensure everything looks as expected. By paying close attention to the paper quality and printer settings, you can produce passport photos at home that meet the stringent requirements for official documents, all while saving time and money. Introducing Portable Instant Photo Printers Do you know how to print passport size photo more conveniently? For those seeking an even simpler solution, portable instant photo printers are a game changer. These compact gadgets connect to your smartphone or digital camera, allowing you to print photos directly from your device. Brands like Liene, Kodak and HP offer models that are perfect for passport photos, delivering crisp, clear images with minimal setup. Plus, their small size means you can take them anywhere, making last-minute printing jobs a breeze. Liene Amber 4x6 Photo Printer Liene Amber 4x6 Photo Printer is known for its high print quality and ease of connectivity, making it a great choice for printing passport photos. It supports wireless printing directly from your smartphone or tablet, ensuring convenience and efficiency. The Liene Photo Printer produces vibrant and crisp images, essential for the clarity required in passport photos. KODAK Dock Plus 4PASS Instant Photo Printer (4x6 inches) KODAK Dock Plus 4PASS Instant Photo Printer simplifies the printing process with features like direct smartphone docking. It excels in creating durable, high-quality prints perfect for passport photos, attributed to its sophisticated dye sublimation printing technology. This ensures the production of crisp and vibrant images. HP Sprocket Select Portable Photo Printer HP Sprocket Select Portable Photo Printer is perfect for printing 2.3x3.4 inch photos directly from your smartphone. For passport photos, you may need to adjust the image size accordingly, but its print quality is suitable for producing clear, detailed images. When selecting a model for printing passport photos, consider the specific requirements for passport photos in your country, such as size, resolution, and paper type. These models are capable of producing high-quality prints that, with the right setup and adjustments, can be suitable for passport applications. Always ensure that the photo size and quality adhere to the guidelines provided by the issuing authority. Why Choose a Portable Instant Photo Printer? Choosing a portable instant photo printer offers unparalleled convenience and efficiency for printing passport photos and more. The allure of these compact devices lies in their ability to combine ease of use with high-quality output, making them an excellent choice for anyone, from travelers to tech enthusiasts. Convenience: The most significant advantage of portable instant photo printers is the ability to print photos wherever and whenever you need them. Whether you're at home, in a hotel room, or on the go, these printers eliminate the need to seek out professional printing services, saving you both time and effort. Ease of Use: Portable instant photo printers are designed with simplicity in mind. With minimal setup required and user-friendly apps that guide you through the printing process, getting your photos printed is as easy as a few taps on your smartphone. This hassle-free approach makes printing accessible to everyone, regardless of tech savvy. Quality: Despite their compact size, portable instant photo printers do not compromise on the quality of the prints. These devices are capable of producing sharp, vibrant photos that meet the rigorous standards required for passport photos. This means you can rely on them to provide prints that are not only suitable for personal use but also compliant with official documentation requirements. In summary, portable instant photo printers offer a compelling blend of convenience, ease, and quality, making them an indispensable tool for modern, on-the-go lifestyles. Summing up Printing passport size photos at home is a convenient, cost-effective DIY project. With just a portable instant photo printer and some patience, you can easily meet all requirements for how to print passport size photo, saving both time and money. This method adds a personal touch that can't be replicated, making it perfect for avid travelers, busy professionals, or DIY enthusiasts. Why not try it next time you need a passport photo? Mastering this skill is rewarding and simple. Happy printing!
Locket photos hold a special place in the realm of personal adornments, encapsulating memories, love, and cherished moments in a compact, wearable form. These tiny, intimate portraits offer a unique way to keep loved ones close, serving not only as a piece of jewelry but as a personal treasure imbued with sentiment and history. Learning how to print locket photos in today's fast-paced world has been revolutionized by the advent of portable photo printers. These devices marry convenience with technology, allowing anyone to easily transform digital memories into tangible keepsakes. With just a few clicks, portable photo printers simplify the task of personalizing lockets with special photos, making this cherished form of expression more accessible than ever. How to print locket photos step by step Creating the perfect locket photo is a blend of art and precision, turning digital memories into physical tokens of affection. This step-by-step guide on how to print locket photos ensures that anyone can achieve professional-looking results right at home, using portable photo printers for maximum convenience. Measuring the Locket Space: Begin with precise measurements of your locket's photo compartment using a ruler or measuring tape. This accuracy is key to a seamless fit, eliminating unsightly gaps. Choosing an Ideal Photo: Opt for a photo of high resolution where the focal point is well positioned. Clarity, brightness, and a thoughtful composition are crucial for maximizing the limited space of a locket. Adjusting Photo Size: Employ photo editing software or tools to scale your image to match the locket's specifications. Resources like Adobe Photoshop or various free online platforms can assist in resizing without compromising image quality. Perfecting the Image: Enhance your photo by modulating brightness, contrast, and color saturation levels. This refinement step guarantees a vibrant and lucid print that faithfully reproduces every nuance. Selecting a Suitable Portable Photo Printer: Search for portable printers renowned for their superior print quality, compatibility with smaller photo formats, and straightforward connectivity features. Preference should be given to models lauded for their efficiency in photo printing. Optimizing Printing Conditions: Choose the highest-grade photo paper compatible with your printer and fine-tune the printing settings to achieve a high-resolution output. This attention to detail ensures your photo emerges sharp and colorful. Trimming and Inserting the Photo: With precision, trim the printed photo along the previously determined dimensions. A sharp pair of scissors is essential for accurate cuts. Subsequently, place the photo into your locket, making sure it fits securely. Adhering to these steps allows for the conversion of any digital photograph into an exquisite locket photo, crafting an everlasting piece of jewelry or a deeply moving present. Why choose a portable photo printer to print locket-size photos In the realm of personal keepsakes, locket photos hold a dear place, offering a tangible connection to moments and loved ones. The advent of portable photo printers has revolutionized how we bring these tiny treasures to life. Here’s why a portable photo printer is your best ally for creating the perfect locket photo. 1. Tailored for Locket Photos Precision Printing: Portable photo printers offer the capability to print at the exact dimensions required for locket photos, ensuring a perfect fit every time without the need for extensive trimming. High-Resolution Output: These printers produce clear, detailed images crucial for the small scale of locket photos, capturing every smile and glance with vivid clarity. 2. Flexibility and Convenience Print Anytime, Anywhere: Capture a moment on your phone and print it directly into a photo ready to be placed in a locket, whether you're at a family event, on a trip, or cozy at home. Easy to Carry: Their compact size means you can easily bring your printer with you, making it possible to print and update locket photos whenever you wish. 3. Personal Touch: Custom Editing: Before printing, photos can be edited to perfection, ensuring the image not only fits the locket’s size but also reflects the desired mood and tone, making each locket photo deeply personal. With the Liene K100 Portable photo printer, you can print on professional photo paper, either color or black and white, and the photo paper is designed with adhesive backing and can be pasted. 4. Economical and Efficient: Cost-Effective: Printing photos at home reduces the need for professional printing services, offering a more economical way to frequently update locket photos. Immediate Results: Avoid the wait times associated with professional services, printing photos as soon as they’re chosen and edited. Compared to traditional printing methods and professional services, portable photo printers deliver a level of immediacy, customization, and intimacy perfectly suited for the creation of locket photos. They empower individuals to bring their cherished memories to life in a form that's not only portable but deeply personal, ensuring that your locket remains a dynamic, ever-evolving token of love and memory. For your convenience, here is a guide on how to print photos from Android phones and how to choose portable printers for iPhone-users. Creative Ideas for Locket Photos Locket photos are a timeless way to carry memories close to your heart, but with the evolution of photo technology, there are now more creative avenues to personalize these miniature keepsakes. Do you know how to print locket photos in a creative way? Here are some innovative ideas for making locket photos even more special, perfect for gifting or commemorating significant moments: Innovating with Photo Enhancements Filters for Mood Setting Apply filters to give your locket photo a vintage look, a warm glow, or a black-and-white classic feel, enhancing the emotional impact of the memory it holds. Creating a Mini Collage Use photo editing software to combine several images into a single, cohesive mini collage. This is especially poignant for lockets, as it allows you to carry multiple memories or represent multiple loved ones within the same space. Text Overlay for Personal Messages Overlay a meaningful date, name, or short message on the photo before printing. This can add a layer of personal significance, making the locket photo a message and a memory. Memorable Occasion and Gifting Ideas Commemorative Keepsakes For anniversaries, create a locket photo from the wedding day and pair it with a current photo to symbolize the journey together. For graduations, a cap-and-gown photo with a motivational quote overlay can inspire and commemorate the achievement. Personalized Lockets for Every Relationship For friends, blend photos of shared adventures or inside jokes into a collage that captures the essence of your friendship. For parents and children, a photo capturing a candid moment together, enhanced with a soft filter, can make a heartwarming gift that carries the warmth of family bonds. Seasonal and Thematic Creativity Seasonal lockets can rotate photos with seasonal themes, such as autumn leaves or snowy landscapes, keeping the locket in tune with the time of year. Thematic lockets for hobbyists, incorporating images related to their passions (e.g., musical notes for musicians, written words for writers) with subtle background textures to match. Implementation Tips Use High-Quality Images: To ensure that your creative efforts translate well into the small format of a locket photo, start with the highest quality image possible. Experiment Before Printing: Take advantage of photo editing software to try different ideas before settling on the final version for print. Consider the Locket's Shape: Whether it's round, oval, or heart-shaped, design your photo or collage to complement the locket's form for a visually harmonious effect. By infusing creativity into your locket photos, you transform a simple image into a multifaceted story, deepening the emotional value of the locket and making it an even more treasured item. Whether for yourself or as a personalized gift, these creative ideas can turn lockets into unique, meaningful keepsakes that capture not just a moment, but a rich tapestry of memories and sentiments. Troubleshooting common issues of printing Printing locket photos with a portable photo printer should be a seamless process, but occasionally, you might encounter some hitches. Here are troubleshooting tips for common issues and advice for maintaining your printer to ensure it continues to produce high-quality prints. 1. Color Inaccuracies Calibration: Ensure your printer is calibrated for color accuracy. Many printers come with a calibration function that can be performed via the printer's settings or a connected app. Monitor and Printer Alignment: The colors on your screen might not always match your print output due to differences in device color profiles. Adjust your monitor settings and use printer profiles that match your paper type to improve color accuracy. 2. Paper Jams Proper Loading: Ensure the paper is loaded correctly according to your printer's guidelines. Avoid overfilling the paper tray and ensure that the paper is not bent or damaged. Regular Cleaning: Clean your printer's rollers regularly to prevent paper dust buildup, which can cause jams. Consult your printer's manual for the recommended cleaning procedure. 3. Size Mismatches Check Printer Settings: Before printing, double-check that the print size settings on your printer or in the printing app match the dimensions needed for your locket photo. Software Accuracy: Use reliable photo editing software to resize your images accurately. Ensure that the dimensions and resolution are correctly set before printing. By addressing common printing issues promptly, you can enjoy consistent, high-quality prints from your portable photo printer for years to come. Keeping your device in top condition ensures that every locket photo you print captures the essence of your cherished memories perfectly. Crafting Locket Memories with Portable Printers Embracing the art of how to print locket photos using a portable photo printer is a blend of convenience and personal expression. This process turns digital memories into tangible mementos, deepening the emotional value embedded in each locket. Let’s delve into creativity and customization, making every locket photo a distinct gem. Seize the chance to keep cherished moments close to your heart and share this heartfelt expression of affection and remembrance with others, all through the convenience and excellence of portable printing.
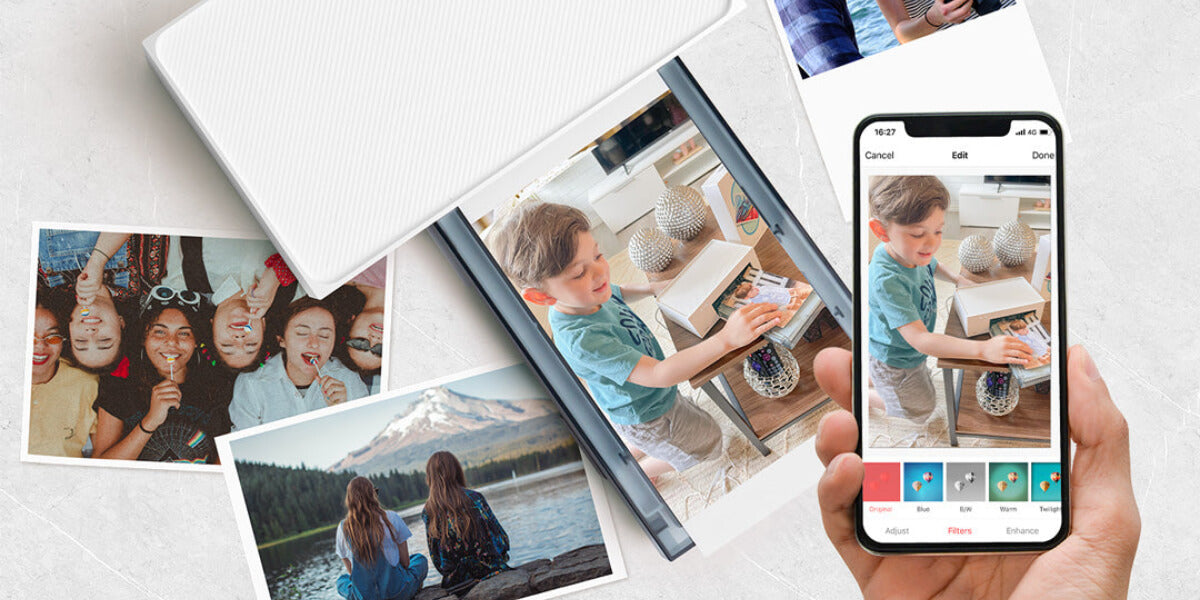
In today's digital age, the ability to instantly print photos directly from our smartphones is a convenience many of us enjoy. However, it's not uncommon to encounter a snag of your instant photo printer not showing up on iPhone. This issue can be perplexing and frustrating, especially when you're eager to print out memories from your phone. But worry not! In this blog, we'll guide you through simple steps to resolve this connectivity issue and get your printer up and running with your iPhone. Find Out the Possible Causes When you face a situation where your printer isn't being recognized by an iPhone, it's significant to recognize that such an issue doesn't arise without reasons. "Printer Not Showing Up on iPhone," like any other tech-related challenge, this problem stems from certain underlying factors. Understanding that there are concrete reasons behind this issue is the first step towards finding a solution. In the realm of technology, particularly in the interaction between different devices like printers and smartphones, everything operates based on defined protocols and settings. When an issue surfaces, it's a signal that one or more factors in this complex interaction aren't aligning as they should. This misalignment can be influenced by a variety of factors inherent to either the printer, the iPhone, or the way they are set up to communicate. First and foremost, incorrect Wi-Fi or Bluetooth settings can hinder the connection between your iPhone and the printer. It's essential to ensure that both devices are correctly set up for communication, whether it’s through a Wi-Fi network or via Bluetooth. Another potential issue could be compatibility between your printer and your iPhone. Not all printers are designed to seamlessly interact with iOS devices, so verifying compatibility is a crucial step. Software or firmware updates are another area to consider. Outdated software on either your iPhone or the printer can lead to connectivity problems. Ensuring that both devices are running the latest software versions can often resolve these issues. Lastly, signal interference or range issues could be the culprit. If the printer is too far from your iPhone or if there are obstructions or other electronic devices interfering with the signal, this could prevent your printer from appearing on your iPhone. Acknowledging and understanding these potential disruptors are critical in troubleshooting and resolving the issue. By methodically examining each aspect – from software compatibility and network settings to physical setup and device configuration – users can identify the root cause of the problem. This approach not only helps in resolving the current issue but also enhances one’s overall understanding of how such devices interact, leading to a more informed and smoother user experience in the future. In the following sections, we'll delve into each of these possible causes in more detail and explore solutions to get your instant photo printing back on track. Troubleshooting Steps When faced with connectivity issues between your iPhone and an instant photo printer, a systematic approach to troubleshooting can often resolve the problem. Here are some key steps you can follow: Checking Wi-Fi/Bluetooth Settings on the Device: For Wi-Fi Printers: Ensure your iPhone is connected to the same Wi-Fi network as the printer. Navigate to Settings > Wi-Fi on your iPhone and verify the network. For Bluetooth Printers: Go to Settings > Bluetooth and ensure Bluetooth is turned on. Check if the printer is listed under "My Devices" and if not, set your printer to pairing mode and try to connect. Verifying Printer Compatibility with the Device: Check the printer's manual or the manufacturer's website to confirm that it's compatible with iOS devices. Some printers might require specific settings or apps to work with iPhones. Updating the Needed App, Printer Firmware, and Device Software: App Updates: If your printer requires a specific app, open the App Store and update it to the latest version. Printer Firmware: Visit the manufacturer's website for instructions on how to update your printer's firmware. Device Software: Keep your iPhone updated with the latest iOS version (Settings > General > Software Update). If these steps don’t resolve the issue, it might be time to contact customer support. This could be the support team for your printer or Apple Support for your iPhone. They can provide more detailed guidance, especially for issues related to specific models or technical glitches beyond basic troubleshooting. By following these steps methodically, you stand a good chance of resolving connectivity issues between your iPhone and instant photo printer. Remember, patience and attention to detail are key in troubleshooting tech devices. Introducing Liene Amber Instant Photo Printer As technology progresses, ensuring seamless device connectivity has become more crucial than ever. This is especially relevant for Liene Amber Printer users, particularly those with iPhones, who might wonder if they will encounter the "Printer Not Showing Up on iPhone" issue. It's important to address these concerns and provide clarity on the compatibility and ease of use of the Liene Amber Printer with Apple devices. Let's explore this topic to assure users about the reliable integration they can anticipate between their iPhone and the Liene Amber Printer. What Makes Liene Amber Instant Photo Printer an Excellent Choice? The Liene Amber Instant Photo Printer stands out for its advanced thermal dye sublimation technology, delivering high-resolution 300 DPI prints in the classic 4x6 inch size. This feature ensures that your photographs are not only vibrant but also rich in detail, replicating professional-quality printing. Adding to its appeal is its broad compatibility, seamlessly working with iPhones, Android devices, and PCs. This flexibility makes it an ideal choice for a diverse range of users. Its Wi-Fi functionality supports connections for up to five users simultaneously, making it perfect for group events or family activities. The communal aspect of the printer fosters a shared experience, enhancing social gatherings. The Liene App further enriches this experience by providing user-friendly editing tools. This feature allows you to add a personal touch to your prints, whether they're from casual outings or special occasions. The package, inclusive of 100 photo papers and three ink cartridges, equips you with everything needed to start printing right away. This readiness, combined with its quick, smear-free printing capability, positions the Liene Amber as an essential tool for those who cherish capturing and preserving moments. Whether at home or on the move, its practicality and ease of use make it the best home-use photo printer for photography enthusiasts and casual users alike. Why Liene Amber Printer Stands Out for iPhone Users Liene Amber Printer is renowned for its user-friendly connectivity, designed to ensure effortless pairing with a variety of devices, including iPhones. While the occurrence of connectivity issues is rare, Liene Amber Printer has taken steps to ensure the issues of “my printer not showing up on iPhone” are easily resolvable. Key Features for Seamless Connectivity Frequent Firmware Updates: The Liene Amber Printer regularly updates its firmware to stay in sync with the latest iOS updates, significantly reducing compatibility issues. User-Friendly Setup: Connecting your Liene Amber Printer to an iPhone is straightforward and hassle-free, thanks to its intuitive setup process. Robust Support System: In the unlikely event of a connection issue, Liene Amber Printer's dedicated customer support team is ready to provide step-by-step assistance. Comprehensive Online Resources: The Liene Amber Printer offers extensive online guides and FAQs to walk users through the iPhone connection process. Positive Customer Feedback: A large number of iPhone users have shared their satisfaction with the Liene Amber Printer, highlighting its reliability and ease of use. To guarantee a smooth printing experience with your iPhone, Liene Amber Printer has focused on key areas such as compatibility checks, maintaining a stable connectivity with Wi-Fi (for Amber Instant Photo Printer) or Bluetooth (for Pearl Portable Photo Printer), and providing clear instructions for both setup and troubleshooting. So rest assured, the Liene Amber Printer is committed to providing a seamless printing experience for iPhone users. With it boasting user-centric design, ongoing software updates, and reliable customer support, users can enjoy their printing experience without being haunted by the thought “why my printer not showing up on iPhone”. Thus, it can be said that the Liene Amber Printer stands as a top choice for Apple device users seeking hassle-free printing solutions. Conclusion In conclusion, while the challenge of “printer not showing up on iPhone” can be a common concern, the solutions are often straightforward and effective. By understanding the potential causes and following the outlined troubleshooting steps, most connectivity issues can be resolved swiftly. The Liene Amber Instant Photo Printer distinguishes itself as a dependable and user-friendly option for iPhone users, thanks to its intuitive design, strong support system, and regular firmware updates. This printer not only delivers exceptional print quality but also guarantees a smooth connection with iOS devices. Tailored for both photography aficionados and those who cherish capturing daily life, the Liene Amber Printer is crafted to blend effortlessly into your digital world. It simplifies the task of turning your digital memories into tangible prints. Embrace the convenience of technology, which is designed to streamline our daily routines. With the correct approach, you can easily overcome any technical challenges. Here's to enjoyable and trouble-free printing!
In recent years, the charm of printing photos at home has seen a remarkable resurgence, capturing the hearts of photography enthusiasts and casual snappers alike. Amidst this revival, a fascinating trend has emerged: the allure of smaller-sized prints, particularly the compact and versatile 2x3 inches format. These pint-sized pictures are not just a nod to nostalgia but represent a significant leap in the personalization and innovation of photo printing. In this guide, we’ll discuss how to use small photo printers to print small pictures, exploring how this seemingly modest innovation is redefining the way we capture and cherish our memories. Join us in uncovering the unique appeal of small-scale photo printing. 1. Understanding small photo printers To learn how to use small photo printers to print small pictures, we need to understand how these printers work first. We're going to delve into the essence of small photo printers, the innovative technologies that power them, and the myriad benefits they offer to photography enthusiasts and casual users alike. What are small photo printers? Small photo printers are compact, portable printing devices designed to print photos directly from your mobile devices. Unlike their larger counterparts, these printers emphasize convenience and immediacy, allowing us to print photos on-the-go. The technology behind small photo printers Inkjet Technology Among the most prevalent options, inkjet printers operate by ejecting minuscule ink droplets onto paper. These printers are renowned for their capability to generate top-notch prints, characterized by vibrant colors and intricate details. ZINK Technology ZINK (Zero Ink) technology signifies a revolutionary leap in printing. ZINK printers diverge from conventional ink cartridges, employing unique paper embedded with color crystals that activate and infuse with color when subjected to heat. This innovation ensures a more portable and less messy printing experience. Dye Sublimation Another technology utilized in small photo printers is dye sublimation. These printers work by heating dye on a ribbon to transfer it onto the photo paper, resulting in durable and high-quality photographic prints. Benefits of using a small photo printer Portability One of the biggest advantages of small photo printers is their compact size, making it easy to take them anywhere. Whether you're at a party, on vacation, or simply hanging out with friends, you can print your memories on the spot. Ease of Use Designed with simplicity in mind, these printers can be easily connected to your devices via Bluetooth or Wi-Fi. With intuitive apps and software, selecting and printing your favorite photos is a breeze. Instant Printing Capabilities The joy of holding a physical photo moments after taking it is unmatched. Small photo printers bring back the nostalgia of instant photography with the convenience of modern technology, allowing you to share tangible memories with friends and family instantly. 2. Preparing to print Learning how to use small photo printers to print small pictures, preparation is important. This involves selecting the right printer, choosing high-quality images, and making necessary edits to your photos. Choosing the right printer When it comes to printing 2x3-inch or other small-size photos, not all printers are created equal. Here's a brief overview of popular models known for their ability to deliver high-quality small prints: Liene Pearl K100 2x3" Portable Photo Printer: Using ZINK technology, it prints 2x3-inch photos with sticky back, allowing user to take their photos as stickers. Polaroid ZIP Mobile Printer: It utilizes ZINK zero ink technology for instant, colorful prints directly from your smartphone. Kodak Mini 2 HD Wireless Mobile Instant Photo Printer: It offers easy Bluetooth connectivity and uses dye sublimation technology for high-quality prints. HP Sprocket Portable Photo Printer: It is another favorite that uses ZINK technology, known for its sleek design and user-friendly app. Each of these printers has its unique features, from inkless printing to connectivity options. Consider what's most important to you, whether it's print quality, ease of use, or portability, when choosing the right model. Selecting photos To ensure your 2x3 prints look their best, follow these tips when selecting photos: Resolution Matters: Choose high-resolution images to avoid pixelation. A higher pixel count will ensure your small prints are clear and detailed. Consider Composition: Since you're working with a smaller canvas, select photos with simple compositions or close-up shots for the best visual impact. Lighting is Key: Well-lit photos tend to print better. Look for images with good natural lighting or well-balanced artificial lighting. Editing photos A little editing can go a long way in enhancing your photos for printing. Here are some basic adjustments to consider: Cropping: Adjust the crop to fit the 2x3-inch format. This can also help you focus on the photo's main subject or eliminate unwanted elements. Brightness, Contrast, and Saturation: Play around with these settings to bring out the best in your photo. Increasing brightness can make your photo appear more vibrant, while adjusting contrast can add depth. Saturation enhances colors, making them more vivid. Use Editing Apps: There are many user-friendly photo editing apps available that can help you make these adjustments easily. Look for apps with good reviews and intuitive interfaces. 3. The printing process Now let’s move to the exact process of how to use small photo printers to print small pictures. Follow this step-by-step guide to ensure a smooth printing experience. Loading the paper Open the paper tray: Most small photo printers have a dedicated compartment or tray for photo paper. Open it according to the manufacturer's instructions. Prepare the paper: If your printer uses ZINK paper, make sure the barcode side faces down. For other types of photo paper, ensure the glossy side is facing the correct direction. Insert the paper: Place the 2x3-inch photo paper into the tray. Avoid touching the glossy surface as much as possible to prevent smudges. Close the tray: Securely close the paper tray or compartment. Ensure it's properly locked in place to avoid any printing errors. Connecting to the printer Bluetooth: Turn on the printer and enable Bluetooth on your smartphone or computer. Select the printer from the list of available devices to pair. Wi-Fi: For Wi-Fi-enabled printers, connect your printer and device to the same Wi-Fi network. Follow any on-screen instructions to complete the connection. Cable Connection: If your printer supports cable connections, simply connect the printer to your device using the appropriate cable, usually USB. Using the printer's app or software Download and Open the App: Download the printer's app from the App Store or Google Play, or install the software on your computer. If you’re using Liene’s printers, Liene Photo App is available. Select Your Photo: Browse your photo library within the app/software and select the image you wish to print. Make Adjustments: Use the app's editing tools to crop, adjust brightness, contrast, and saturation, or apply filters. Choose Print Settings: Select the 2x3-inch size option and any other relevant settings, such as print quality. Now you can print small photos from your instant photo printer! Troubleshooting common issues Paper Jams: Gently remove any stuck paper from the printer. Check the manufacturer's instructions for the best way to clear a jam. Low Print Quality: Ensure the photo paper is loaded correctly and that you're using the right type of paper. Also, check for low battery or ink levels, if applicable. Connectivity Issues: Restart the printer and your device. Make sure Bluetooth or Wi-Fi is enabled and functioning properly. Re-pair or reconnect as needed. Creative uses for 2x3-inch prints 2x3-inch prints are not just photos; they're a canvas for creativity. Whether you're looking to add a personal touch to your space, craft unique gifts, or undertake fun projects, these small prints offer endless possibilities. Here are some creative ways to use them. Scrapbooks: Integrate 2x3 prints into scrapbooks as part of a visual diary. Combine them with notes, stickers, and other memorabilia to capture memories in a creative and personalized way. Some photo papers, designed with sticky back, allow users to use their printed photos as stickers. Photo Walls: Create a dynamic photo wall by arranging 2x3 prints in various patterns. Use washi tape for a damage-free way to display your photos and easily swap them out. Greeting Cards: Use these prints to craft personalized greeting cards. Glue a photo to the front of a blank card and add your message inside for a personal touch that stands out. Desk Decor: Stand your 2x3 prints on your desk using mini easels or clip them to small stands. This is a great way to keep loved ones and cherished memories in sight during your day. Maintenance and care Taking proper care of your small photo printer and the 2x3-inch prints you create ensures longevity and consistent print quality. To ensure the longevity of both your printer and 2x3-inch prints, proper maintenance and photo care are essential. For printer maintenance, routinely clean the printhead and paper path using a soft, lint-free cloth, following the manufacturer's cleaning guidelines. When your printer is not in use, store it in a cool, dry location, away from direct sunlight, to prevent dust buildup and exposure to extreme temperatures that can impact performance. For photo care, protect your prints by storing them in acid-free photo albums or archival-quality sleeves to prevent fading and discoloration. Handle prints with care to avoid fingerprints or scratches, and store them in a dark, cool environment with controlled humidity to prevent deterioration. Regularly inspect your stored prints for damage and consider creating digital backups to safeguard your cherished memories. Summing up In conclusion, small photo printers offer the delightful convenience of instant 2x3-inch picture printing, bringing cherished memories to life. And that’s why many people are asking how to use small photo printers to print small pictures. This size of photos embodies portability, simplicity, and immediate gratification. Embrace the creative potential of these compact marvels by embarking on personal projects, crafting unique gifts, and transforming your living space with mini works of art. The possibilities are boundless, and the joy of seeing your photos materialize in an instant is truly captivating. So, dive into the world of small photo printers, ignite your creativity, and relish the tangible essence of your treasured moments. Happy printing!
1 / 3