


Custom face stickers are taking over parties, weddings, and gift exchanges because they’re fun, personal, and guaranteed to get people talking. They work for all kinds of occasions, from big celebrations like birthdays and graduations to small, thoughtful surprises in gift wrapping. This guide will walk you through everything from picking the right photos to adding playful design touches, plus how to produce high-quality stickers at home so you can bring laughter and personality to any event.![]()
![]()

Why Custom Face Stickers Are Perfect for Parties and Gifts
Custom face stickers are more than decoration. They can set the tone for your event and make it truly memorable.
Fun and personalized touch to events: Adding someone’s face to party items makes guests feel included and creates a lasting memory. It works especially well for milestones like birthdays or weddings.
Unique conversation starter: Guests often laugh, share stories, and take photos when they see familiar faces on decorations or favors. This helps everyone feel more connected.
Budget friendly alternative to specialty print shops: Making stickers at home lets you control the quantity and design while keeping costs low. You can produce exactly what you need without paying for large print runs.
Suitable for many occasions: From graduations and holidays to casual get-togethers and gag gifts, custom face stickers can be tailored to match the style and mood of any celebration.
Planning Your Custom Face Sticker Design
Good planning will make your stickers look sharper and more professional. Taking a few minutes to get the design right will save time later and make the finished stickers stand out.
Choosing the right photos: Use images that are clear, front facing, and taken in good lighting. This ensures facial details are sharp and easy to recognize once printed. Avoid blurry, shadowed, or angled shots as they are harder to cut accurately.
Adding fun elements: Party themes can come alive with small details like digital hats, sunglasses, or text captions. These additions make the stickers more engaging and can be matched to the event’s color scheme or style.
Using design tools: Free and paid tools such as Canva, Procreate, or Photoshop allow you to crop, adjust colors, and add creative elements. Spend a little time experimenting with filters and layouts to make the design pop.
Creating a high resolution PNG with a transparent background: Exporting the final design as a high resolution PNG with no background will give the cleanest cut lines. A transparent background helps the cutter follow the outline precisely and prevents unwanted white edges around the face.
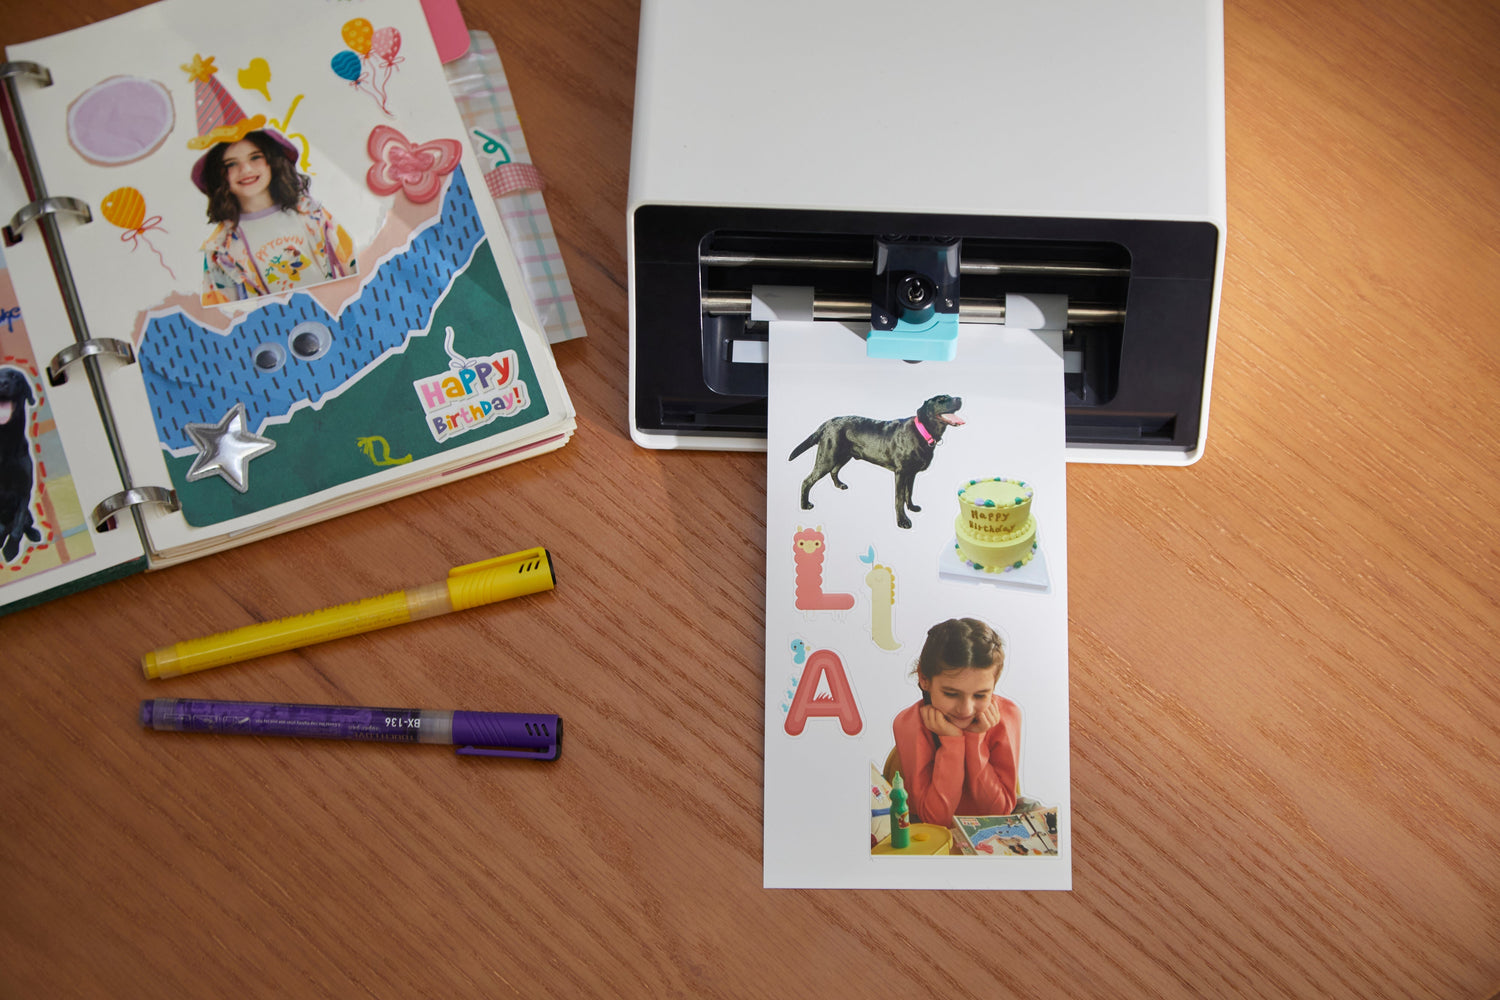
How to Make Custom Face Stickers with Liene PixCut S1
After your design is ready, you need a quick way to turn it into high-quality stickers at home. The Liene PixCut S1 prints in sharp 300 dpi and cuts each design with precision, so you can have party-ready stickers in minutes.
Step 1: Upload or Design
Open the Liene App and either create your sticker design directly in the app or import one from Canva or Procreate. Make sure to save the final file as a high-resolution PNG or JPG so the print is sharp and clear.
Step 2: Start Printing
Place Liene sticker paper into the PixCut S1, select 300 dpi for crisp details, and tap “Print” to begin.
Step 3: Automatic Kiss Cut
The machine will automatically detect the edges of your design and perform an accurate kiss cut, leaving the backing intact so the stickers peel cleanly. No tracing or extra tools are needed.
Step 4: Peel and Apply
Gently peel your stickers from the sheet and place them on party props, invitations, gift wraps, drink cups, or any other surface you want to decorate.
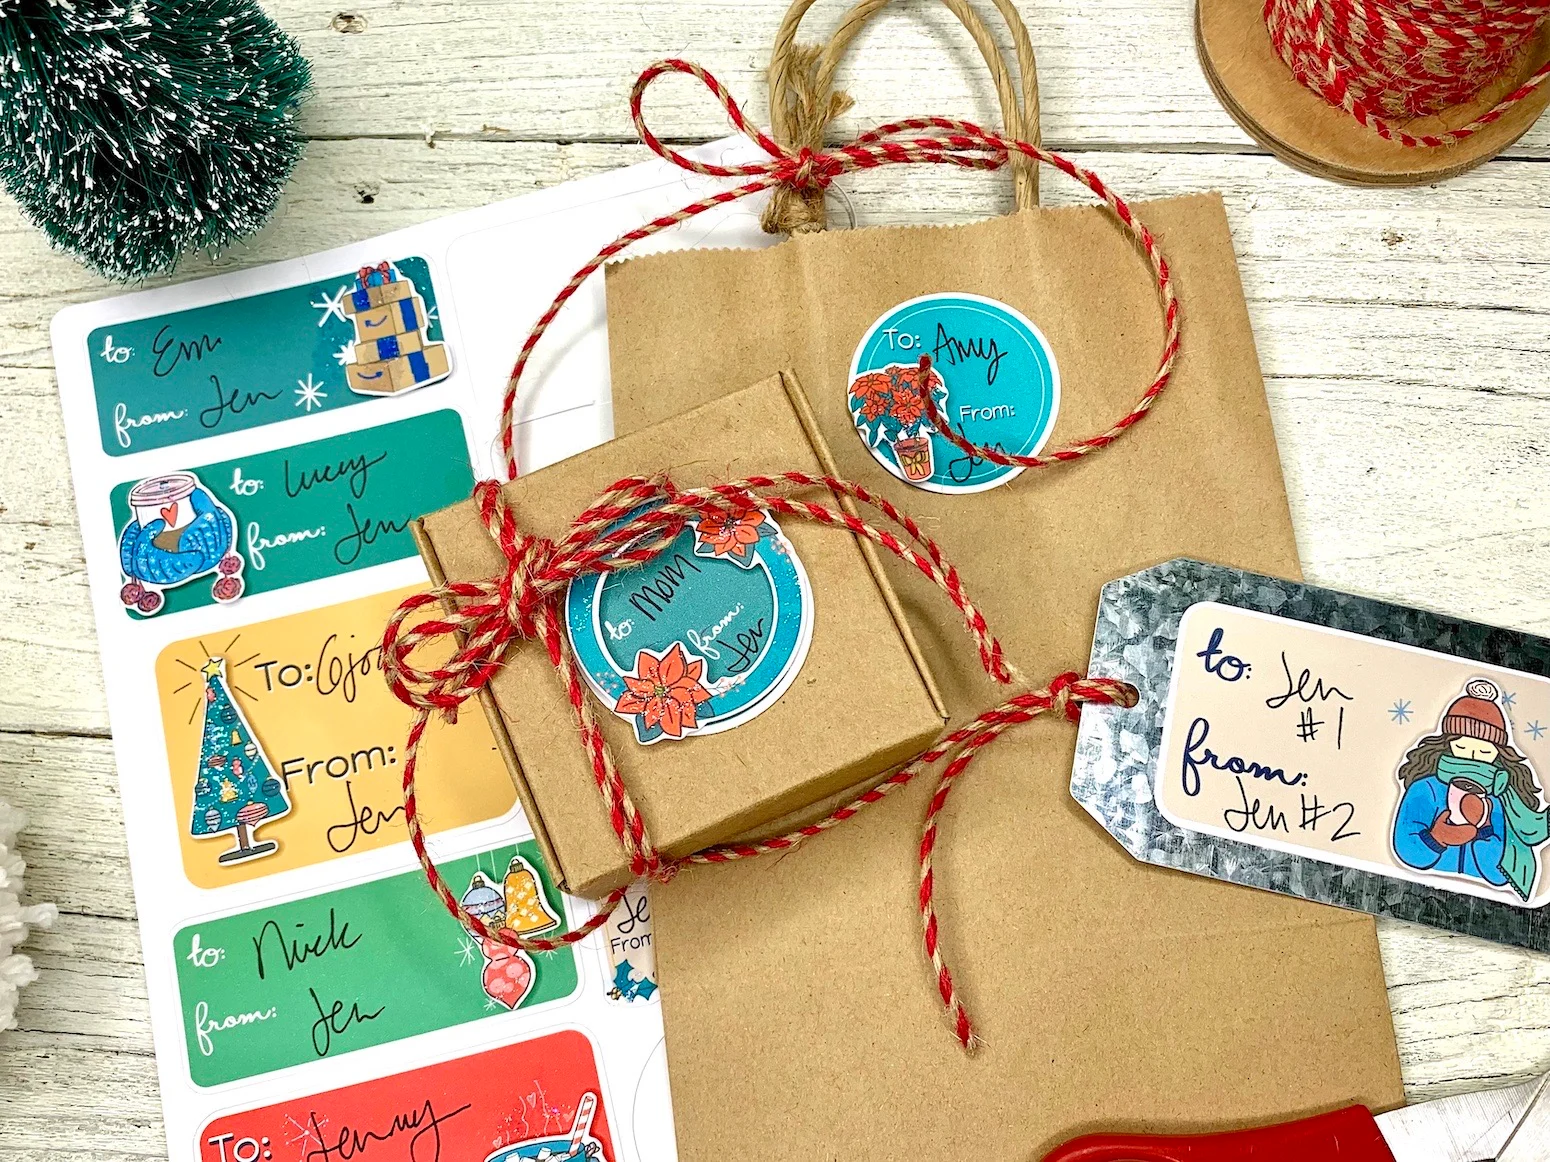
Other Ways to Use Your Custom Face Stickers
Custom face stickers are not limited to invitations or party favors. With a little creativity, they can be used in many ways to make your event more memorable.
Decorating party hats, banners, and table centerpieces: Placing stickers on hats lets guests wear the celebration, while banners and centerpieces with faces add humor and a personal connection to the décor.
Sealing gift bags or envelopes: Use stickers as a fun seal for treat bags or invitation envelopes. It adds a personal touch and makes the packaging stand out before it is even opened.
Personalizing phone cases or water bottles: Give guests a small keepsake by adding stickers to cases or bottles. They are durable and can handle daily use, making them a reminder of the event long after it ends.
As part of a DIY party photo booth kit: Include the stickers with props like glasses, hats, and masks. Guests can stick them on props or themselves for playful, themed photos that capture the mood of the party.
Pro Tips for Best Results
A few small adjustments in your process can make your stickers look sharper and last longer.
Use high quality images to avoid pixelation: Start with clear, well lit photos that are in focus. Blurry or low resolution images will look even worse once printed, especially on larger stickers.
Keep background transparent for precise cuts: Save your design as a PNG with no background so the cutter can follow the outline exactly. This avoids unwanted borders or uneven edges.
Store sticker sheets flat to avoid curling before the event: Keep printed sheets on a flat surface in a dry place. Humidity and bending can cause curling, which makes application harder.
Experiment with sizes: Try smaller stickers for cups or party favors and larger ones for banners or photo booth props. Mixing sizes creates more visual variety and lets you decorate more surfaces.
Conclusion
Making your own custom face stickers adds personality, humor, and a personal connection to any event. You can match them to a theme, control the quality, and create exactly what you need without the cost or wait of a print shop. With the Liene PixCut S1, printing and cutting are combined in one step, making it simple to produce professional looking stickers at home. Now that you know how to plan, design, and apply them, try creating your own and see how much fun they bring to your next party or gift.
FAQs
What’s the easiest way to make custom face stickers at home?
Getting your own all in one sticker maker is the simplest path. You can print exactly when you need to, avoid minimum orders, and keep costs predictable. For a smooth start, pick up the Liene PixCut S1 machine and materials. With everything in one box, you can go from a photo to finished stickers in a few minutes.
Can I use any photo for face stickers?
Yes. Choose a photo you like and import it into the app. For clean results, pick a clear, front facing image with good lighting and sharp focus. Save or export as PNG or JPG. If the background is busy, remove it first so the cut line follows the face cleanly. A high resolution file prevents soft edges and keeps details like hair and eyelashes crisp.
What paper should I use for stickers?
If you are using the PixCut S1, use official Liene sticker paper and matching cartridges. The paper is optimized for thermal dye sublimation, receives an automatic protective layer while printing, and is tuned for precise kiss cutting. A good option is the enhanced adhesion sticker paper. Third party papers or ribbons are not supported and can affect print quality and cutting accuracy.
laissez un commentaire
Ce site est protégé par hCaptcha, et la Politique de confidentialité et les Conditions de service de hCaptcha s’appliquent.