


Start School with Style — Watch & Get Inspired
🎁 Get a FREE DIY Kit


Craft Smarter, Beginner Friendly
Unbox. Connect. Create. Set up in seconds. From print to cut, the Easiest Setup. Instant Creativity.
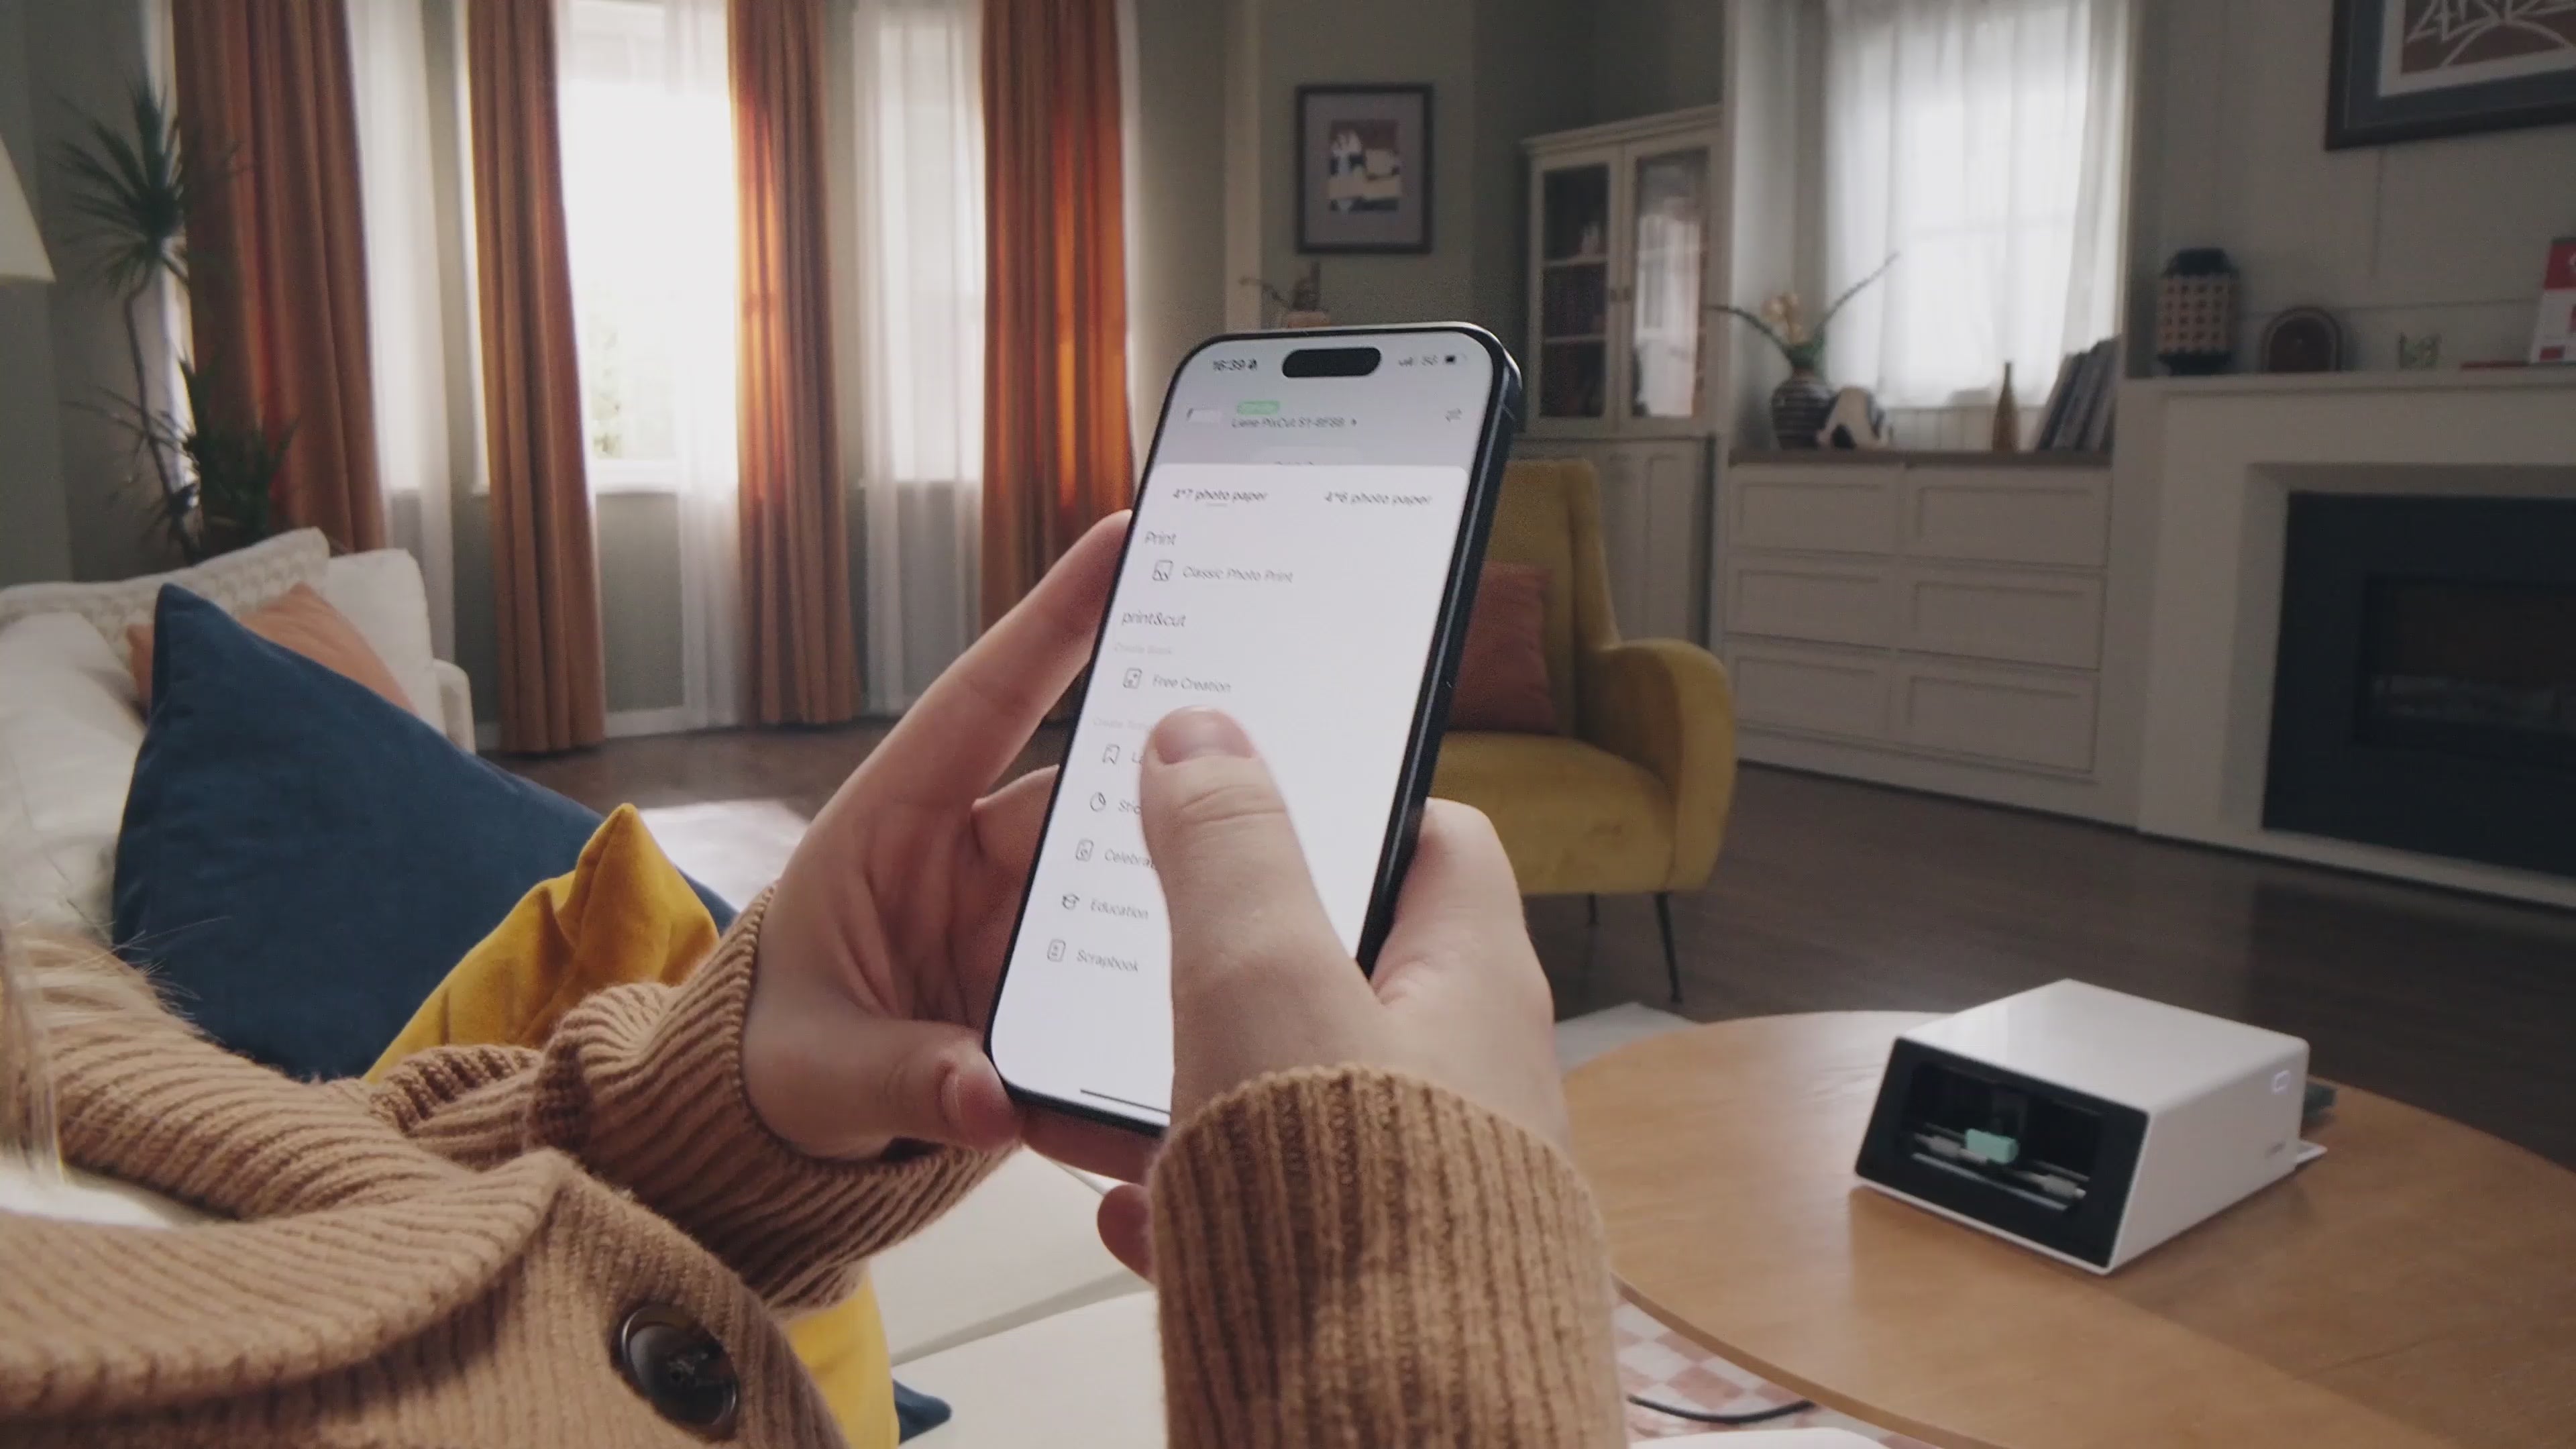
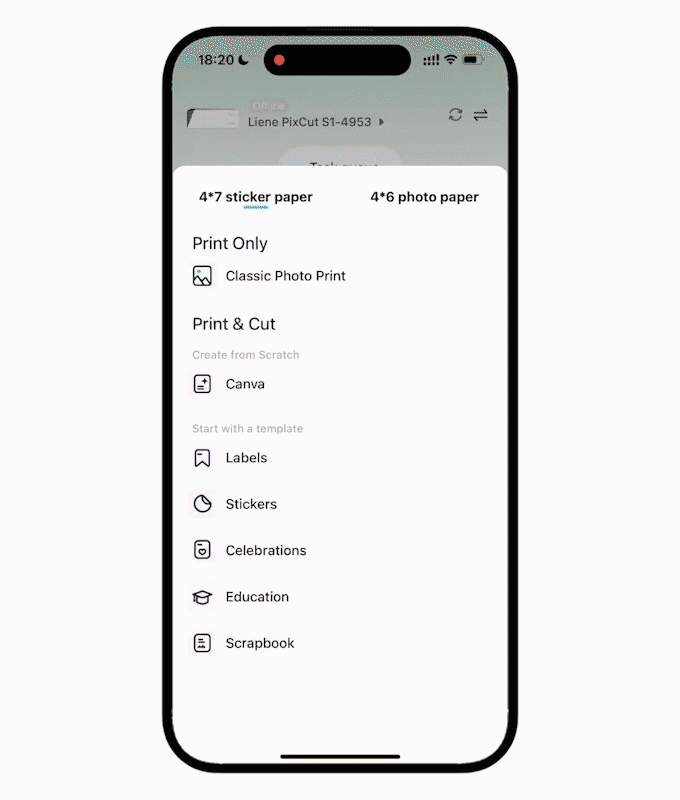
Step 1: Design Your Way
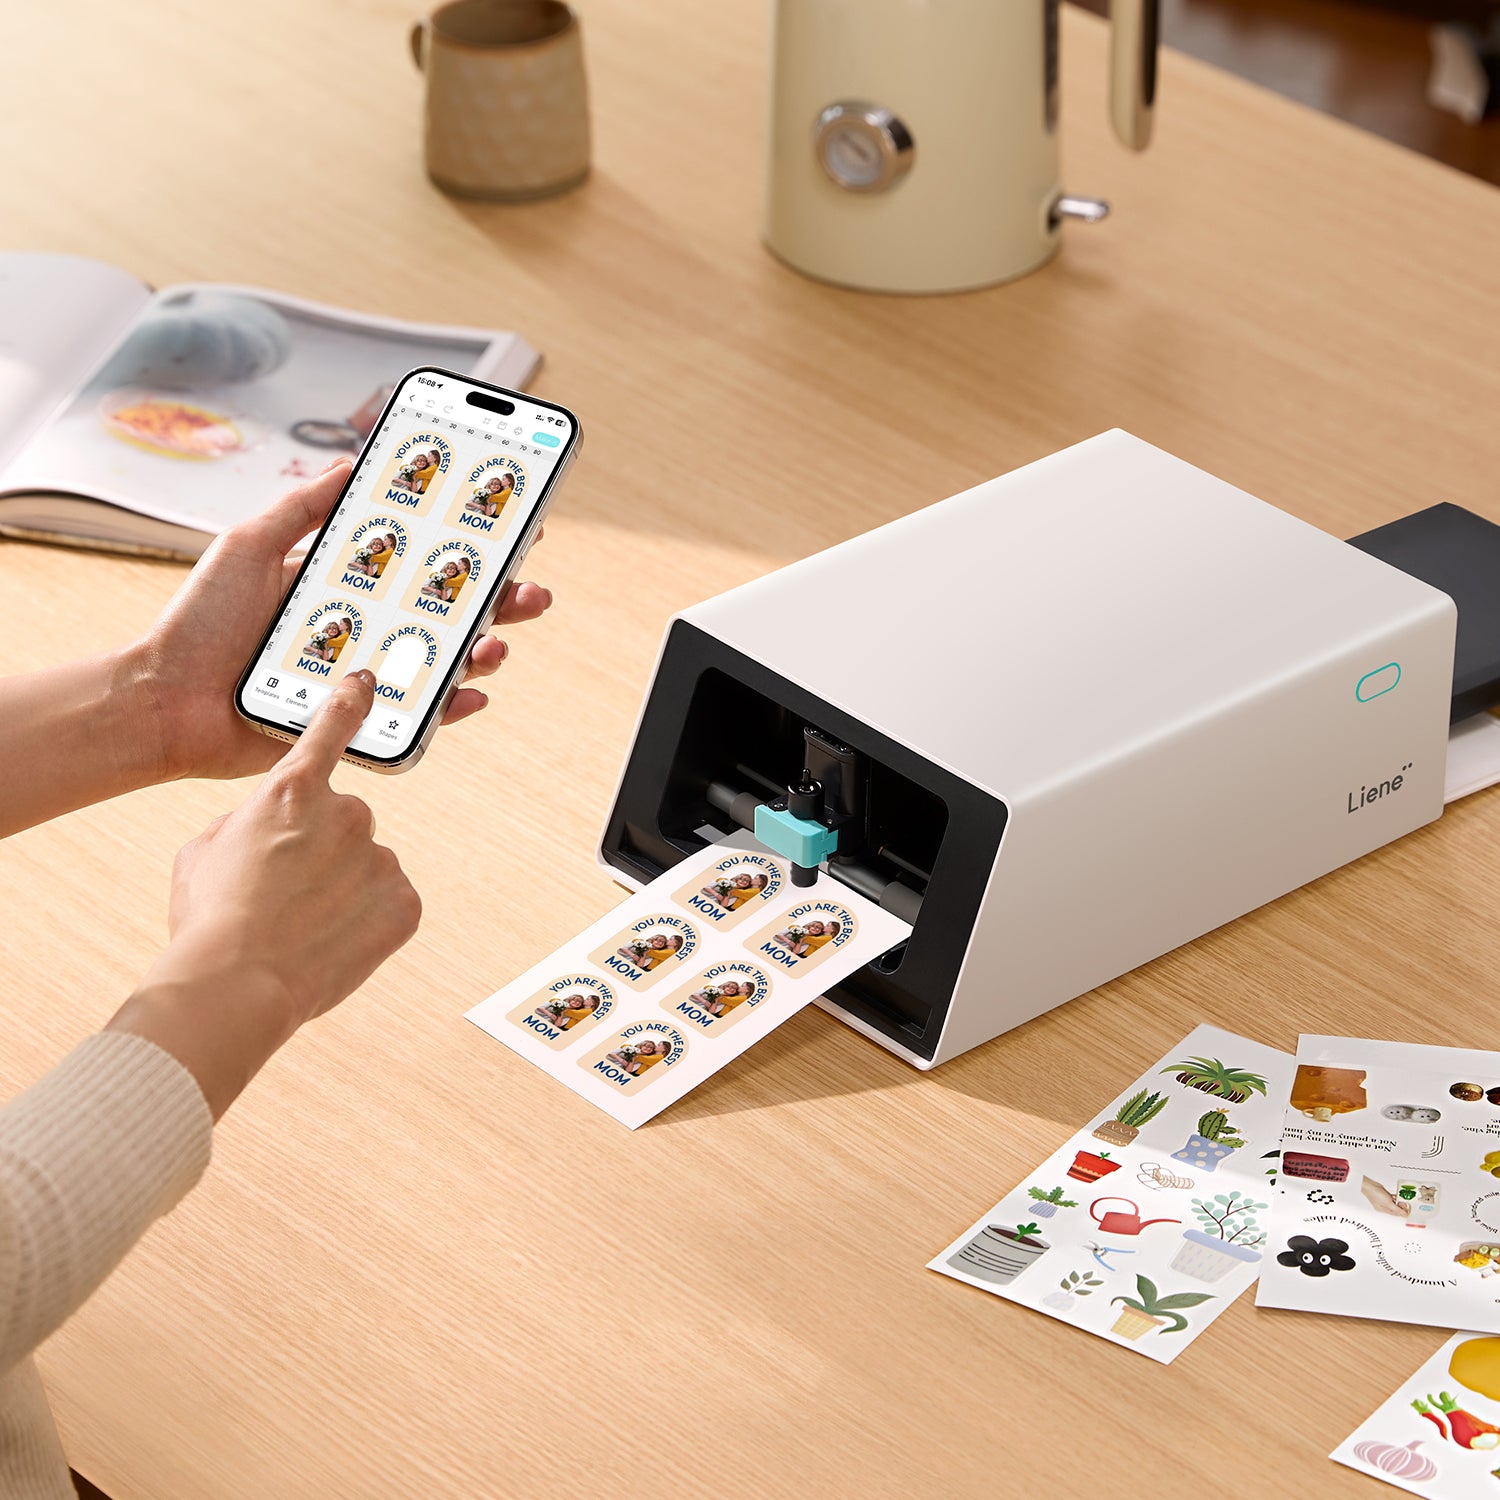
Upload Your Designs or Choose From 15000+ Templates in Our App.

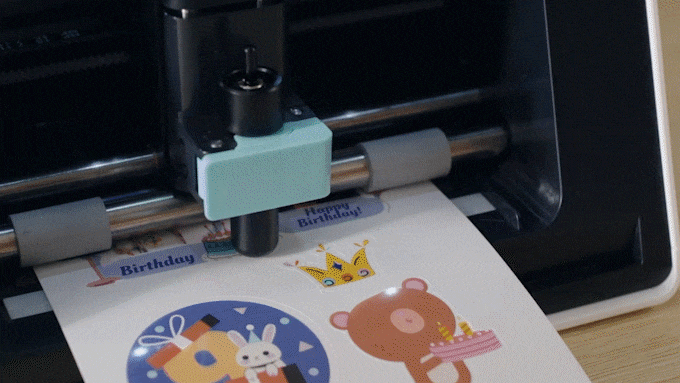
Step 2: Print & Cut Seamlessly
Achieve perfect results without any manual effort.

Step 3: Transform Your World
Add a touch of creativity to everything around you!
Get It Early, Craft Your Way!


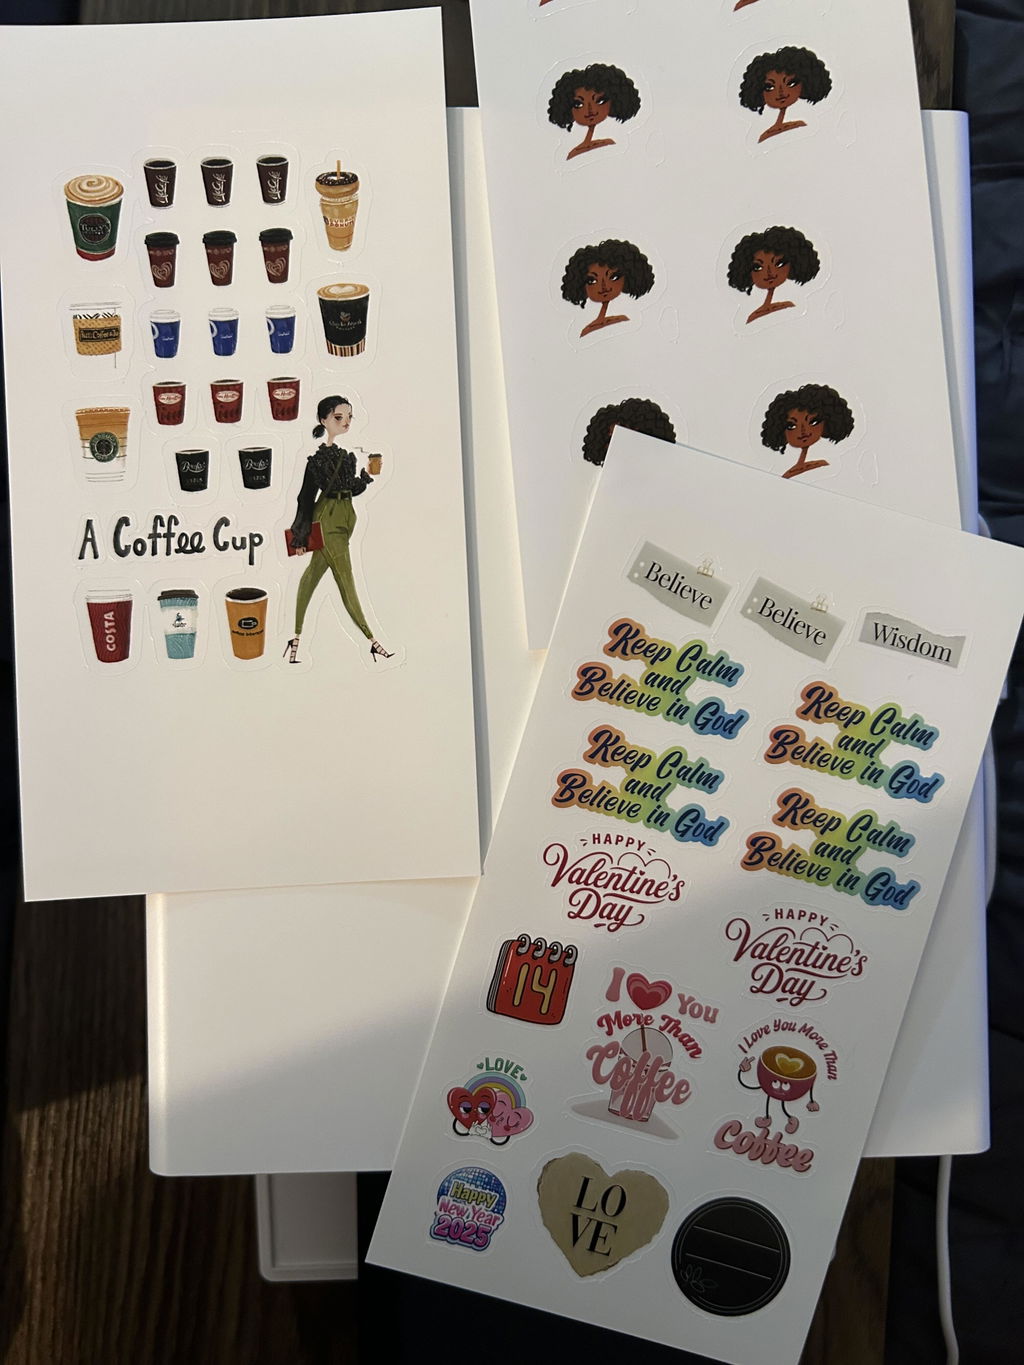
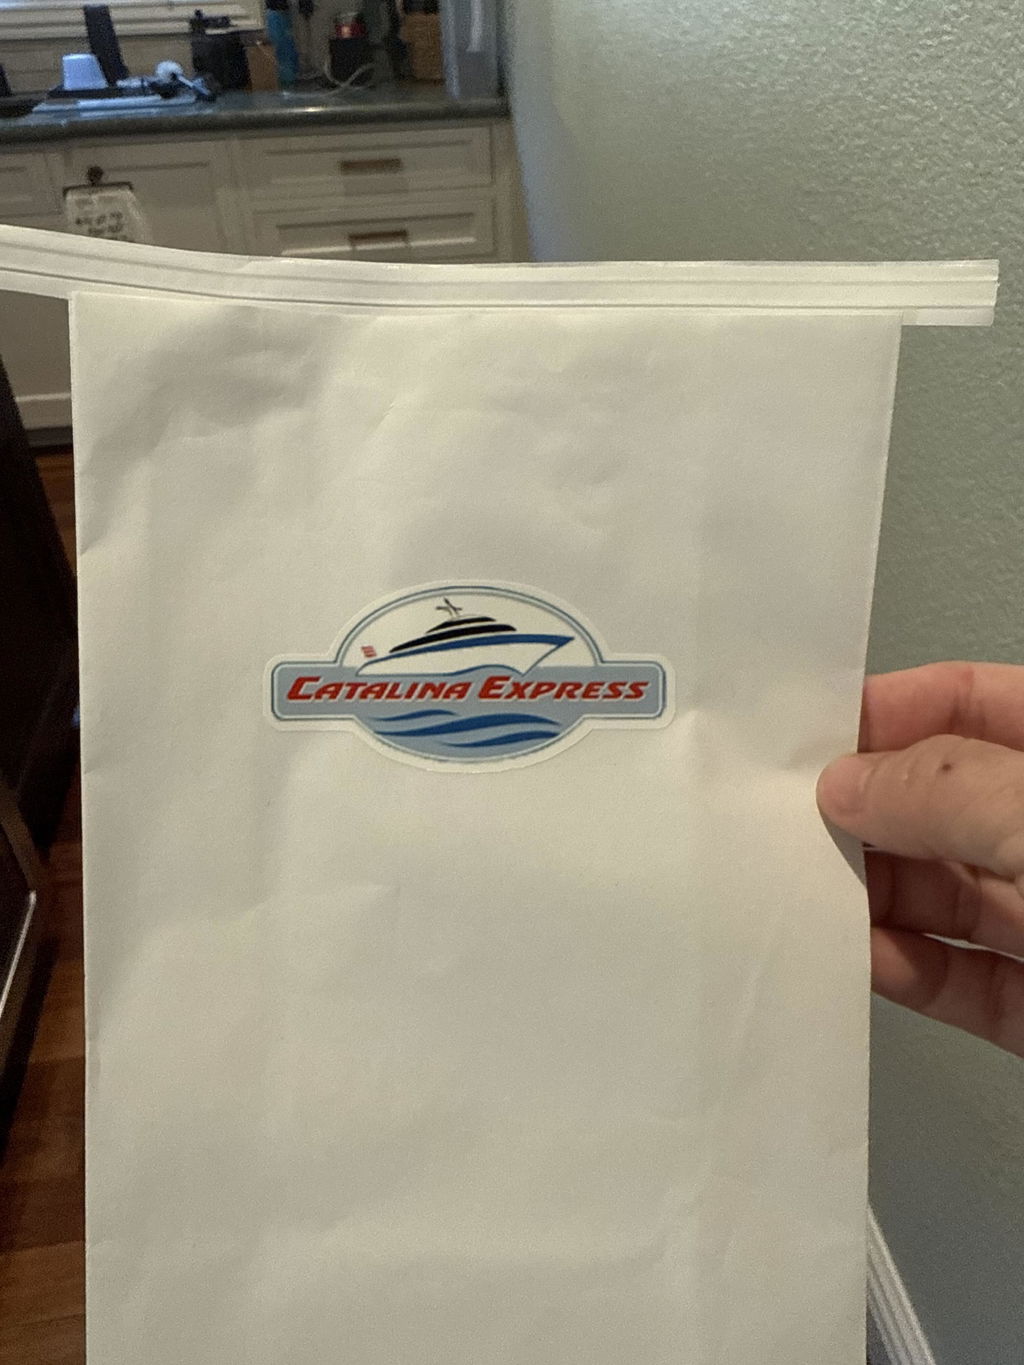
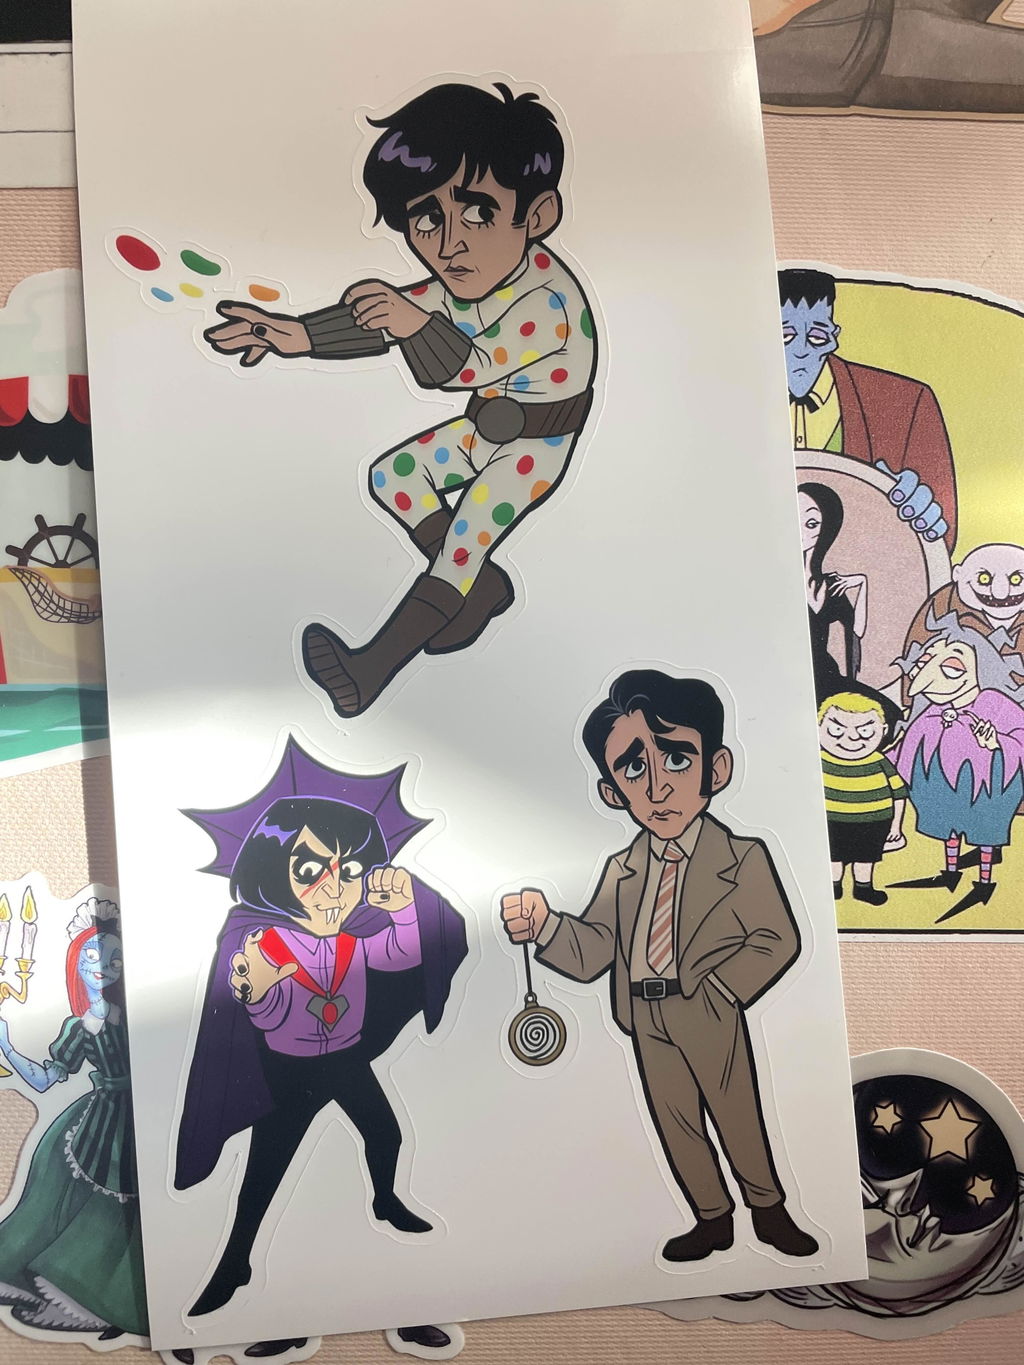
See What You Can Create with PixCut S1
Projects Crafted by Our Talented PixCut S1 Users
Projects Crafted by Our Talented PixCut S1 Users

See What Our Customers Say
Let customers speak for us
I have truly enjoy using this cool machine. Am still learning of it but it has been a delight. Thank you for such a amazing printer. Looking forward to other products. To make it even better you consider not charging for the AI feature it's very nice I feel that you will prosper more with your sells by keeping this feature cost free. Thank you again.

One of the best printers I have used in terms of functionality and price. I use this for printing tags for tennis rackets and other things and works great. It sticks very good to the racket and the colors hold up against sun exposure.
Maybe the app can be improved a little and Mac native app would be the next step as sometimes it's very hard to design things on the phone.
Other than that, happy with the purchase and stickers.
I love this printer specifically purchased it for printing and cutting stickers. So easy I love it. Nothing complicated like Cricut. If you want to print stickers easily get this printer. I hope they will provide more Christian/Faith stickers in app. T
I am really enjoying my Leine photo/sticker printer/cutter! It is making it so easy for me to make stickers for upcoming events! I can see this being very handy for a whole bunch of projects!
Got my printer from the initial kickstater. Super easy to set up, super easy to use the app. The quality of the prints are waaay better than I expected. While it certainly isn't on the level of a professional sticker printing service, I do think the quality is good enough to sell your own custom stickers and sticker sheets in your shop and at conventions!
My only criticism is the sticker adhesive isn't strong enough. I am aware that the stickers are meant to be re-stickable, but I do think you guys need to come out with a stronger more 'permeant' adhesive option.
Honestly, if you guys come out with a better adhesive I will 100% switch over to printing the stickers I sell in my shop to this device.
Great for Hobbyists, Not for Precision Work The PIXCUT S1 is a solid machine for hobbyists, especially those who enjoy scrapbooking or similar crafts where precision and adhesion aren't critical. The color quality is fantastic, producing vibrant and sharp prints that look amazing. However, it falls short for more demanding applications. The adhesive on the stickers doesn't hold well to plastic and textured surfaces, which limits its versatility. Additionally, the cutting accuracy is inconsistent, and will not do borderless cutting, it doesn't deliver on that promise. The lack of calibration options in the software only adds to the frustration.
Overall, it's a good choice for casual use but not ideal for professionals or projects requiring precise cuts and reliable adhesion.
I just received my Liene PixCut S1 and I absolutely love it. Having the ability to make my own stickers on demand takes me back to a childhood dream. Not only am I enjoying it, my children are having a blast with me being able to print them any kind of stickers they want.
The print quality is great, the cutting quality is great, the app is super easy to use, and the time it takes to create, print & cut is extremely fast. Highly recommend!
My wife has been having a ball with her sticker maker. She’s not technically savvy but she’s been doing pretty well with it from what I’ve seen.
Bring Your Ideas to Life with PixCut S1


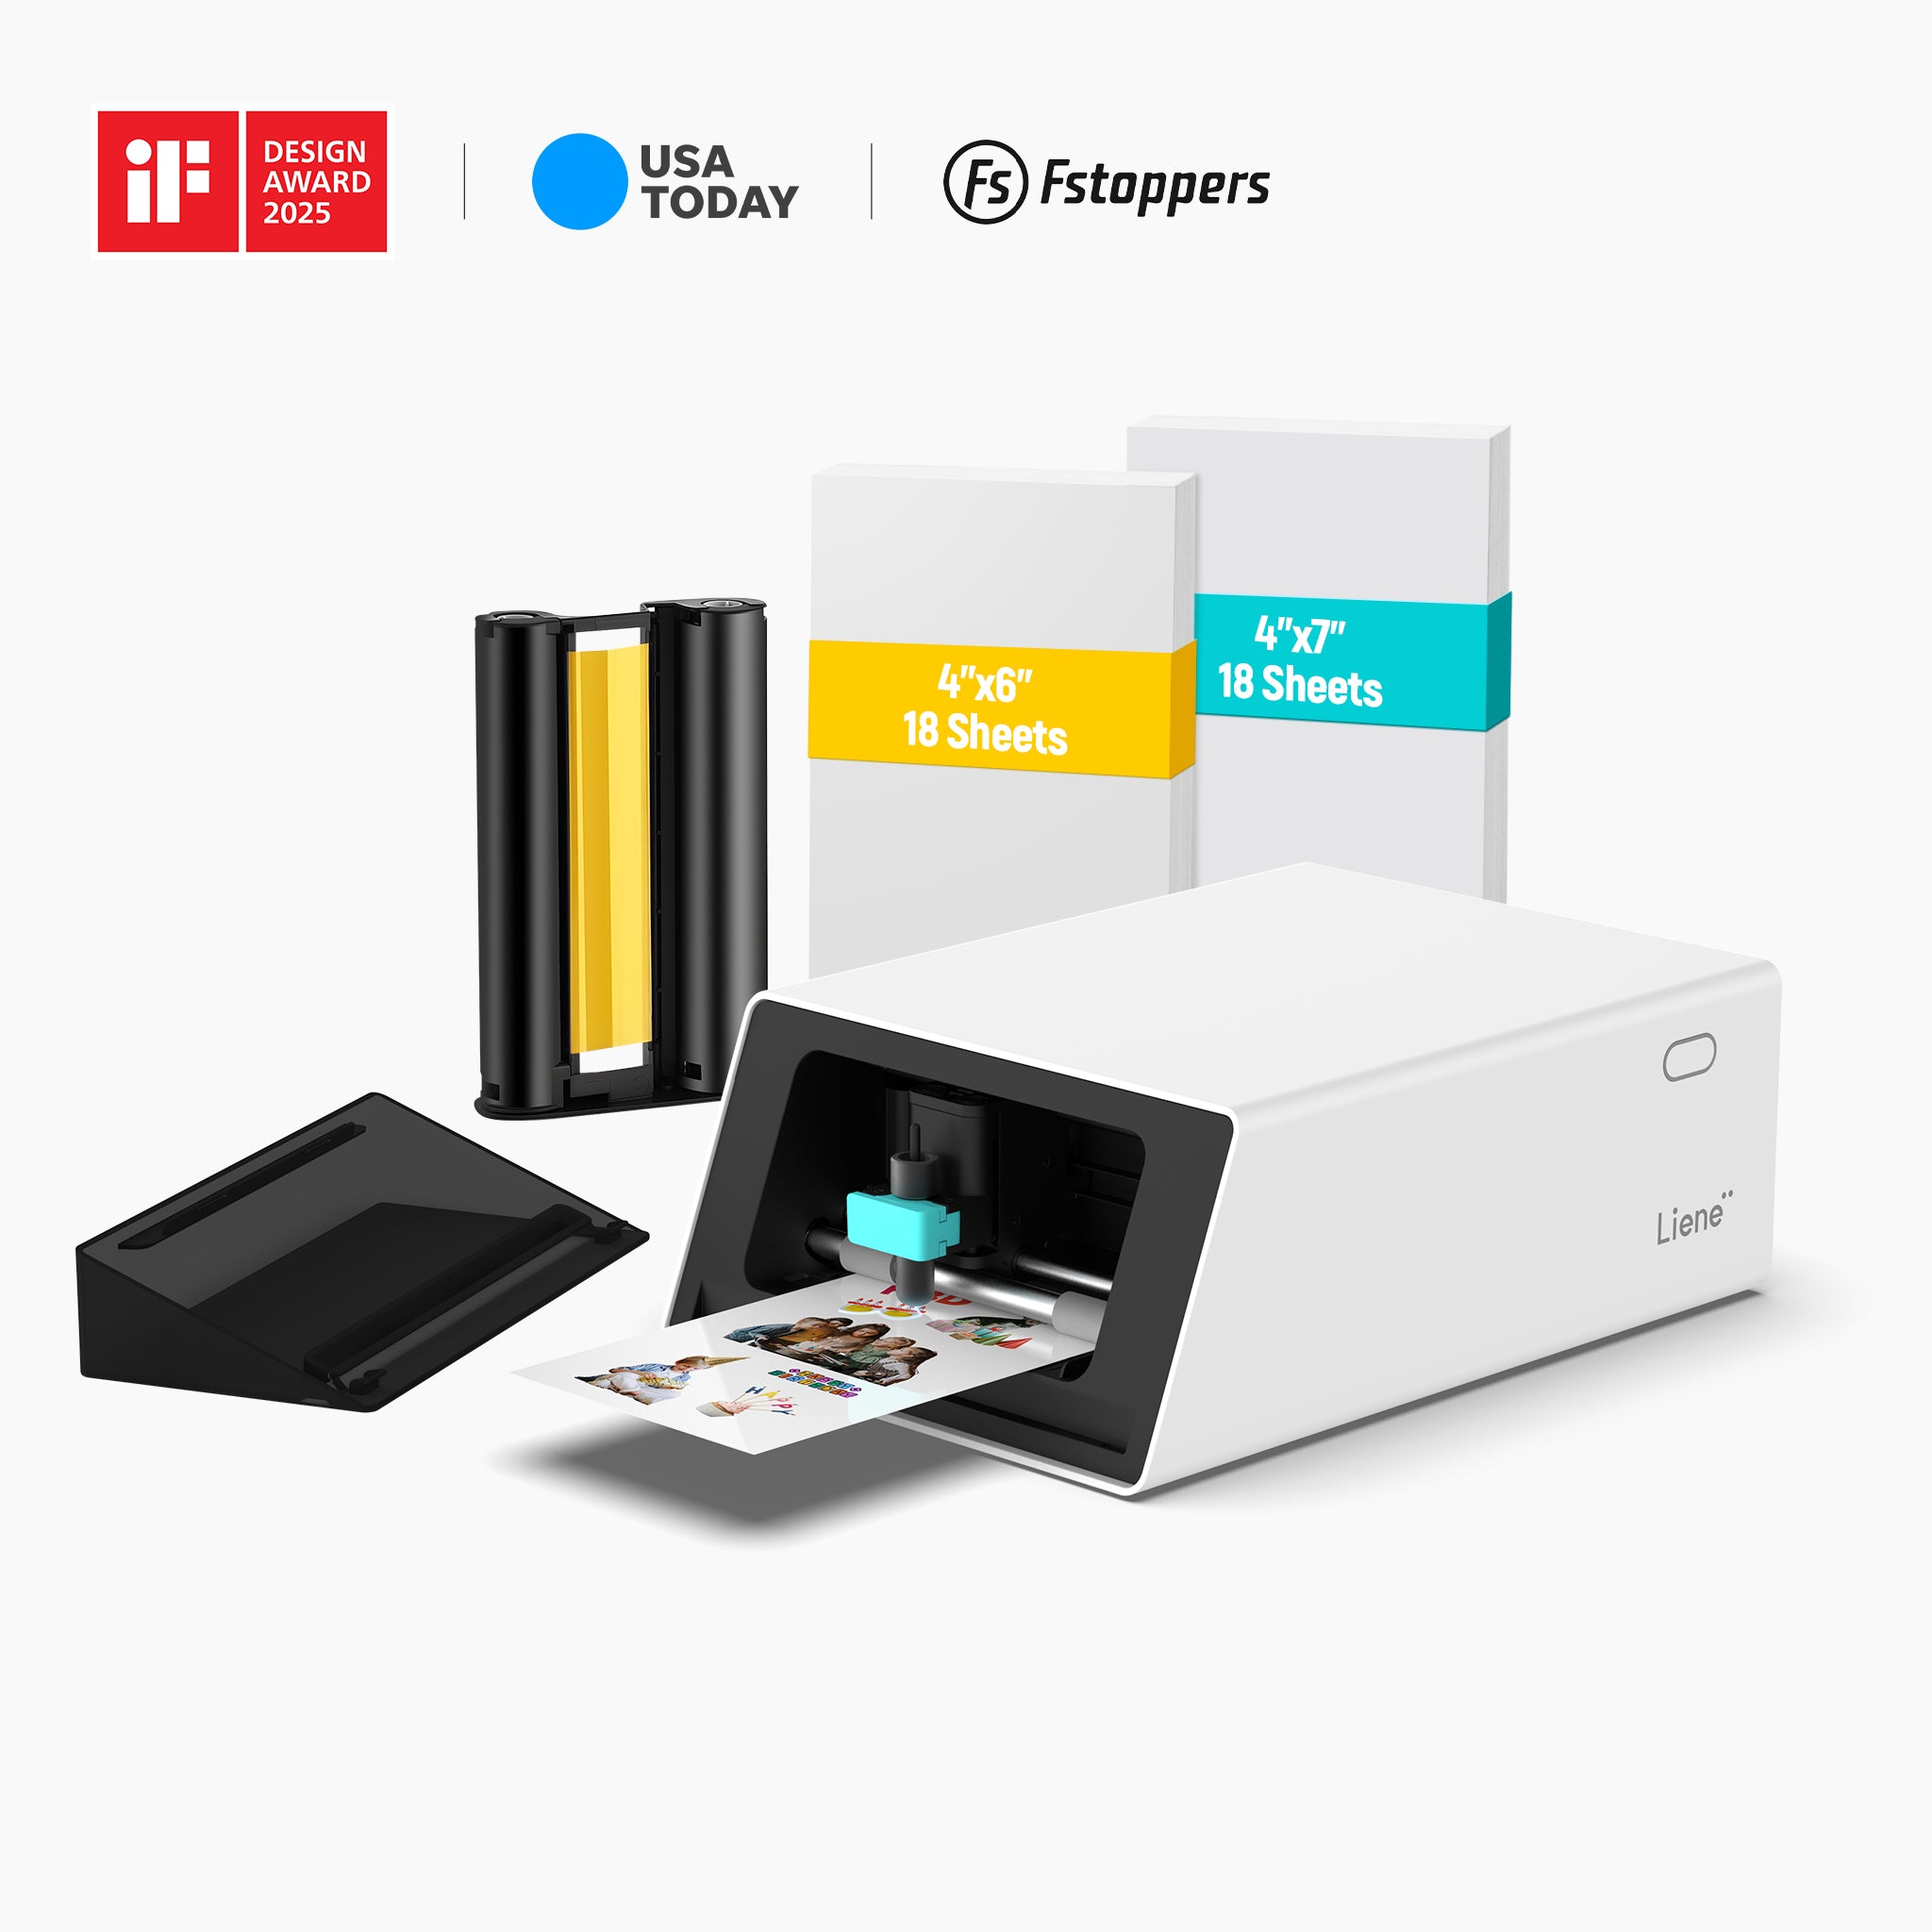


Print, Cut, Stick, and Unleash Your Creativity!
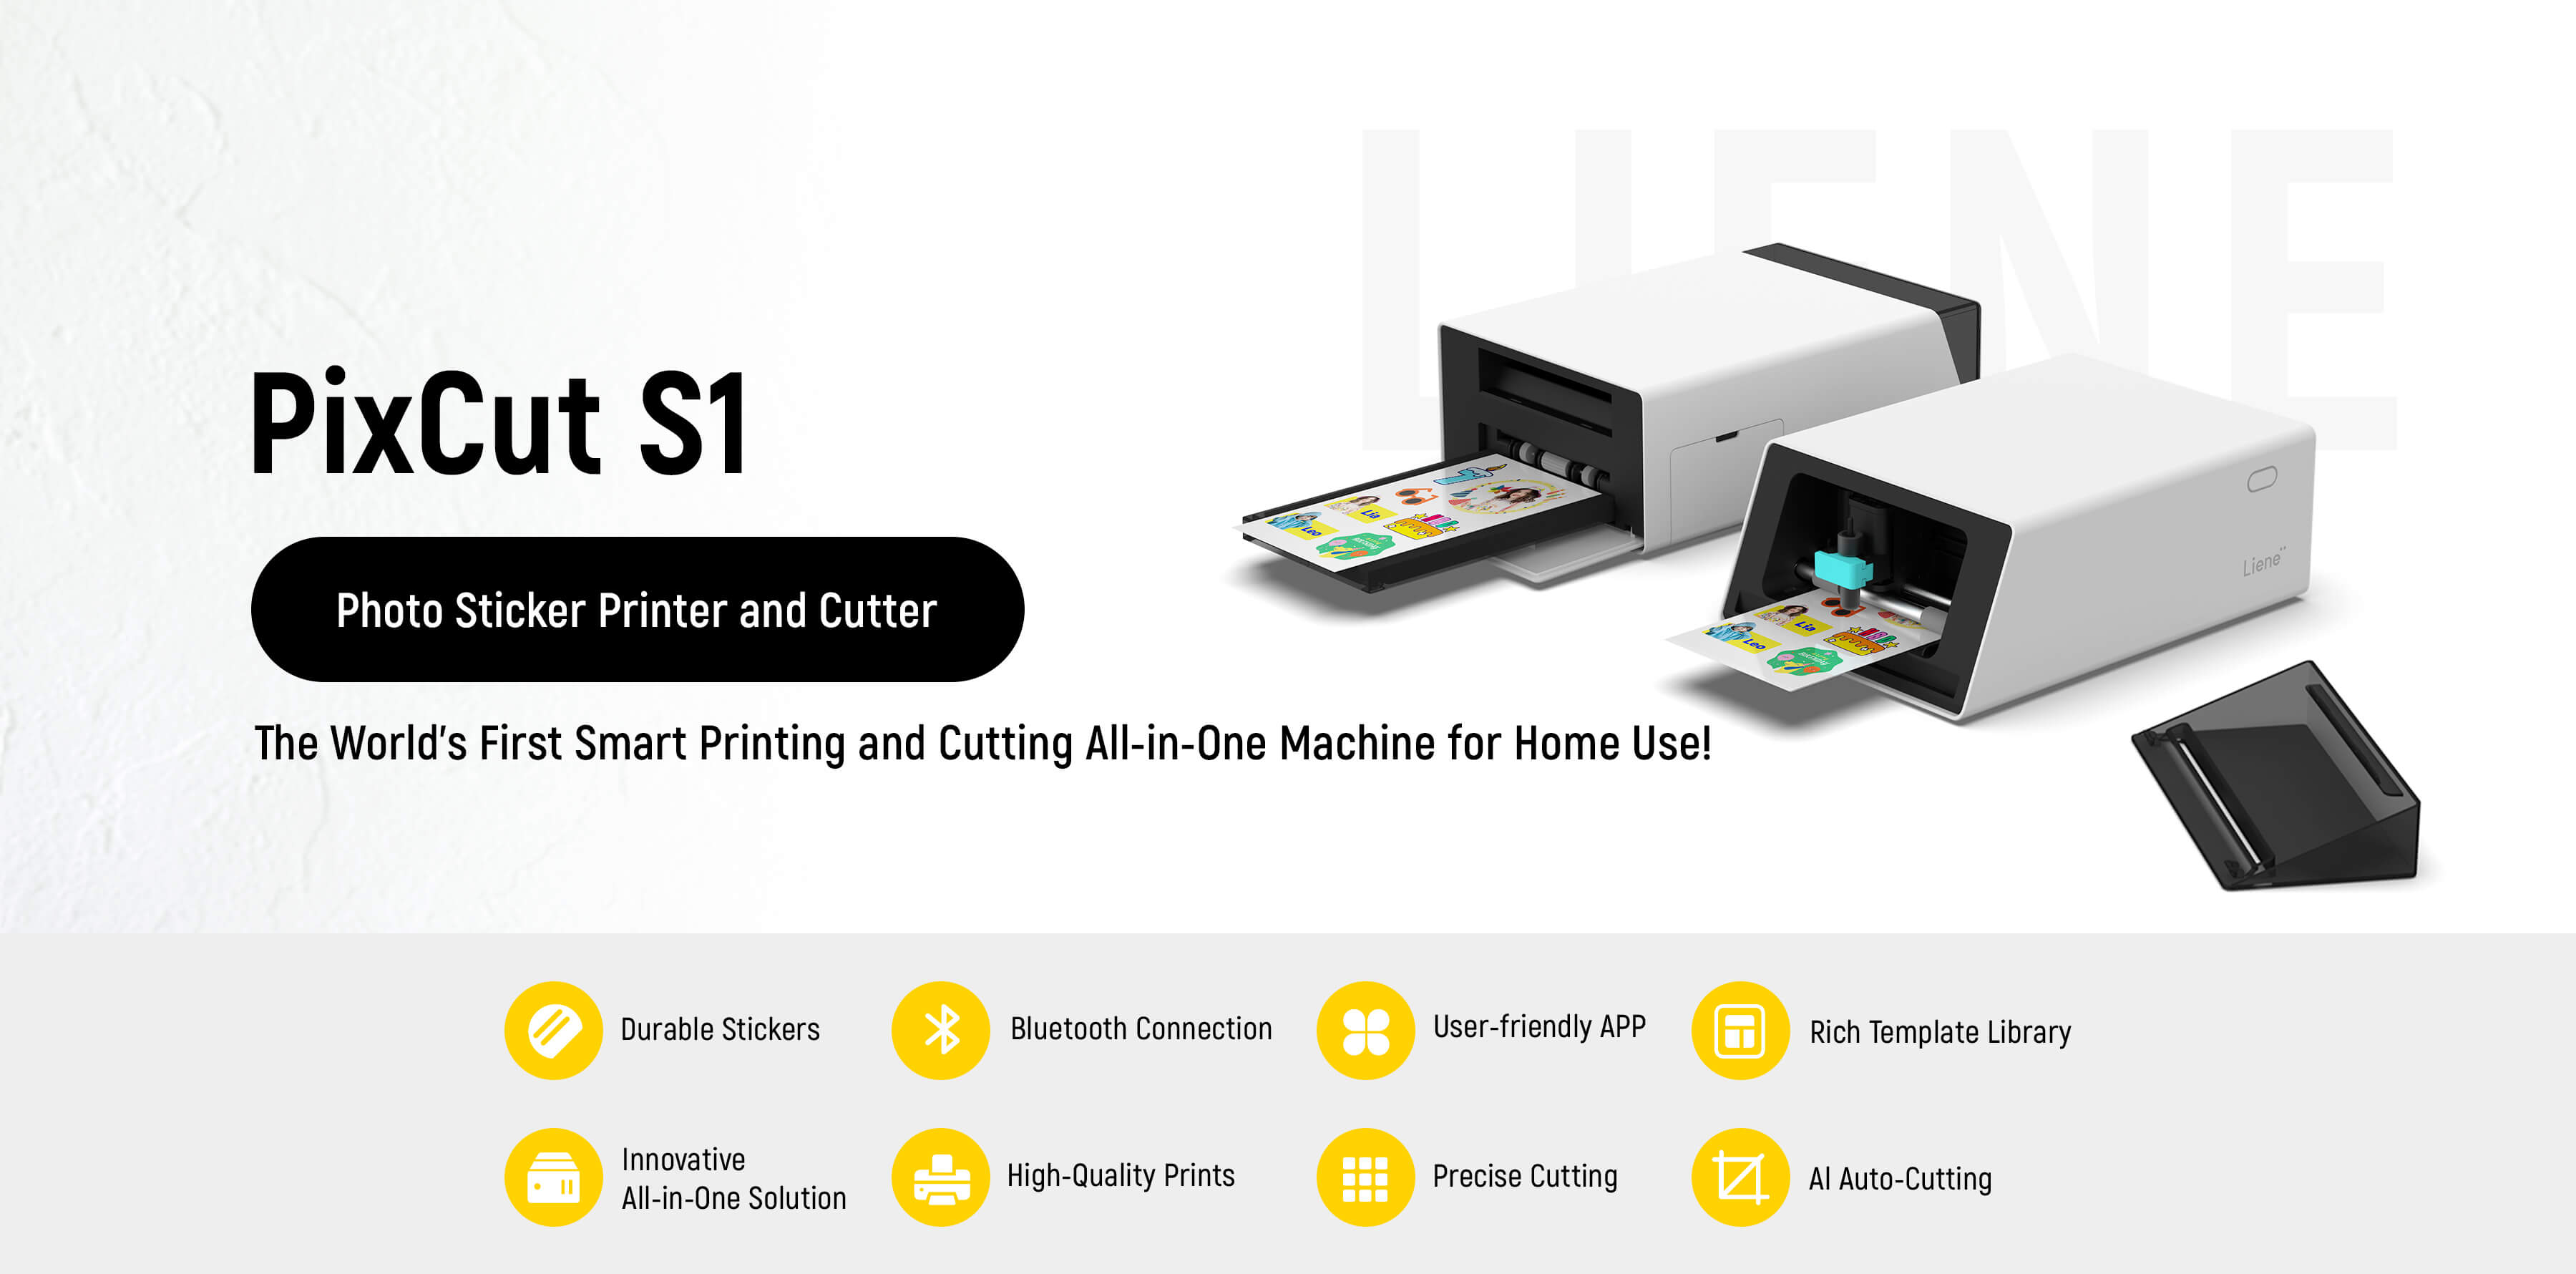
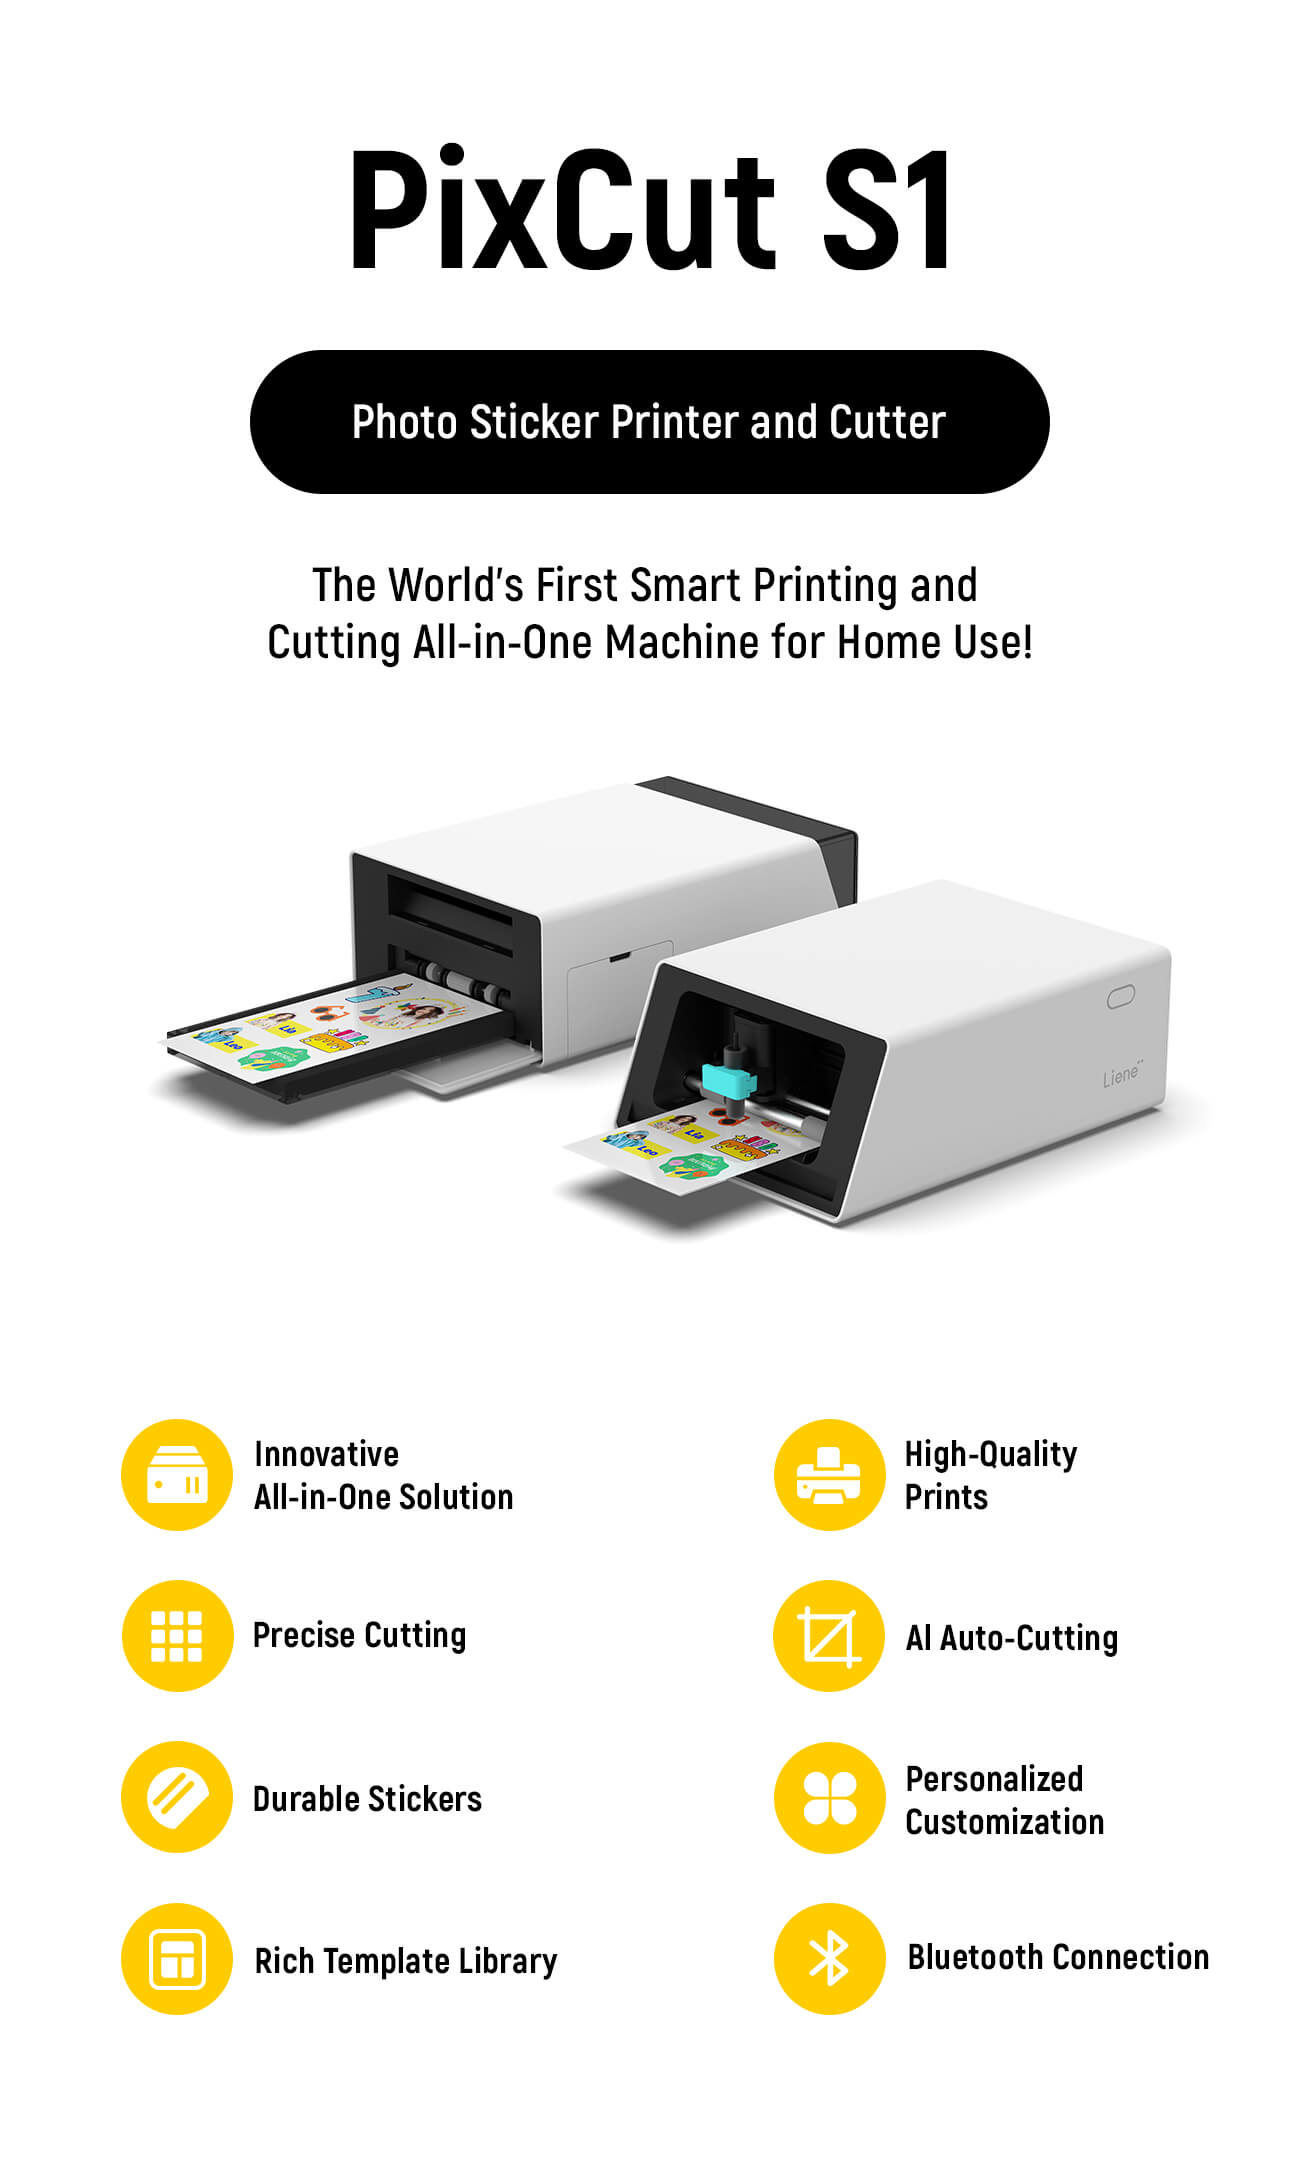
All-in-One Creative Hub
Creativity. Simplified.
No more hassle. Print-Laminate-Cut—all in one smooth flow. Effortless creation with perfect precision. No device swapping, no manual steps—just pure creativity at your fingertips.
AI-powered Sticker Creation
Create Like A Pro!
AI removes backgrounds and generates cutting paths—perfect results in under 1 minute.
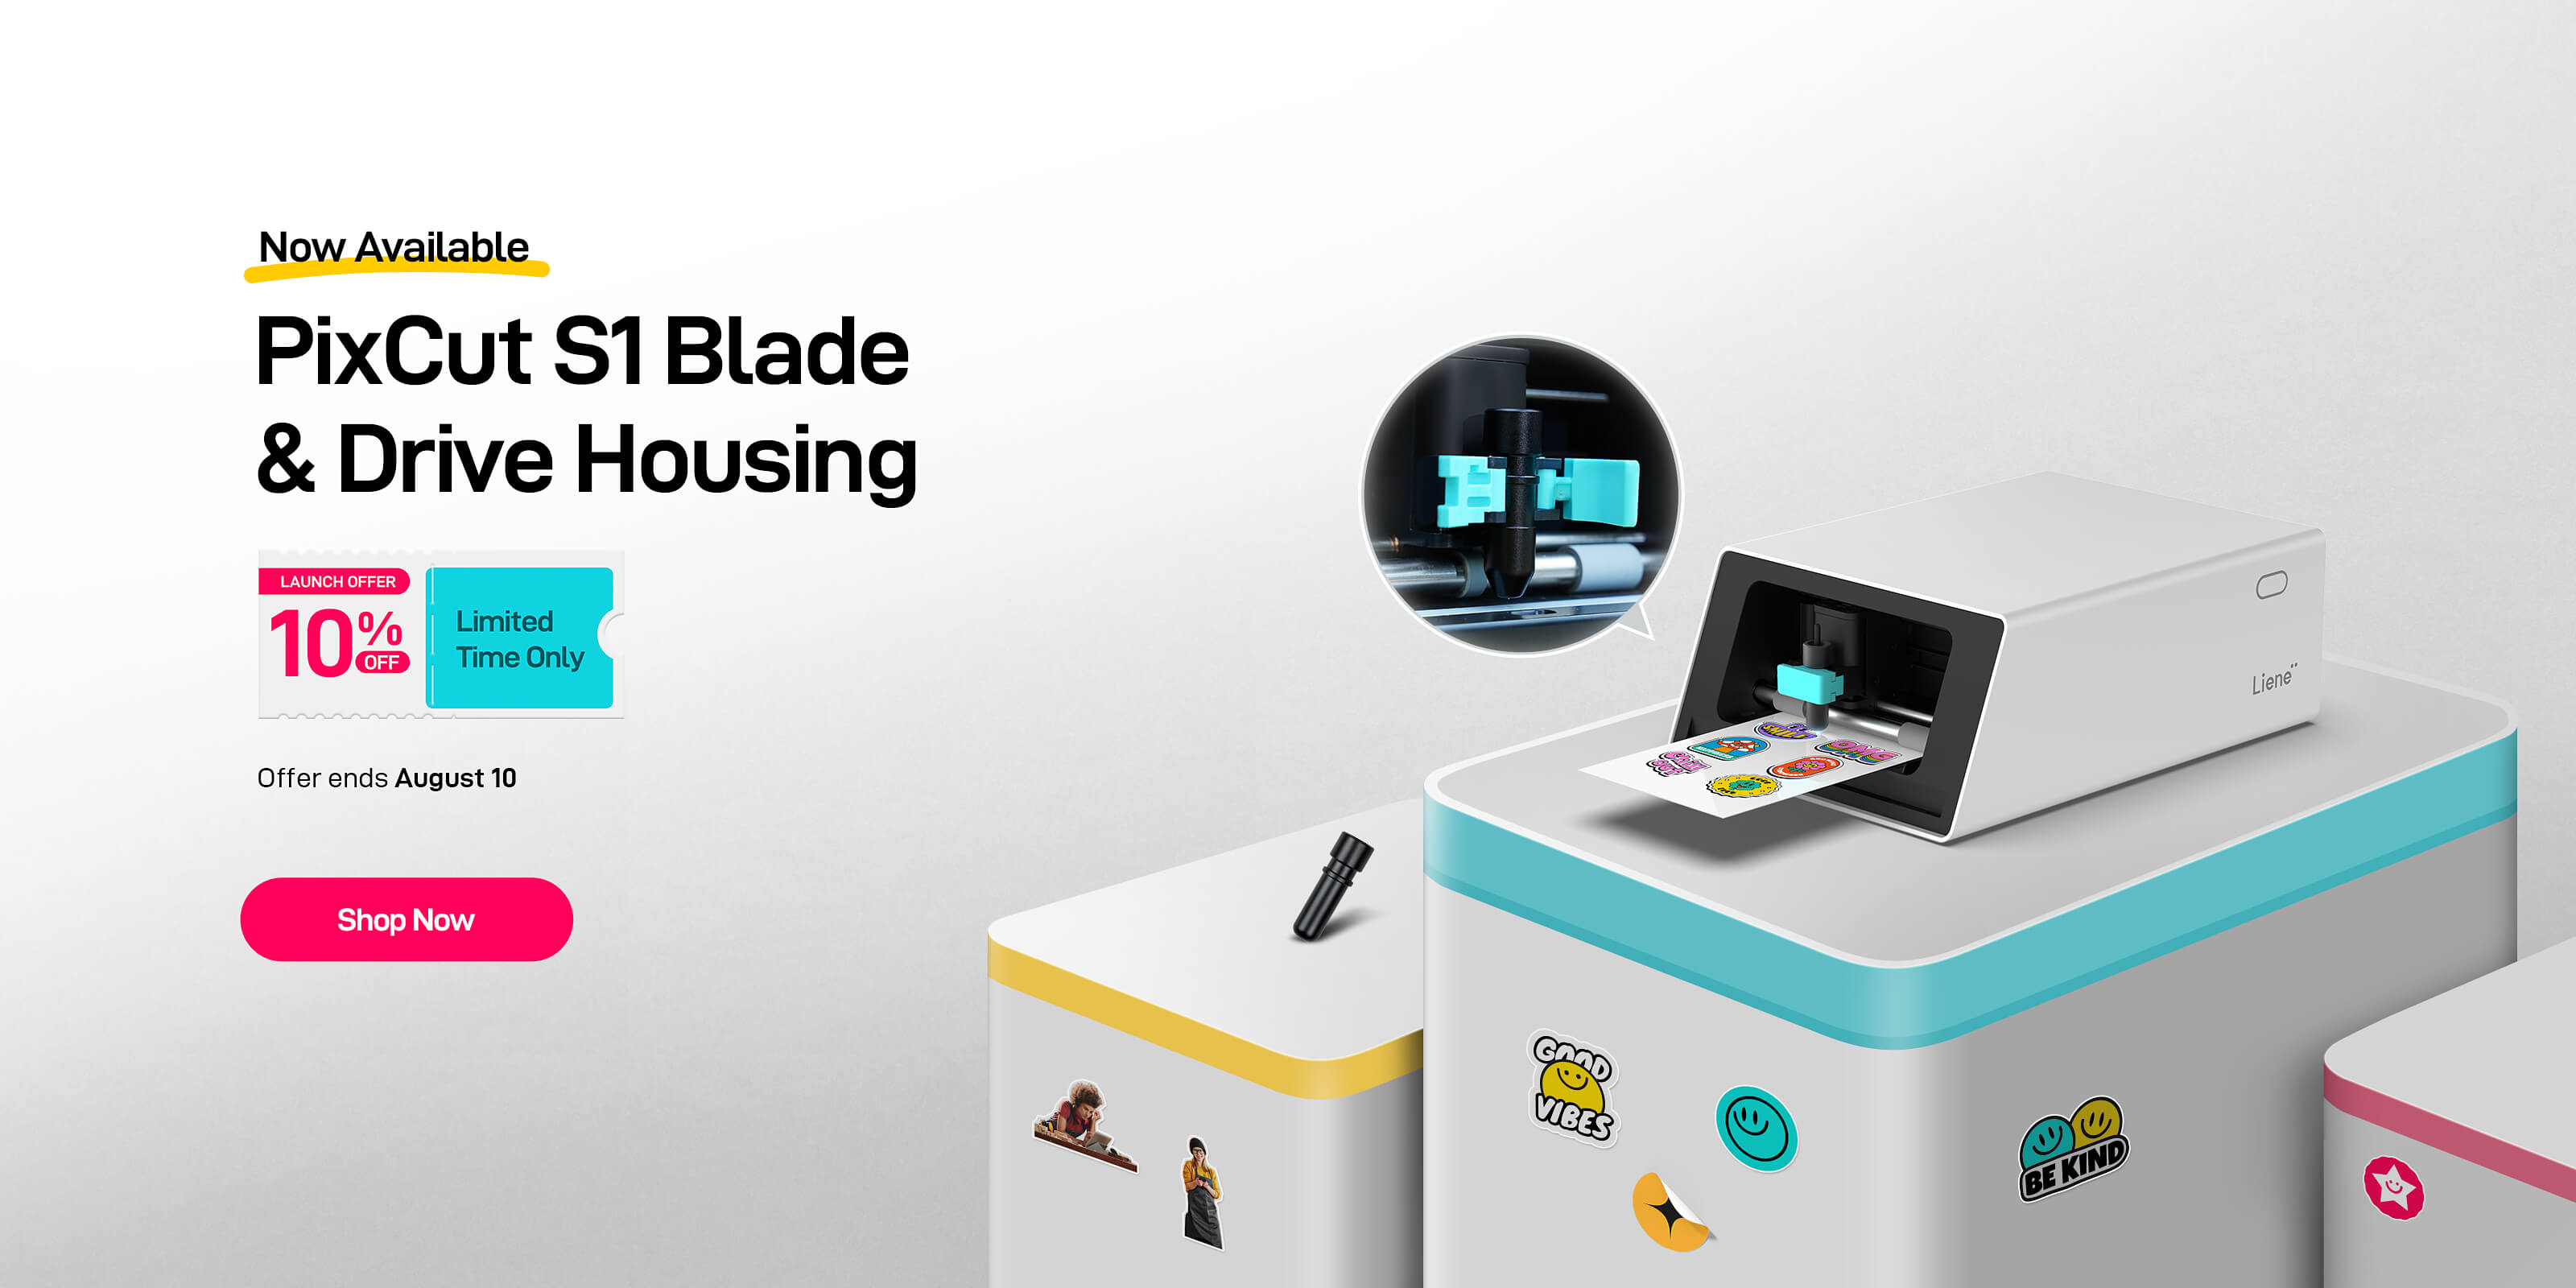
Precision Cutting, Perfected!
The ultra-fine 0.1mm blade ensures razor-sharp kiss cuts—no manual adjustments or pressure tuning needed.


FAQ
Is the FREE DIY Kit available for all orders?
Is the FREE DIY Kit available for all orders?
The FREE DIY Kit (valued at $19.99) is only available for orders shipped within the United States. Unfortunately, customers in Europe are not eligible for the free gift at this time.
How to combine printed and cut stickers with DIY materials?
How to combine printed and cut stickers with DIY materials?
There are two methods to create fridge magnets:
1. Method 1: Direct Application
ꔷ Prepare the Magnetic Block:
Use tweezers to peel off the adhesive backing from the magnetic block.
ꔷ Apply the Sticker:
Use tweezers or your hands to remove the sticker from its backing.Stick the sticker directly onto the magnetic block.
2. Method 2: Using a Plastic Card
Note: This method may cause bubbles.
ꔷ Prepare the Plastic Card:
Remove the protective film from the plastic card.Place the card on the sticker without removing the sticker's backing.
ꔷ Smooth Out Bubbles:
Gently push any bubbles on the surface using an acrylic sheet.
ꔷ Assemble the Magnet:
Use tweezers to peel off the adhesive backing from the plastic sheet.Remove the protective film from both sides of the acrylic sheet.Stick one side of the acrylic sheet onto the sticker.Peel off the sticker from its backing.
ꔷ Attach to Magnetic Block:
Use tweezers to peel off the adhesive backing from the magnetic block.Attach the assembled sticker to the magnetic block.
Recommendation:
For the best results, it is recommended to apply the sticker directly onto the magnetic block using Method 1.
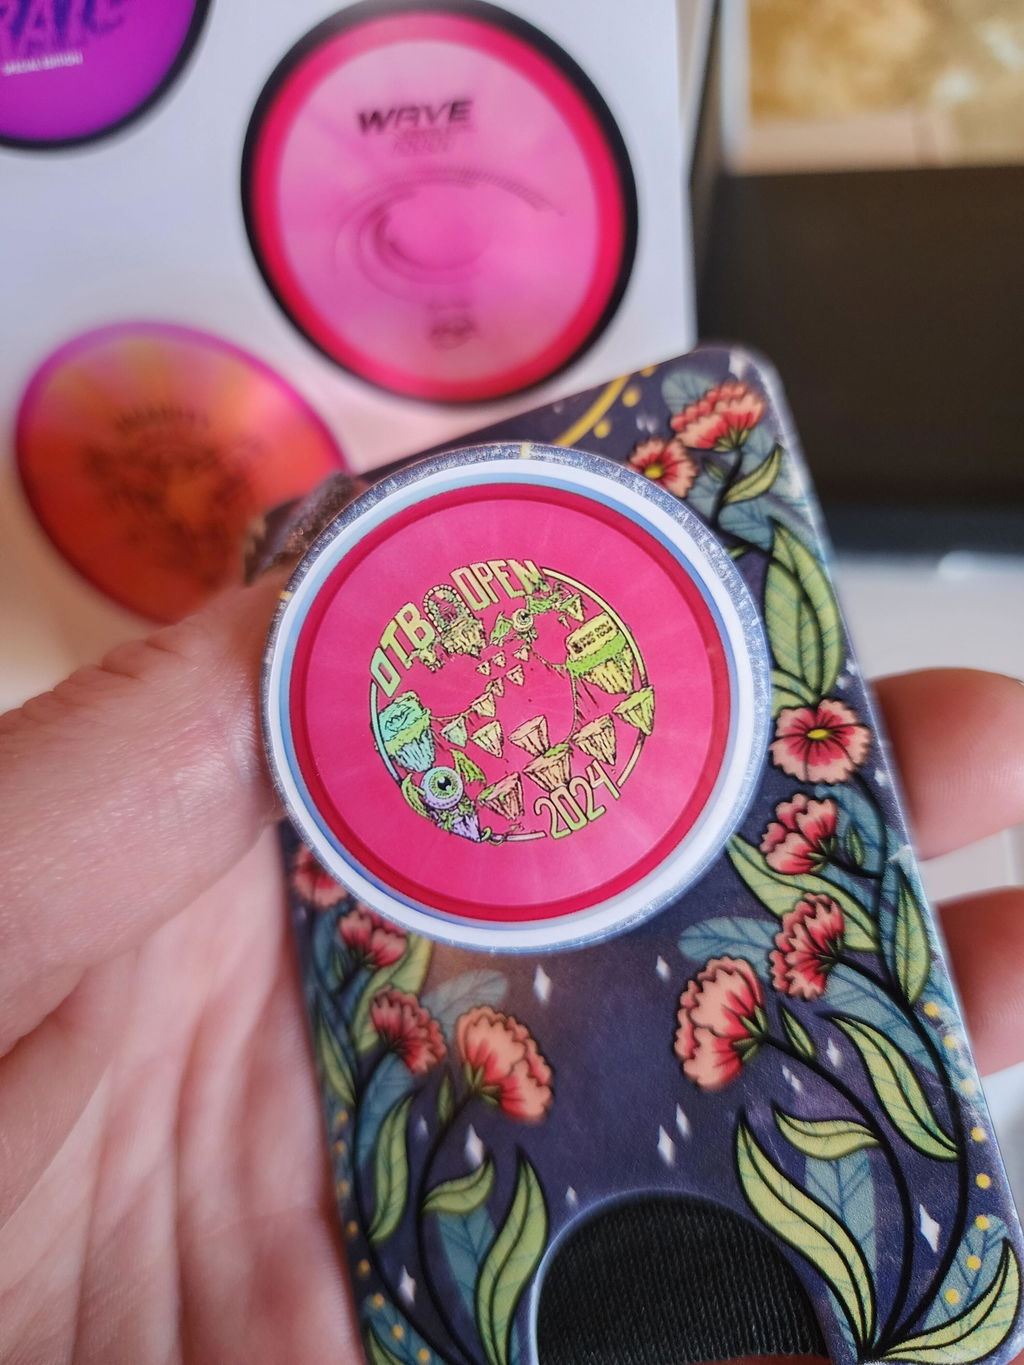
How to DIY your own sticker?
How to DIY your own sticker?
1. Find the template that matches the badge
Open the Liene Photo App and navigate to the homepage. Tap on "Decorative Stickers," then locate and select "Creative DIY Kit Stickers" to access the circular sticker (badge template) page.
2. DIY Option 1: Replace Template Content with Your Photo
ꔷ Remove the default template content.
ꔷ Tap the circular frame to open the bottom toolbar.
ꔷ Select "Image Fill" to upload your own photo and replace the template image.
3. DIY Option 2: Customize with Canvas Tools
ꔷ Adjust the size of elements on the second template as needed.
ꔷ Tap the circular frame to change the background.
ꔷ Use the Text Tool to edit or add custom text.
4. Prepare for Printing and Cutting
ꔷ Tap "Make-it" to view the print and cut preview page.
ꔷ Go to Settings at the bottom and select "0 Border Cut" to eliminate white edges.
ꔷ (Optional) If white edges persist, return to the canvas, tap "Background", and adjust the background color for a better effect.
ꔷ Delete any prompt text from the template before finalizing.Print and Cut
5. Print and Cut
Review the preview, confirm settings, and proceed with printing and cutting.
How to find the corresponding template in the Liene Photo APP?
How to find the corresponding template in the Liene Photo APP?
1. Open the Liene Photo APP and ensure that the machine is connected.
2. On the app's homepage, tap on "Decorative Stickers.
3. After entering that category, swipe the top categories to the end and click on "Creative DIY Kit Stickers.
4.Once inside, you will see the matching templates.
What can the Liene PixCut S1 do?
What can the Liene PixCut S1 do?
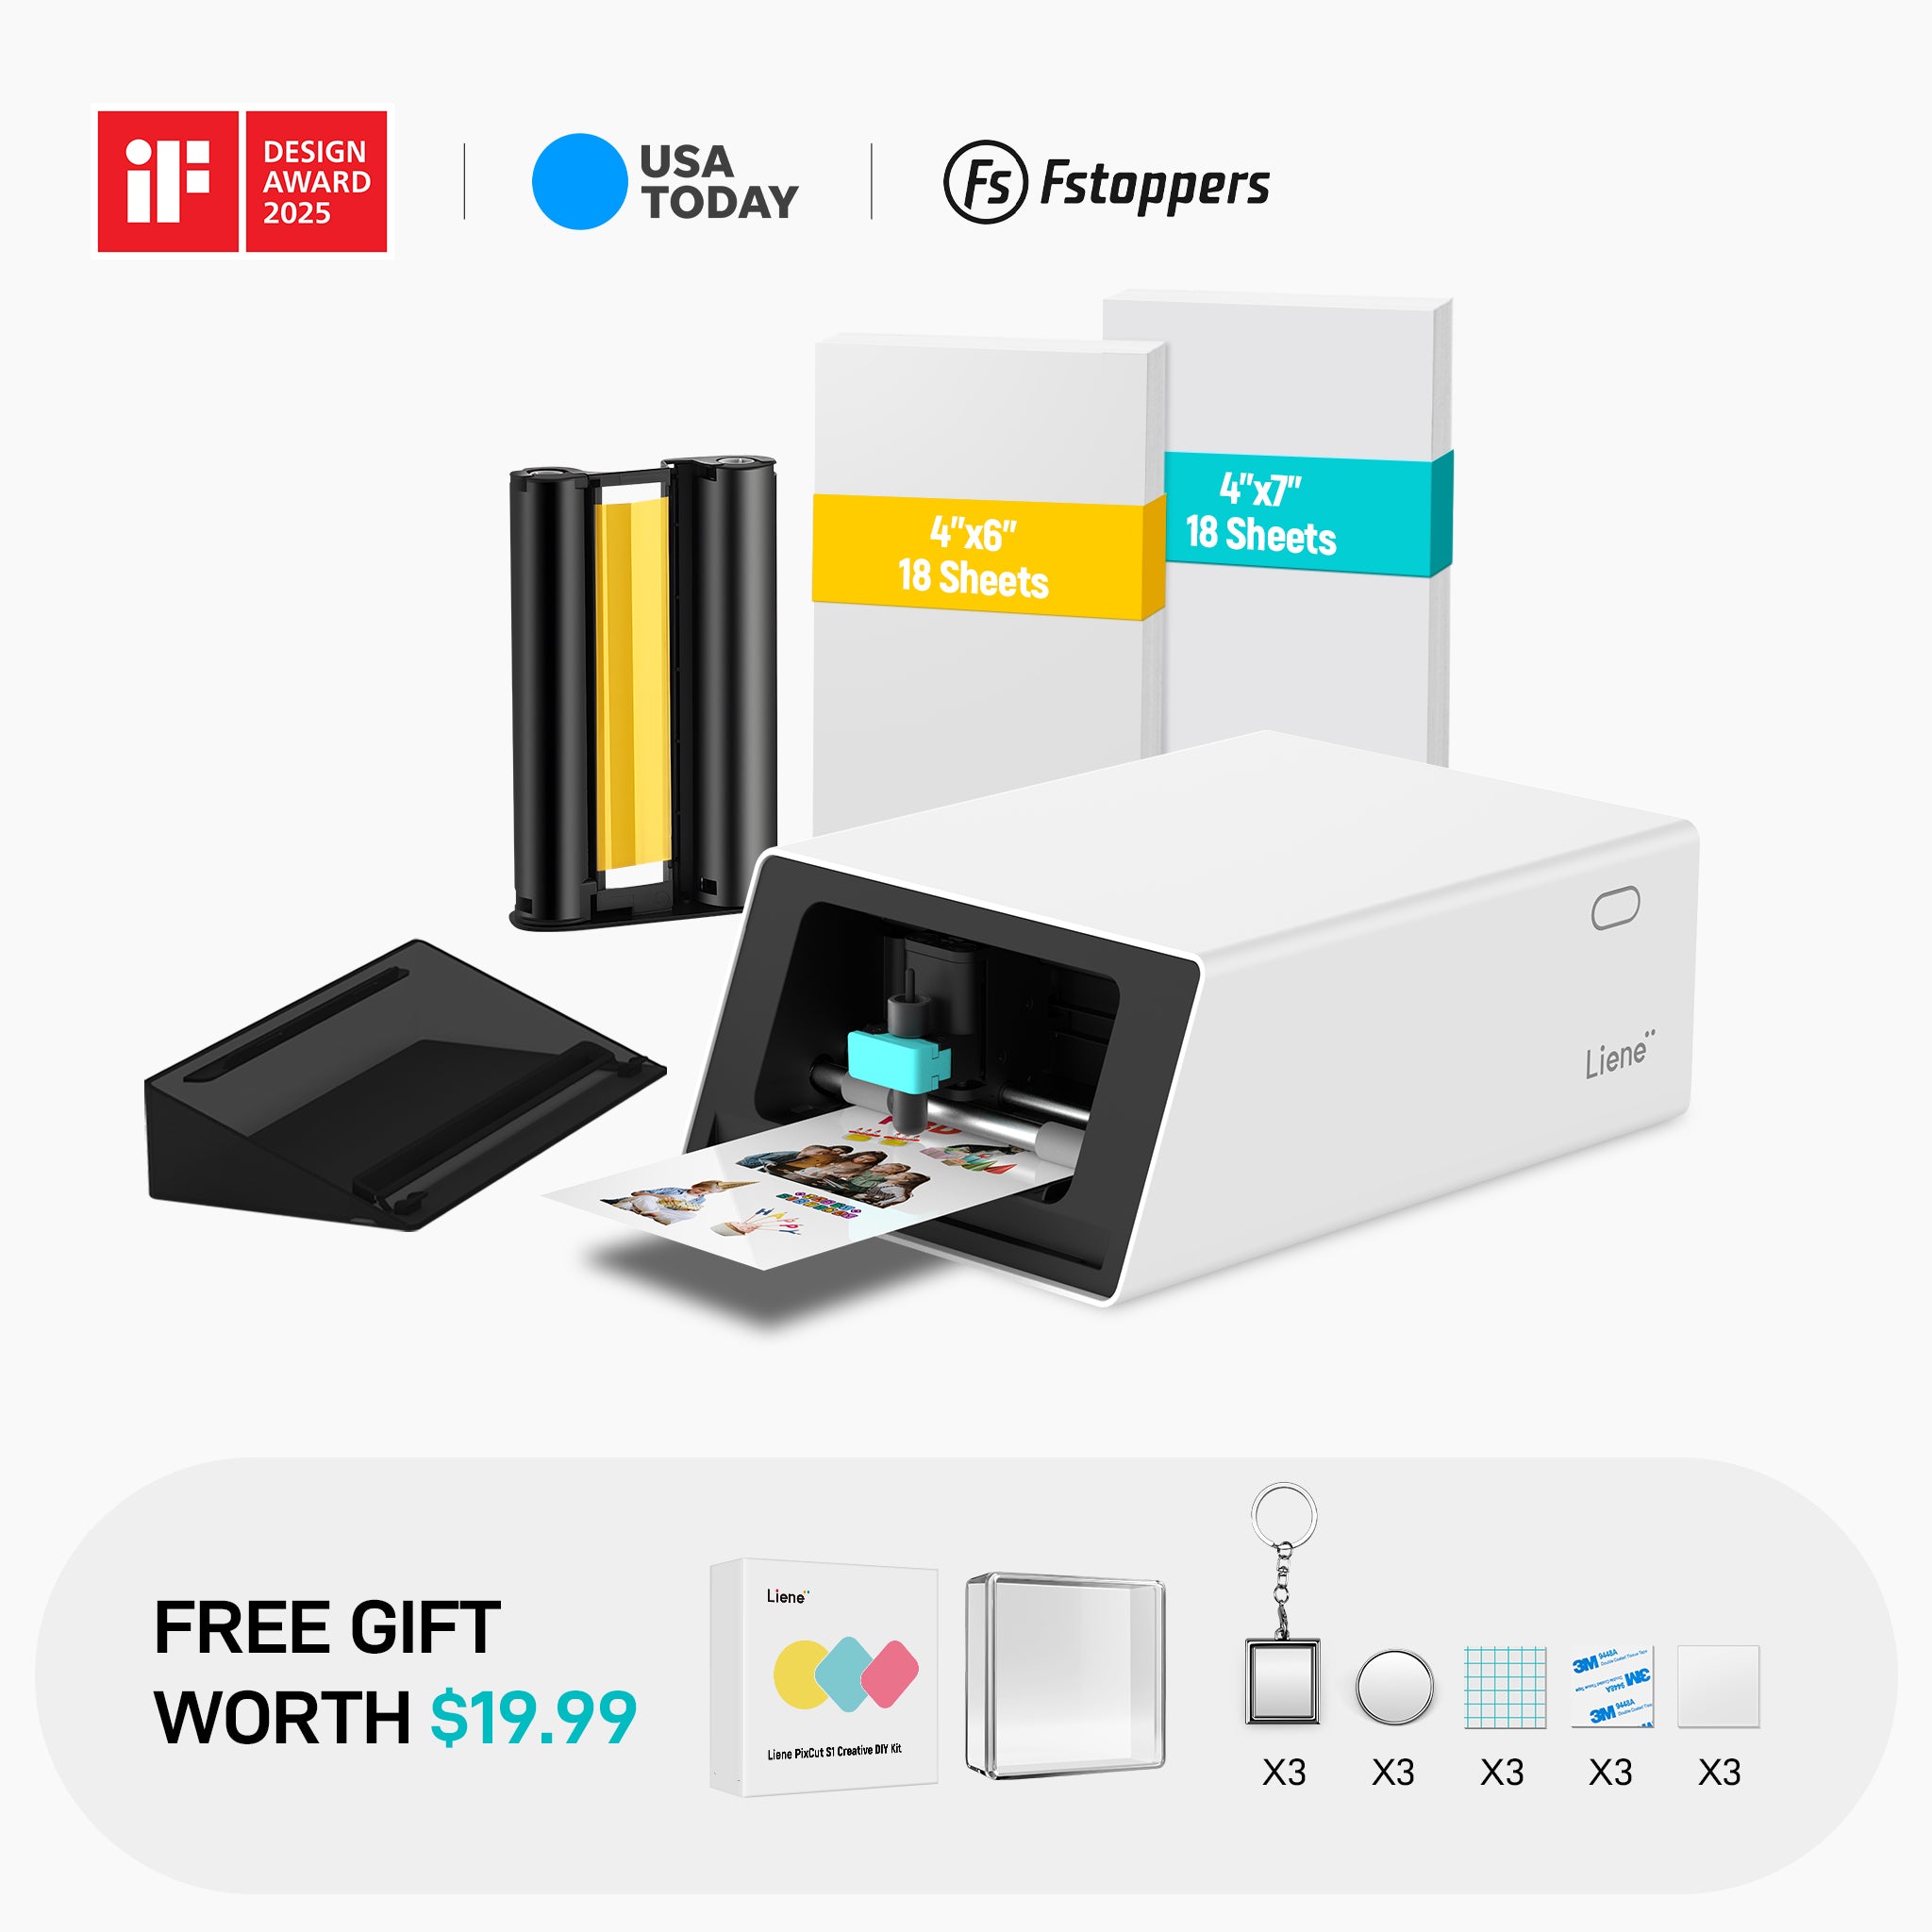
- Custom Stickers and Labels: Create high-quality, durable stickers and labels for personalizing belongings, branding, and creative projects.
- Classic Photo Printing: Print 4x6 or 4x7 inch photos, perfect for albums, frames, and personalized gifts.
- ID and Passport Photos: Easily print and cut passport and ID photos for various countries and sizes.
- DIY Phone Sticker Skins: Print and cut custom skins for popular phone models, allowing users to peel and apply directly to their phones or cases.
How is the PixCut S1 different from traditional machines?
How is the PixCut S1 different from traditional machines?
The PixCut S1 combines printing and cutting into a single, seamless process, requiring no manual adjustments or feeding of paper. This smart design allows it to complete both tasks in about 2 minutes, significantly reducing time and effort compared to traditional machines, which often take over 30 minutes.
Does it print and cut without intervention?
Does it print and cut without intervention?
Yes, the PixCut S1 is designed to print and cut without any manual intervention. It seamlessly integrates both functions, automatically and effortlessly feed materials for a seamless experience without the need for manual adjustments, allowing you to create high-quality, precisely cut stickers and photos effortlessly. Simply set your design, and the PixCut S1 will handle the rest.
When will my order ship?
When will my order ship?
Ships within 1-2 business day. Arrive in 2-5 bussiness day.