


Labels are small details that make a big difference in daily life. They keep your pantry jars easy to recognize, add a personal touch to kids’ school supplies, and turn simple party favors into something memorable. Custom labels bring both order and creativity into your home, helping you stay organized while adding style. In this guide, you will see why making labels at home is so practical, explore creative ways to use them every day, and learn a simple method to design and print your own professional-quality labels.

Why Make Your Own Labels at Home?
Making labels at home is not just about saving money, it also gives you full control over how your space looks and functions. Here are the main reasons why it’s worth doing:
Cost savings: Ordering custom labels online can be expensive, especially if you only need a small batch. By printing your own, the cost per label drops significantly, and you can avoid minimum order requirements that often push up the price.
Creative freedom: Designing at home means you are not limited to pre-set templates. You can choose fonts, colors, icons, or even add family names and fun graphics. This freedom allows your labels to match your kitchen style, your kids’ personalities, or your brand identity if you run a small business.
Flexibility: Sometimes you just need one or two labels, other times you might want dozens. At home you can print exactly the quantity you need without worrying about leftover stock or waste. This is especially useful for seasonal labels or one-time events.
Convenience: No waiting days for shipping or dealing with delays. You can design and print labels the moment you need them, whether it’s for an urgent school project, last-minute party favors, or reorganizing your pantry on the weekend.
Label Ideas for Everyday Use
Labels are useful in every corner of your home and even beyond. Here are some practical ways you can use custom labels every day:
Pantry Labels: Mark jars, bins, and containers with ingredient names, expiration dates, or portion sizes. Clear, bold labels make it easy to grab the right item while cooking and reduce the risk of food waste.
Kids’ School Supplies: Add fun and colorful labels to notebooks, lunchboxes, and water bottles. Personalized designs help kids keep track of their belongings and make everyday items feel special.
Home Office Labels: Keep your workspace clutter-free by labeling files, storage boxes, and even cables. Clear labeling saves time when searching for documents and makes your office setup look more professional.
Event and Party Labels: Create custom stickers for birthdays, weddings, or holiday gatherings. Use them on party favors, invitations, or table decorations to add a personal and stylish touch.
Small Business Labels: Print thank-you stickers, packaging labels, or shipping tags for your products. Custom labels help strengthen your brand identity and leave a professional impression on customers.
Decorative Labels: Experiment with seasonal themes, inspirational quotes, or planner stickers. Decorative labels can brighten up shelves, planners, or journals, making organization both functional and enjoyable.
How to Make Custom Labels at Home with PixCut S1
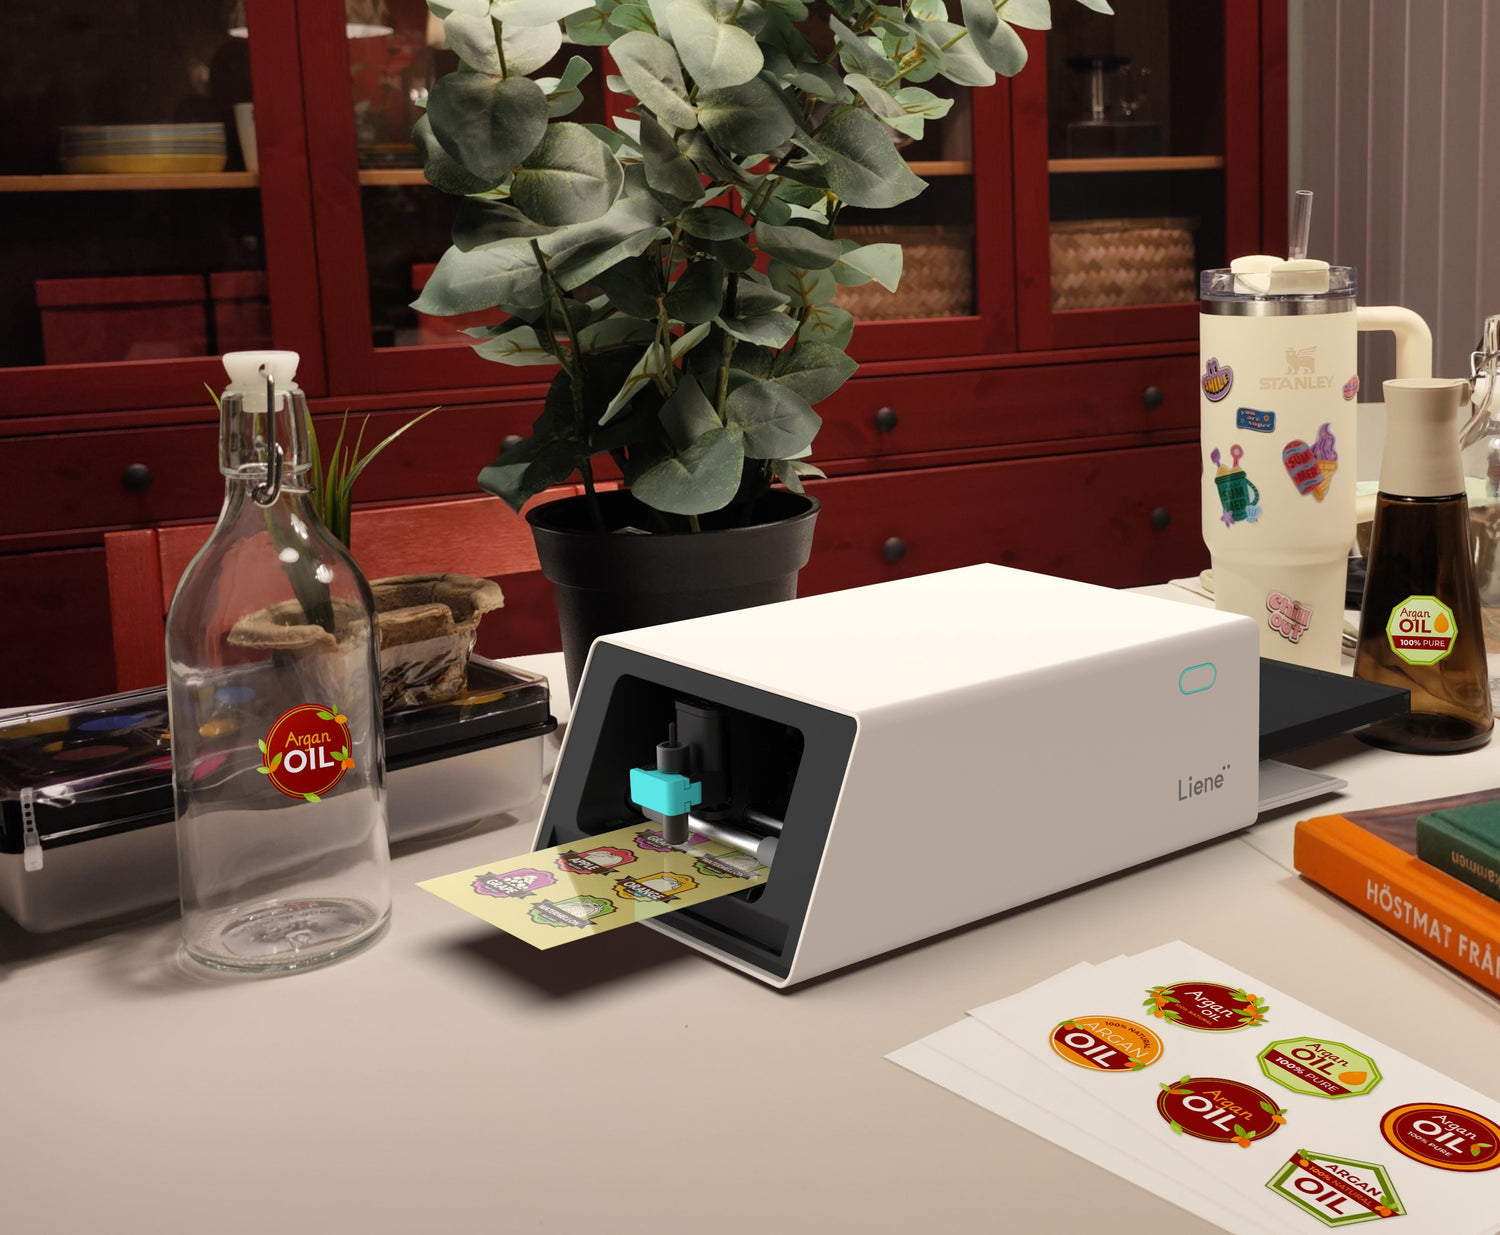
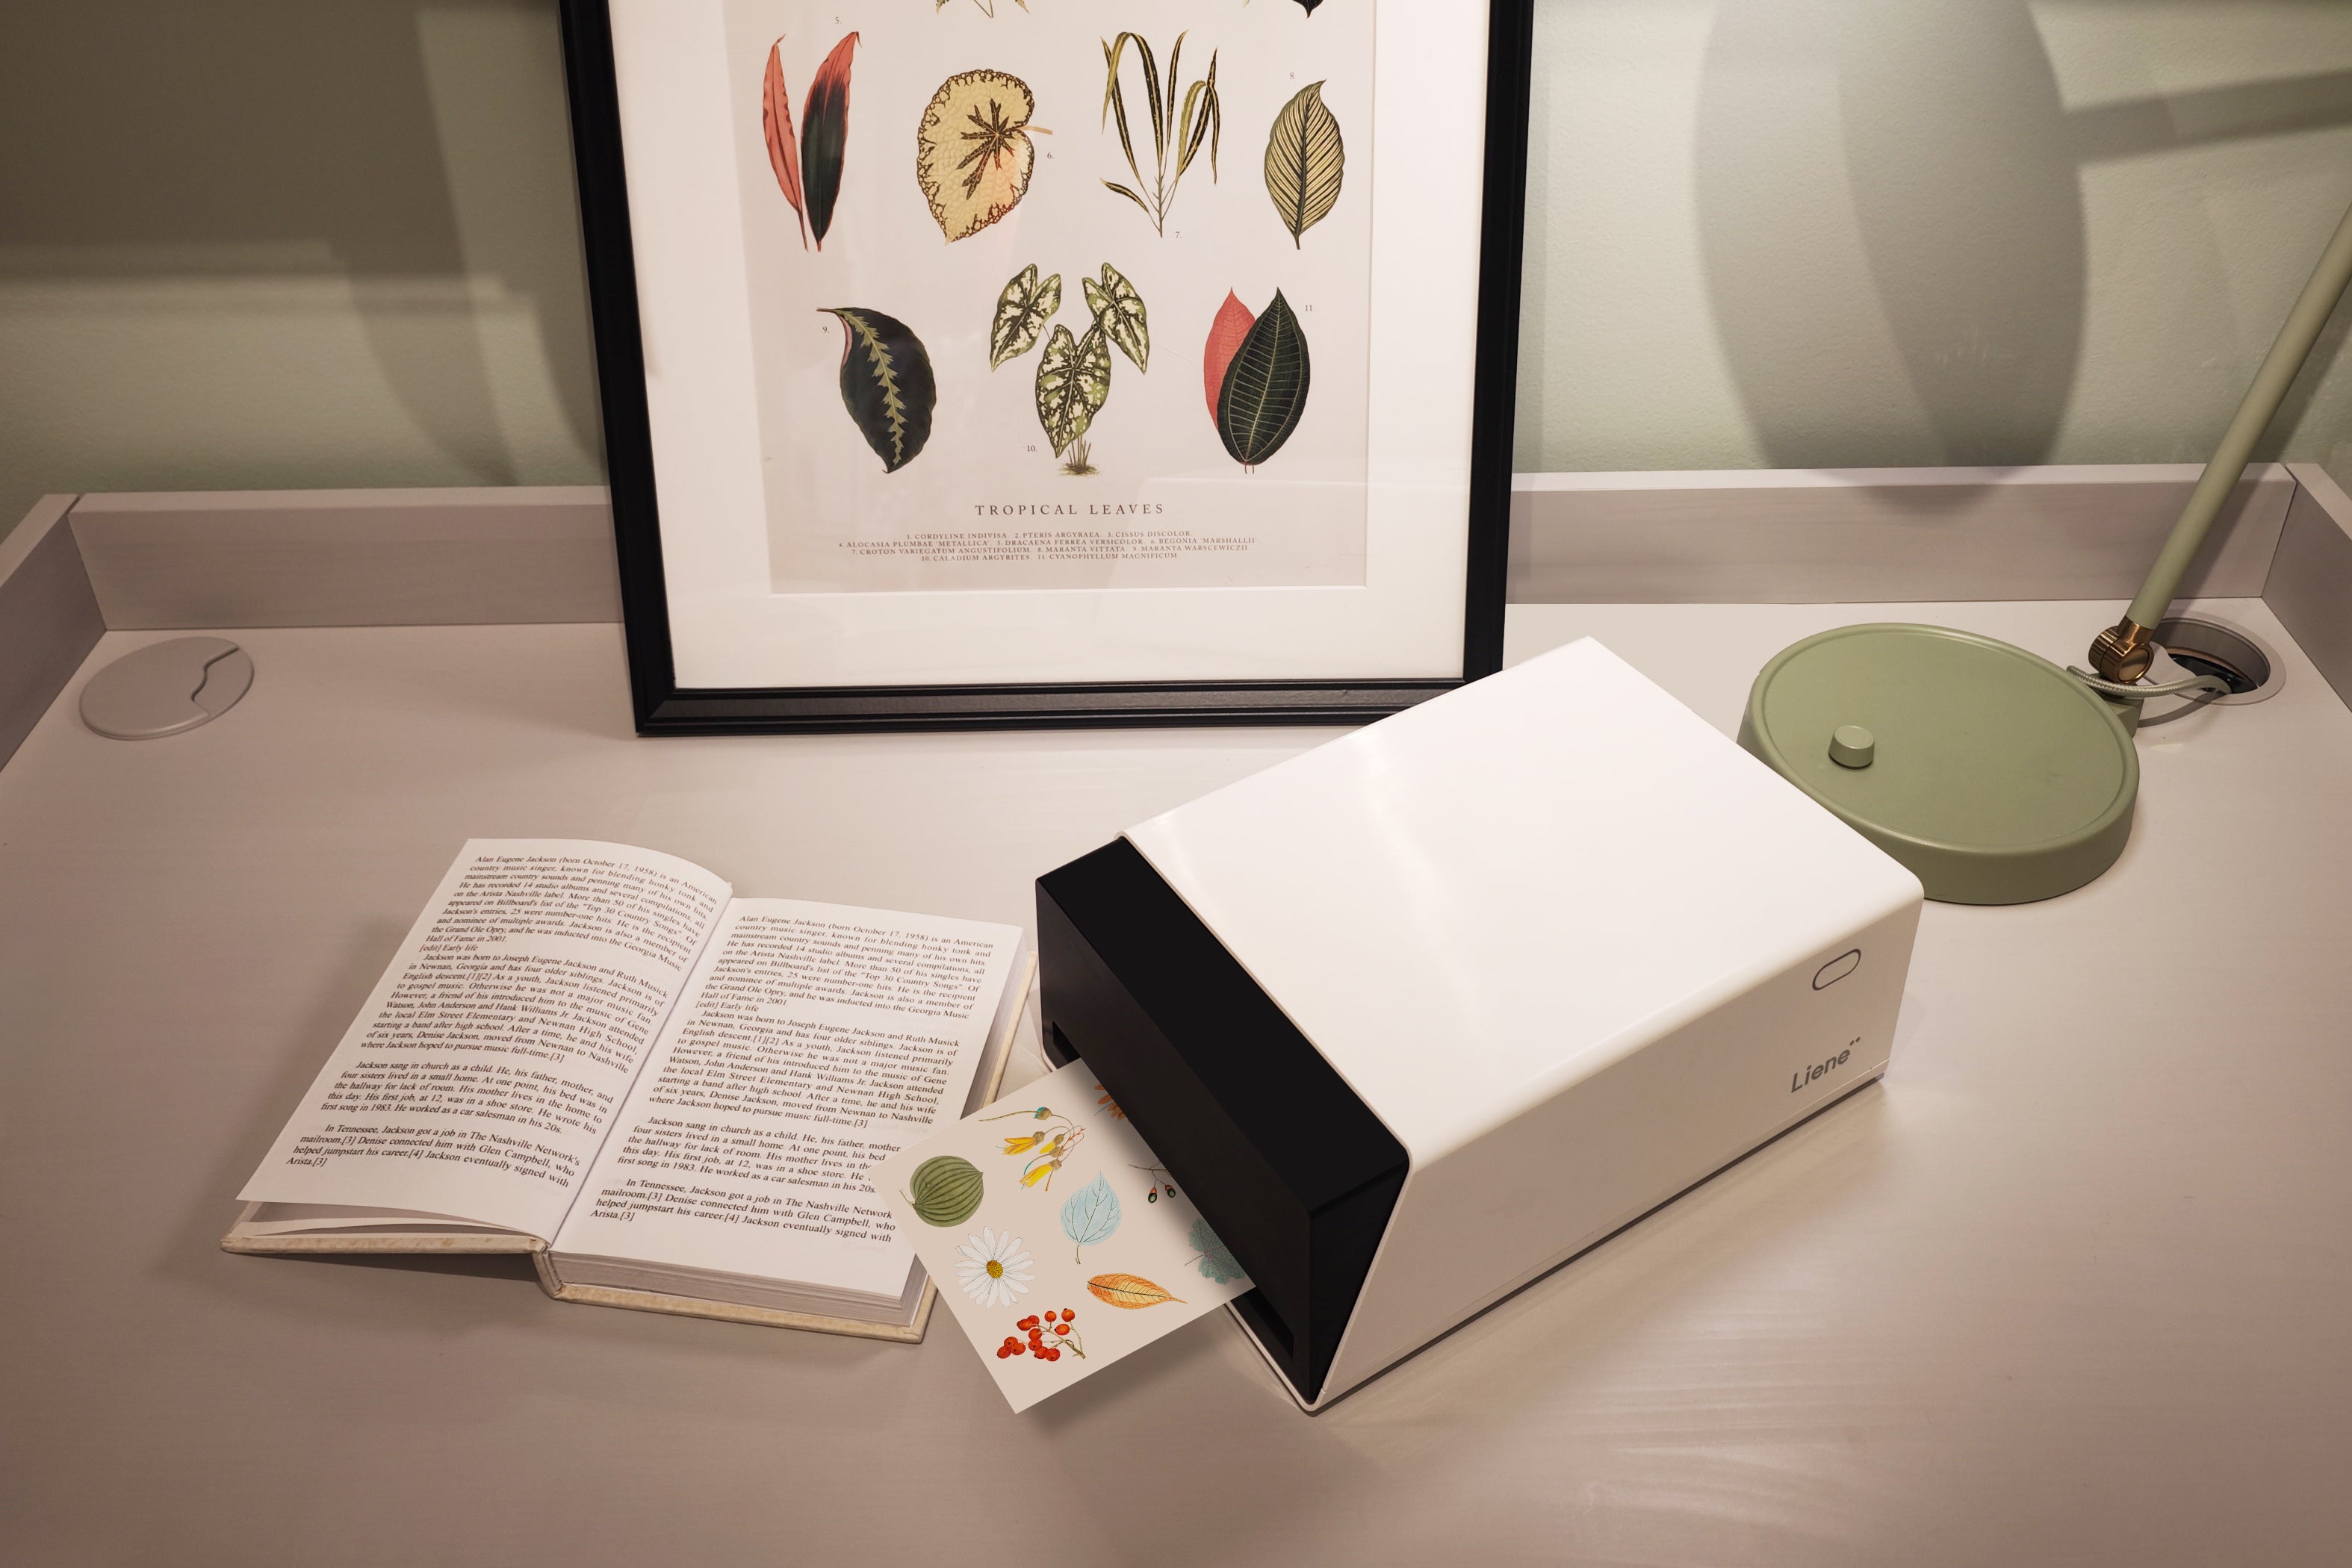
All the label ideas above can be created quickly and professionally with the Liene PixCut S1 Sticker Maker. This all-in-one machine prints, laminates, and cuts in just minutes — no separate printer or manual cutting needed. The PixCut S1 is beginner-friendly, delivers waterproof and scratch-resistant labels, and is perfect for both home and small business use.

Here’s how you can make your own labels step by step:
Step 1: Prepare the Machine
Install the ink ribbon cartridge and load the official 4×7" Liene PET sticker paper. The PixCut S1 automatically feeds and aligns the paper, which means you can start right away without extra setup.
Step 2: Design Your Stickers
Open the Liene Photo app on your phone or tablet and upload your designs in PNG or JPG format. The app includes background removal and auto cut-line tools, making it easy to set up layouts for pantry labels, school supplies, or event stickers.
Step 3: Select Kiss-Cut Mode
Preview your design in the app and select Kiss-Cut mode. This setting cuts only through the sticker layer while leaving the backing sheet intact, so labels peel off cleanly and are easy to apply.
Step 4: Print, Laminate and Cut
Send your design to the PixCut S1. The machine prints in high resolution using thermal dye-sublimation, applies a protective lamination for durability, and precisely cuts each label. In just a few minutes, your custom stickers are ready to use.
Extra Tips for Long-Lasting Labels
Even the best-designed labels need a little care to stay neat and durable. Follow these tips to make sure your stickers last as long as you need them:
Apply to clean, dry surfaces: Wipe jars, bottles, or bins before sticking on a label. This prevents dust or grease from weakening the adhesive.
Choose waterproof materials: In kitchens, bathrooms, or outdoor settings, use waterproof sticker paper so labels can handle moisture and frequent cleaning.
Use removable sticker paper for reusable containers: If jars or boxes often change contents, removable labels make it easy to peel and reapply without leaving residue.
Store extra labels properly: Keep unused labels flat in a cool, dry place. Avoid direct sunlight or humidity, which can reduce adhesive strength over time
Conclusion
Making labels at home is simple, affordable, and a great way to add order to your daily life. Instead of relying on pre-made options, you can design labels that match your exact needs and style. With the right tools, your ideas quickly turn into durable, professional-quality stickers that are ready to use in the kitchen, office, or for special events. Start designing your own labels today and see how a small change can bring more organization and creativity into your routine.
FAQs
What materials do I need to start making custom labels at home
To get started, you only need a few basics:
1. A label maker or printer such as the PixCut S1 for professional-quality results
2. The official Liene PET sticker paper and ink cartridge set for long-lasting labels
3. The Liene Photo App to upload, edit, and prepare your designs
4. Clean jars, bottles, or containers for applying your labels
With these materials, you can create labels that are clear, durable, and ready to use right away.
Can homemade labels be waterproof and durable enough for kitchen or outdoor use?
Yes. When printed with PixCut S1 on PET sticker paper, the labels are laminated during printing, making them waterproof, fade-resistant, and scratch-resistant. This ensures they hold up well in kitchens, bathrooms, or even outdoor settings.
Is it cheaper to make custom labels at home or order them online?
Making your own labels at home is usually much more affordable. Online custom labels often require minimum orders and higher prices per sheet, while at home you can print only what you need. Over time, the savings are significant, especially for families, hobbyists, and small business owners who use labels frequently.

Leave a comment
This site is protected by hCaptcha and the hCaptcha Privacy Policy and Terms of Service apply.