


Photo Stickers at Home: What a Photo Sticker Printer Does (and What to Look For)
A photo printed on sticker paper isn't a sticker yet. Here's how to make photo stickers at home, and what a photo sticker printer does that a photo printer can't.
Explore blogs about photo printers topics for the latest tech, creative ideas, and printing tips. Elevate your printing experience and capture moments.
A photo printed on sticker paper isn't a sticker yet. Here's how to make photo stickers at home, and what a photo sticker printer does that a photo printer can't.

Somewhere between the first "can I buy that?" at a market table and the fiftieth online order, sticker making stops being a hobby with byproducts and turns into a business with costs. The machine question changes at that point too. A hobbyist can shrug off a wasted sheet or a fussy workflow. A business feels both, week after week, in margin and in evenings. So this guide works through the choice the way a seller has to: what one sticker costs to make, what the consumables add up to over a season, how much desk the setup claims, and where each route stops making sense. What Changes When You Start Selling Three things, mainly. Volume goes up, so the cost of a single sticker matters in a way it never did when you were decorating your own planner. Consistency starts to matter, because a customer who reorders expects the second batch to match the first. And waste turns into a line item: a crooked cut or a smudged sheet used to be a shrug, and now it is materials you paid for producing nothing you can sell. None of that requires industrial equipment. Most sticker businesses at the market-table and online-shop stage run on the same desktop machines hobbyists use. It just means the buying decision leans harder on the numbers, so that is where to start. Most sticker businesses start exactly here: a planner, a pile of designs, and the first sheets other people ask to buy. Price One Sticker Before You Price Any Machine On the Liene PixCut S1, the math is short. Refills run $42.99 for 72 sheets with the ink cartridges in the pack, which lands near $0.60 a sheet, laminated and cut. How many stickers a sheet becomes depends on how densely you pack it, and packing sheets densely is a skill sellers pick up fast. The two-machine route prices out as a stack instead: sticker paper at $23.99 to $29.99 for 50 sheets at Cricut's own prices, inkjet ink on top, laminate sheets where waterproofing matters, and $9.99 a month for Cricut Access if you want its sticker tool doing layout. None of those numbers is scary on its own. The bookkeeping is the difference: one route is a single refill SKU you reorder when the box runs low, the other is four or five supplies that run out on their own schedules. At tax time, or just on a Sunday night when you are counting what a fair paid you after supplies, the single line item is worth something. There is a third route, and a business post should say so: ordering from a print shop. When we ran the numbers on it, home printing stayed cheaper up to roughly 2,200 sheets in a single order. Below that line, which is where nearly every market-table and small-shop seller lives, printing your own wins. Past it, you have outgrown this article and should be negotiating with a print shop. One refill box against the four-supply stack: the reorder list is the difference your bookkeeping feels. Count the Machines on the Desk A sticker machine for a small business earns its desk space or it doesn't, and most sellers are working from a corner of a room rather than a studio. The PixCut S1 is one box about the size of a shoebox: it prints at 300 DPI in dye-sublimation, seals the sheet under a four-layer laminate, and kiss cuts around each design in the same pass. Design happens in the free app, which carries more than 50,000 templates plus AI background removal, and the machine holds a Bluetooth connection with up to three devices. The alternative is a chain: an inkjet to print, a cutting machine to cut, laminate applied by hand or by a laminator in between. It produces sellable stickers, and plenty of shops run this way. What changes at business volume is the cost of the seams. Every handoff between machines is a place where alignment can drift, and a drifted cut at hobby scale is an annoyance, while at business scale it is scrap you paid for. The one-machine route removes the handoffs rather than managing them, which is most of its pitch to a seller. One shoebox-sized machine, one workflow: sheets, strips and a phone case's worth of stickers between orders. What Your Customers End Up Holding Sticker buyers have held a lot of stickers, and they can tell. Two things read as quality in the hand. The first is the laminate: PixCut sheets come out under a four-layer coat that stands up to water, scratches and fading, so the laptop sticker survives the commute and fingerprints wipe clean instead of wearing in. The second is the printing itself. Dye-sublimation lays color down in continuous tone rather than sprayed dots, which is why photo designs keep looking like photos, and why smooth gradients stay smooth on the finished product. Kiss-cut sheets also hand you a small merchandising bonus, since the backing stays whole and a mixed sheet reads like the ones in a stationery shop, with your designs on it. Make: magazine's review made the seller case directly, calling the machine a strong fit for sellers customizing stickers for customers at in-person events. Printing a buyer's name onto a design while they browse the rest of the table is the kind of trick that gets remembered. Where sold stickers end up living: a laptop that leaves the house every day. Printing to Order Instead of Holding Stock The quiet advantage of making stickers in-house is what it does to inventory. A shop that orders 500 of a design is betting the design sells. A shop that prints its own can run 20, watch what happens, and let the market vote before committing a full box of anything. Slow designs die cheaply. Strong ones get printed the night before the next fair, in whatever quantity the last fair suggested. The same logic covers custom work. Personalized orders, name variants, one-off requests: when a full printed sheet costs about $0.60, there is room to say yes to small custom jobs that a print-shop minimum would turn into a loss. And on the durability side, the machine is rated for the long haul, tested through 5,000+ continuous prints, which at small-business volume is a lot of market days. Print twenty, see what sells: small runs make every design a cheap experiment. Where This Setup Stops An honest edge map, because a machine bought for the wrong business is dead weight. If your product line runs past stickers into vinyl decals, iron-on shirts or cardstock, a cutting machine belongs in the plan, since the PixCut only makes its own sticker and photo sheets. If your orders are heading toward true bulk, hundreds of identical sheets at a time, a print shop's pricing eventually beats any desktop machine, ours included. And if you are still deciding what kind of maker business you are, the full buying guide compares every route without the business framing. For the selling side itself, pricing, listings and where the first customers come from, our guide to selling stickers online picks up where the hardware question ends. Organizer and label sheets are a product line of their own, and a steady one at market tables. FAQ What is the best sticker printer for a small business? For a business that is mostly stickers, an all-in-one sticker printer and cutter, and the PixCut S1 specifically: about $0.60 a sheet in supplies from a single refill SKU, laminated output customers can tell apart from paper stickers, and one machine's worth of desk space. Businesses whose product line runs past stickers are better served adding a cutting machine. How much does it cost to make stickers to sell? About $0.60 per printed sheet on the PixCut S1, from refill packs at $42.99 for 72 sheets with ink included. That covers printing, lamination and cutting, and your per-sticker cost is that sheet divided by however many designs you fit on it. Is the print quality good enough to charge money for? Laminated dye-sub output is the same category of printing photo labs use, and the kiss-cut sheets handle like store-bought ones. Quality complaints in this hobby usually trace to unlaminated inkjet prints meeting water, which is the failure the built-in laminate exists to prevent. Do I need a cutting machine to start a sticker business? Not for stickers themselves, since an all-in-one sticker printer and cutter does its own cutting. A cutting machine earns its place when the product line grows into vinyl, iron-on or cardstock, and some shops eventually run both machines side by side for different products. How many stickers does one refill box produce? A box is 72 sheets, and the count depends on how you lay them out. Small designs pack twenty or more to a 4x7" sheet, big die-cut-style designs run four to six, so a single box covers anywhere from a few hundred stickers to well past a thousand. Start With One Market Day Skip the hypothetical business plan and price a real day instead: one fair table, or one week of shop orders. Count the sheets it would take, multiply by $0.60, compare that against what you charge, and the right sticker machine for your small business mostly picks itself. The PixCut S1 starts at $279.99 with 18 sticker sheets and 18 photo sheets in the box, which is enough paper to find out what your customers reach for before the first refill order. Shop PixCut S1

Three machines crafters cross-shop, three different jobs. How the Maker 5, the SELPHY CP1500 and the PixCut S1 compare for making stickers.

Halloween is the stickiest holiday on the calendar, and that is meant literally. Candy bags need sealing, costume pieces need names on them, pumpkins need faces, and the planner wants a countdown. One 4x7" sheet covers a surprising amount of that, at about $0.20 a sticker when you print your own. Here are 40 Halloween sticker ideas, sorted by where they end up, from the front door to the school notebook. The house rule matters double in October: stick to art and photos you made yourself. Halloween is crowded with characters that belong to movie studios, and not one idea below needs them. Ghosts, bats, pumpkins and black cats have been public property for centuries, and a wobbly hand-drawn ghost beats a licensed one on a kid's lunchbox every time. Sketching October sticker designs, on paper and on the tablet. Costume and Prop Labels Costumes come with a lot of loose parts, and the parts start wandering off the moment the season begins. 1. Name labels for costume pieces. Put a small name sticker inside the hat, the cape and anything else that detaches before the school party. Costume pieces turn up in lost-and-found bins, and a name inside is what gets them home. 2. Left shoe, right shoe dots. Useful for little kids whose boots look identical from above. A pumpkin in the left one and a bat in the right settles the question without any reading involved. 3. Prop bin labels. One printed label per storage tub for wigs, makeup and capes. Add the year in small type and next October you will know which wig has already done two Halloweens. 4. A "this is part of a costume" tag. For the week when the living room fills with strange objects nobody is allowed to throw away, and a tag on each one saves the explaining. 5. Costume care notes. A small sticker on the hanger: hand wash, do not tumble, glue is still drying. Candy Bag Seals The candy side of the holiday runs on small round stickers. One sheet prints a party's worth, and a circle seals a paper fold no matter how crooked the fold is. 6. Treat bag seals. A pumpkin or ghost to close each paper treat bag. It holds the fold shut on the walk home, and it looks better than tape. 7. "Boo!" delivery stickers. For the neighbourhood boo-basket tradition, a seal for the note that says you have been booed. The custom says anonymous, so homemade fits the assignment better than store-bought. 8. Allergy-aware markers. A clear nut-free or no-gelatin dot for treat bags headed to school parties. Parents of allergic kids read these first, so keep the text large and the design plain. 9. Guess-the-count jar seal. One large sticker sealing the candy jar for the guessing game, with a blank line for the winner's name. 10. Leftover candy dater. A small date sticker for the post-Halloween stash, mostly so future-you knows which year's candy corn this is. Halloween candy already comes in circles, and seal stickers print the same way. Party and Table Decor A Halloween party looks expensive or homemade depending on the small stuff, and the small stuff is mostly labels. Print the table set the night before and decorating takes one pass around the room. 11. Cup markers. Small spooky designs so guests can tell their cups apart, for less than themed party cups cost. 12. Napkin wraps. A printed strip wrapped around each rolled napkin dresses up a plain stack. Fifteen minutes of wrapping covers a full table. 13. Food tent labels. Witch fingers, monster eyes, swamp punch. Spooky menu names carry a lot of the atmosphere, and a printed label reads better in dim party lighting than marker on a sticky note. 14. Photo-corner stickers. Bats and webs for the corners of a DIY photo wall, which is what makes a bedsheet backdrop look intentional. 15. Game prize seals. A gold-ish pumpkin on the winner's bag from each party game. Kids take prize stickers seriously, so print more than you think you need. One evening of designing turns into a counter's worth of October stickers. Pumpkins and the Front Door Outdoor stickers have to deal with actual weather. Sheets from the PixCut S1 come out under a four-layer laminate, which handles porch drizzle and damp pumpkin skin, and candy fingerprints wipe off the surface. 16. No-carve pumpkin faces. Printed eyes, mouths and eyebrows that get arranged and moved around until the pumpkin looks right. Small kids build the face themselves, and no carving tools come out of the drawer. 17. Door numbers, haunted edition. Your house number in a spooky style near the doorbell, so trick-or-treaters and their parents find the right porch. 18. A "take one please" bowl sign. A big sticker for the unattended candy bowl. It enforces nothing, but the bowl looks more official. 19. Window silhouettes. Bats and cats along a window edge, printed in plain black. With a lamp behind them at dusk, they read from the street surprisingly well. 20. Countdown door dots. Ten numbered dots by the door, one peeled off each morning starting on the 22nd. Like an advent calendar, only shorter and with more bats. Decorated pumpkins without any carving: lettering and doodles do the work. Notebooks, Planners and the October Spread The planner crowd owns October. Orange and black is the one colour scheme that makes a weekly spread look decorated instead of busy. 21. A countdown strip for the weekly spread. Thirty-one small marks across the top of the October spread, filled in or peeled off one day at a time. 22. Party planning icons. A cauldron for the shopping list, a mask for costume errands. Once the icons exist in the app they come back every October without redrawing. 23. Spooky movie night log. One ticket-shaped sticker for each spooky movie watched this season, with the title written in by hand. 24. Trick-or-treat route markers. For families who take the route seriously, small dots on a hand-drawn map of the streets with the good candy. 25. A November 1st recovery sticker. One sticker for the day after, marking out couch time and leftover candy. Water Bottles, Laptops and Everything Else Seasonal stickers work best on the things you carry every day, because those get seen by everyone and swapped out without guilt. Smooth surfaces hold them best, so glass, steel and painted plastic all work. 26. Seasonal bottle swap. A ghost or pumpkin on the school water bottle for October, peeled clean in November. Our water bottle sticker ideas covers the year-round version of this habit. 27. Laptop pumpkin, October only. A single small pumpkin on the corner of the laptop, gone again in early November. Easier to commit to than a permanent one on a work machine. 28. Teacher treat tags. A small printed tag for whatever goes to the teacher this season, with space left for a handwritten line. 29. Pet photo, Halloween frame. Your own pet's photo with bat wings or a witch hat added in the app. The sticker version of a pet costume stays on all night. 30. Candy-grade thank you stickers. For the houses handing out full-size bars, a thank-you sticker on a note through the mail slot. Those neighbours earned it. Glass takes a laminated sticker well, which makes the party glassware fair game. Spooky Mail and Treat Deliveries Not every treat gets handed over in person. The mailable side of the holiday has its own sticker needs, and most of them are small, round and printed twenty at a time. 31. Envelope seals for Halloween cards. A bat or web on the back flap of each card you send. Most mail is bills, so a sealed orange envelope tends to get opened first. 32. Treat jar gift tags. A printed to-and-from tag for jars of candy going to neighbours and coworkers. Write the names in by hand and the jar needs no card. 33. Wax-seal-look stickers. A printed circle designed to look like a pressed wax seal, in deep orange or black. Ceremony without the melted wax. 34. College care-package stickers. For the box of candy heading to a student too far away to trick-or-treat. A few stickers inside the flap make a cardboard box read as a package from home. 35. Party invitation seals. Small stickers closing paper invitations for whatever gathering October brings. Paper invitations are rare enough now that people hold onto them. The Classroom Party Teachers and room parents run a parallel Halloween, usually on a tight budget and a tighter schedule. Printed stickers cover a lot of that ground cheaply, and a design can be run again the week it runs out. 36. October reward stickers. A teacher's own reward designs for the month, with ghosts standing in for gold stars. A sheet of fifty costs about as much as one coffee. 37. Class party cup and pencil tags. Name stickers for cups and pencils at the class party, printed from the roster ahead of time. Twenty-five names fit on one sheet with room to spare. 38. Goodie-bag assembly stickers. Matching seals for the class goodie bags, printed in one batch and split between room parents. 39. Pumpkin contest badges. Small award stickers for a classroom pumpkin-decorating contest, with enough categories that most entries win something. Spookiest, silliest, most glitter. 40. Reading month bookmarks. October bookmark stickers for the classroom library corner, on cardstock cut from whatever is in the supply cupboard. How to Print Them at Home The workflow is short. Design in the free Liene app, which carries more than 50,000 templates alongside your own photos and art, then tap print. The PixCut S1 prints at 300 DPI, laminates and kiss cuts the sheet in one pass, with the print itself running 59 seconds. Kiss cut means each sticker peels off while the backing stays whole, so a mixed sheet survives being carried to a party and handed around. Original designs can start anywhere, and a tablet sketch imports straight into the app. Two practical notes for October. Mixing sizes on one sheet works fine, so a big bowl sign can share space with twenty candy seals, and the cost stays around $0.20 per finished sticker either way. Over-print the small round designs, since seals and dots disappear fastest once a party starts. The lamination is also what lets these live outdoors on damp pumpkins, with no separate sealing step to remember. If this list puts you in a seasonal mood, the same approach runs all year: our back to school sticker ideas covers September, and planner stickers for the school year keeps the notebook side going through June. FAQ What are good Halloween stickers to make at home? The ones that get used up fastest are a good start, meaning candy bag seals, cup markers and name labels for costumes. They print by the dozen on a single sheet. Are printed Halloween stickers waterproof? Laminated ones handle October fine. PixCut S1 sheets come out under a four-layer laminate, which covers porch weather, damp pumpkin skin and sticky fingers. For anything outdoors all month, press firmly onto a clean dry surface. Can I use Halloween movie characters on my stickers? For stickers you sell or share widely, no, those characters belong to studios. For the home crowd, original ghosts, witches, bats and pumpkins are safer, and they come out looking like yours. Do Halloween stickers work on pumpkins? Real pumpkin skin is smooth enough for a good press, and laminated stickers hold on well for the season. Wipe the surface dry first, and expect the pumpkin to give out before the sticker does. How much does a sheet of Halloween stickers cost to print? About $0.20 per finished sticker on the PixCut S1, from refill packs at $42.99 for 72 sheets with the cartridges included. A single sheet covers a party's worth of candy seals with room left over. Print the October Sheet Pick a handful of ideas that match your actual October plans and print one mixed sheet this week. The season is short, a sheet costs a few dollars, and whichever stickers get peeled first will tell you what to print more of next year. The PixCut S1 handles the printing, laminating and cutting, and October takes care of the rest of the calendar. Shop PixCut S1
All blog articles could not be loaded. Only this blog is shown.
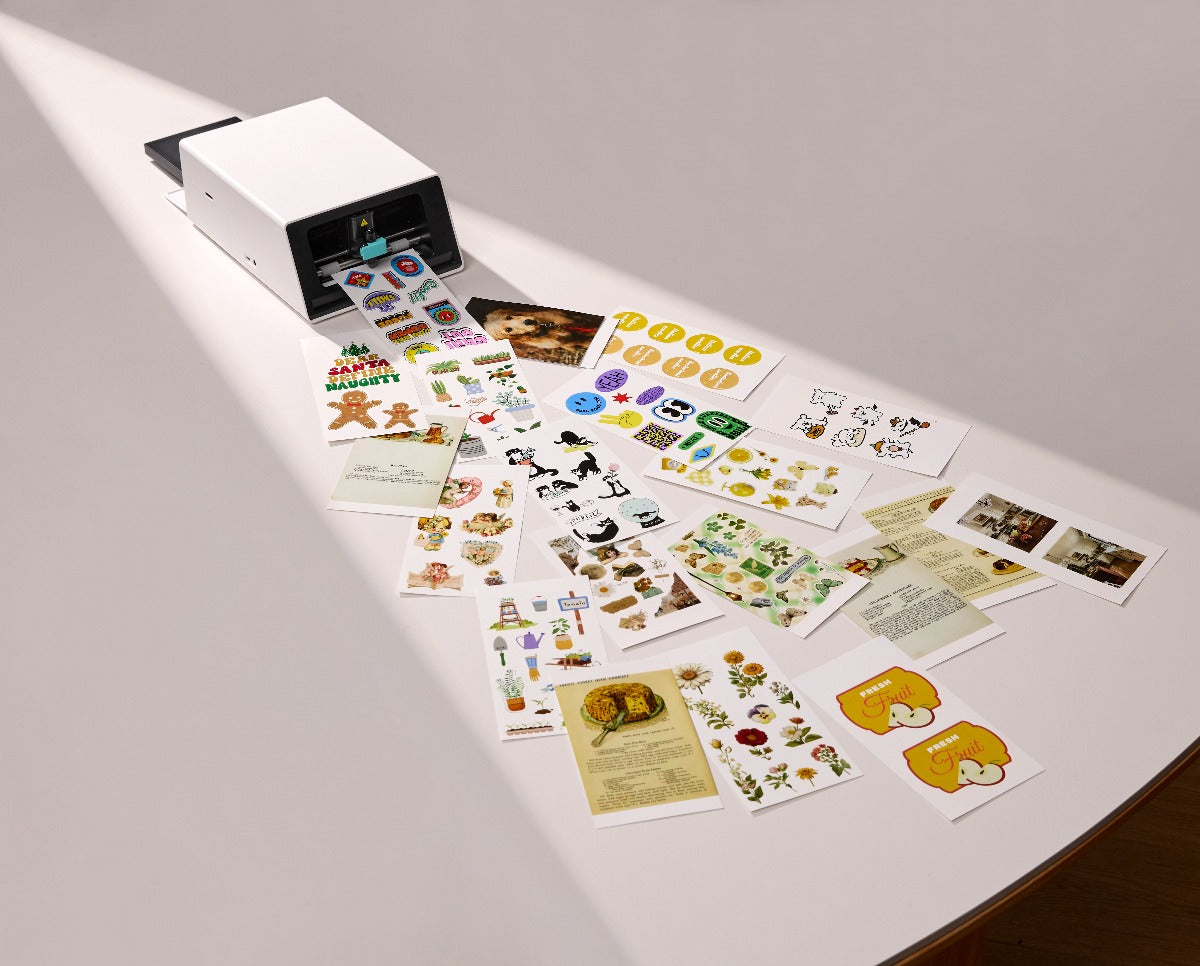
If you’ve ever browsed through a collection of designs for your water bottle, laptop, or car, you’ve likely come across both stickers and decals. The terms are often used interchangeably, but they actually refer to two different types of products, each with its own materials, application method, and purpose. While both can be decorative and expressive, they’re built for different environments and levels of durability. Understanding the difference can help you choose the right one for your needs—and better yet, make them yourself at home. With a compact, beginner-friendly tool like the Liene PixCut S1, creating stickers is quick, fun, and easy. All you need is a basic understanding of what sets these things apart to get started with confidence. What Is a Sticker? A sticker is a printed design, such as a logo, illustration, or text—applied to adhesive sticker paper. It’s essentially a peel-and-stick solution that requires no additional tools or steps to apply. Just peel off the backing, press it onto a clean surface, and you’re done in seconds. Stickers are versatile, easy to use, and perfect for quick personalization or branding. Stickers are often used for: Decorating notebooks, laptops, or water bottles Enhancing product packaging and envelopes Creating name tags, labels, and business branding Adding fun, colorful elements to planners and scrapbooks Expressing creativity and personality through art The Liene PixCut S1 makes sticker creation effortless and precise. With 300dpi high-resolution printing and AI-powered precision cutting, your sticker designs come out sharp, vibrant, and perfectly trimmed. You can design directly in the user-friendly Liene app or import custom graphics from your favorite design software. Whether you’re crafting for fun, organizing your space, or starting a small business, the PixCut S1 is a smart, compact tool that brings your sticker ideas to life with ease. Beyond everyday decoration, stickers also serve as powerful tools for storytelling and communication. Whether you're marking important dates in a planner, creating custom labels for handmade goods, or designing a sticker sheet to share your art, stickers allow you to convey ideas in a playful, visual way. With the Liene PixCut S1, bringing those ideas to life is not only simple—it’s also incredibly satisfying. You can experiment with styles, shapes, and sizes to make each sticker uniquely yours. What Is a Decal? A decal is similar to a sticker in that it features a printed or cut design with an adhesive backing, but the application process is different. Rather than simply peeling and sticking, decals are transferred onto a surface using a layer of transfer tape. This method helps keep complex designs or separated elements—like individual letters—perfectly aligned during application. It's especially useful for larger graphics or anything that needs clean, precise placement. Decals are typically made from cut vinyl, a material known for its durability and weather resistance. Once applied, decals can withstand sun, moisture, and general wear and tear, making them a great choice for long-term or outdoor use. Common surfaces where decals are used include: Car windows and bumpers Storefront windows or display glass Interior walls or home furniture Laptops, tablets, and other electronics where a seamless look is preferred Because of their resilience and polished finish, decals are often chosen for business signage, automotive branding, and custom home decor. The transfer process allows the design to appear as if it's been painted or printed directly onto the surface, with no background or border. However, the Liene PixCut S1 is designed exclusively for stickers and does not support vinyl cutting or transfer tape needed for decals. The PixCut S1 is not for heavy-duty or weatherproof decal applications. Understanding this distinction ensures you’ll get the best results from your PixCut S1—and choose the right materials for the right job. Key Differences Between Decals and Stickers Aspect Stickers Decals Application Method Peel and stick directly onto the surface. Requires transfer tape to apply the design precisely to the surface. Materials Made from adhesive sticker paper. Made from cut vinyl; uses transfer tape for placement. Durability Suitable for indoor use; may fade or peel with moisture or sun exposure. More durable and weather-resistant; ideal for outdoor or long-term use. Common Uses Perfect for laptops, notebooks, planners, scrapbooking, and packaging. Best for business signs, car graphics, window displays, and wall art. Compatibility with PixCut S1 Fully compatible; PixCut S1 prints and cuts stickers with precision. Not supported Which One Should You Use? So, how do you choose between a sticker and a decal? It all depends on what you're trying to create and where you plan to apply it. Use Stickers If You Want To: Decorate your laptop, journal, or phone case Add flair to product packaging or shipping boxes Create fun, colorful graphics for scrapbooking or labeling Showcase your cherished memories in photo albums, travel journals, or custom keepsakes Use Decals If You Want To: Add branding to a car, glass storefront, or sign Decorate your home walls or furniture with vinyl quotes or designs Apply durable designs to outdoor surfaces or rough materials You can start small with stickers and move to decals for more advanced projects. How to Create Stickers at Home with Liene PixCut S1 Whether you’re making stickers, the process is remarkably simple with the Liene PixCut S1. Here’s a quick step-by-step guide: Step 1: Design Your Artwork Use the Liene App to create your design or import artwork from your phone or computer. You can adjust colors, scale the design, and set up the cut outline right inside the app. Step 2: Print with Liene PixCut S1 Load your Liene official sticker paper into the PixCut S1 and hit print. The 300dpi resolution ensures your design is crisp, detailed, and ready for cutting. Step 3: Precision Cutting Once printed, the PixCut S1 uses AI-powered cutting to trace the exact outline of your design. This means no jagged edges, misalignment, or wasted materials. For Stickers: Simply peel and stick. Your sticker is ready to go—whether you’re labeling, decorating, or gifting. For Decals: The PixCut S1 supports sticker paper only. It does not handle vinyl materials or support transfer tape usage. Why Liene PixCut S1 Is Ideal for Stickers The Liene PixCut S1 isn’t just another printer or cutter—it’s a versatile, compact machine that combines the power of both into one stylish tool. Here’s why it stands out for home creators: High-Resolution Printing (300dpi): Prints in 300dpi high-resolution, ensuring crisp, vibrant, and detailed designs. Your artwork comes to life with rich colors and clean lines, perfect for everything from fun sticker sheets to polished branding materials. AI-Powered Precision Cutting: AI-powered precision cutting allows for perfectly outlined shapes, even for complex or intricate designs. You’ll never have to worry about jagged edges or manual trimming again. Wireless and App-Controlled Convenience: App-controlled and fully wireless, the PixCut S1 lets you design and print directly from your smartphone or tablet. No cables, no technical hassle—just creative freedom at your fingertips. Supports Multiple Materials: Supports multiple materials, including printable sticker paper. Whether you’re making peel-and-stick labels or professional stickers, the PixCut S1 handles it with ease. Compact, Stylish, and Beginner-Friendly: Compact, stylish, and beginner-friendly, it fits comfortably on a desk or craft shelf while offering powerful performance. Even if you're new to crafting, you'll be up and running in minutes. Whether you’re a small business owner, hobbyist, or first-time DIYer, the PixCut S1 makes sticker-making easy to sticker making without investing in separate devices. Conclusion Stickers are peel-and-stick designs great for fun and easy applications, while decals are transferred vinyl graphics that offer durability and a sleek finish. Knowing the difference helps you choose the right approach for your next project. With the Liene PixCut S1, you can design, print, and cut stickers right from home, with no hassle and no mess. So go ahead—get creative, stay organized, and make your ideas stick. Ready to start? Explore everything you can do with PixCut S1 at Liene. FAQs What is the difference between decals and stickers? Stickers are peel-and-stick designs printed on adhesive sticker paper. Decals are usually vinyl designs transferred using transfer tape for a clean, borderless look. Are decals more durable than stickers? Yes. Decals are typically made of weather-resistant vinyl, making them more suitable for outdoor and long-term use. Can I make stickers and decals with Liene PixCut S1? No. The PixCut S1 is built for sticker creation only. It does not support vinyl or decal production. What materials do I need to make decals? You’ll need printable vinyl sheets and transfer tape. Consider using a vinyl cutter for decal projects. Do I need transfer tape for stickers? No, transfer tape is only needed for decals. Stickers can be applied directly by peeling off the backing and sticking them to your desired surface.
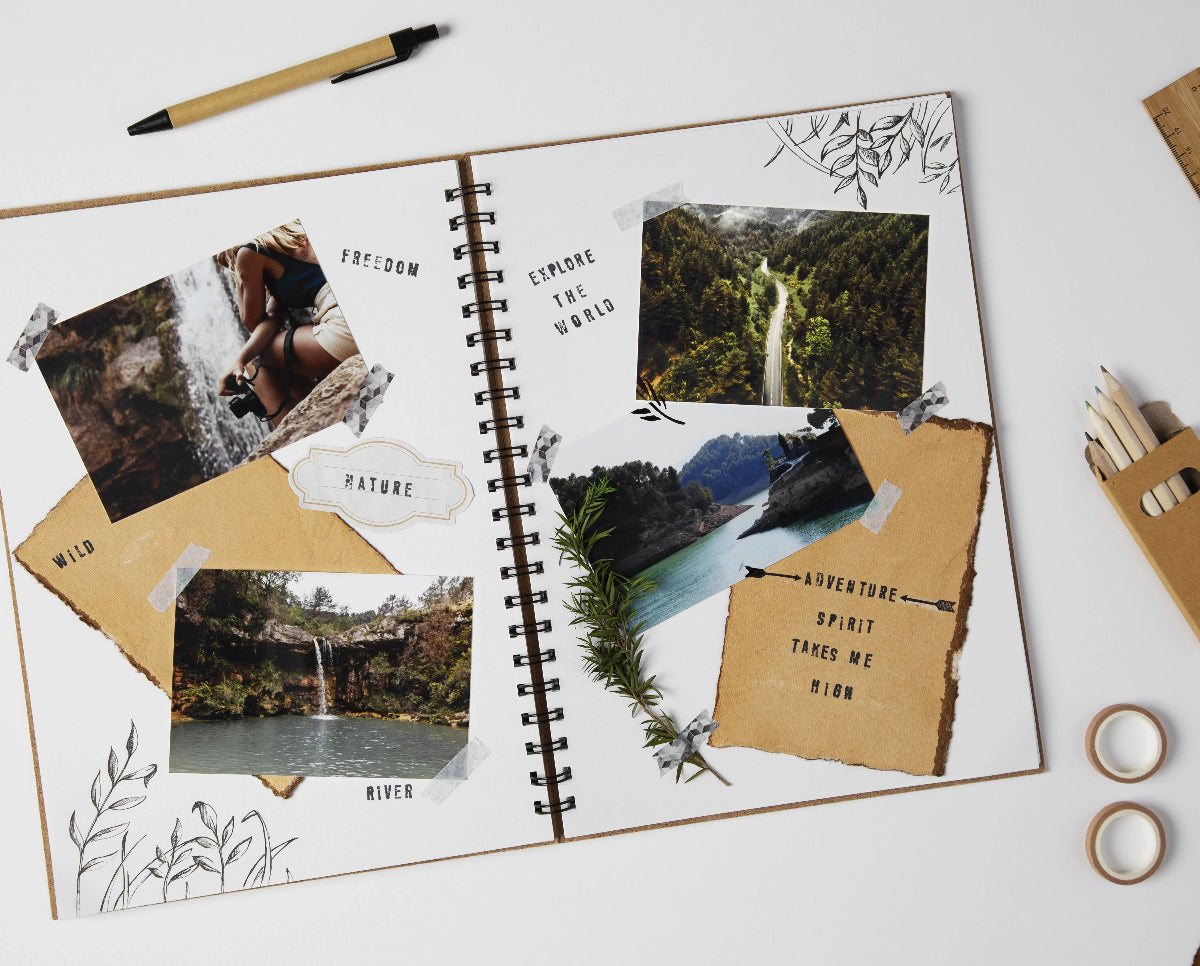
Hallo Sticker-Liebhaber und Scrapbook-Fans! Habt ihr genug von den immer gleichen Stickern aus dem Laden? Sehnt ihr euch nach einer persönlichen Note für euer Scrapbook, die einfach „Ich“ ist? Dann habt ihr Glück! Heute zeigen wir euch 5 kreative Möglichkeiten, Scrapbook-Sticker selbst zu gestalten, die euren Seiten nicht nur eine persönliche Note verleihen, sondern euer Scrapbook auch einzigartig machen. Von Basteln mit Haushaltsgegenständen bis hin zu Technik-Freaks – wir haben eine Auswahl, die eure Kreativität anregt und vielleicht sogar ein neues Hobby in Gang bringt. Also, ran an die Schere, Drucker an und los geht’s! 1. Individuelle Aufkleber von professionellen Druckereien Brauchen Sie schnell hochwertige, individuelle Scrapbook-Sticker? Professionelle Druckservices sind die Lösung! Verwandeln Sie Ihre Designs mit nur einem Klick in edle Sticker – schnell und elegant – in lokalen Geschäften oder online. Gestalten Sie nach Herzenslust: Lassen Sie Ihrer Kreativität beim Gestalten Ihrer Sticker freien Lauf. Sie können Design-Software oder einfachere Online-Tools vieler Druckereien verwenden. Ob gefühlvolle Zitate, eigene Kunstwerke oder Fotos – achten Sie darauf, dass Ihr Design die Atmosphäre Ihres Scrapbooks widerspiegelt. Wählen Sie Ihren Service: Recherchieren Sie, um einen Druckservice zu finden, der Ihren Anforderungen entspricht. Online-Plattformen bieten oft eine große Auswahl an Materialien, Oberflächen und Größen. Suchen Sie nach Diensten, die Ihnen die Bestellung kleiner Mengen ermöglichen, wenn Sie keine großen Mengen kaufen möchten. Qualität und Macken:Achten Sie bei der Auswahl eines Dienstleisters auf die Druckqualität und das Material der Aufkleber. Manche Anbieter bieten wasserfeste, Vinyl- oder sogar holografische Aufkleber an, die Ihrem Scrapbook das gewisse Etwas verleihen. Lesen Sie unbedingt Bewertungen oder fordern Sie Muster an, wenn Sie sich nicht sicher sind. Ordnen und Organisieren:Sobald Sie mit Ihrem Design zufrieden sind und Ihren Drucker ausgewählt haben, geben Sie Ihre Bestellung auf. Sobald Ihre Sticker eintreffen, müssen Sie sie nur noch abziehen und auf Ihre Scrapbook-Seiten kleben. Ordnen Sie sie so an, dass sie Ihre Geschichte erzählen. Wenn Sie Ihre individuellen Scrapbook-Sticker von einem professionellen Druckservice drucken lassen, sparen Sie nicht nur Zeit, sondern verleihen Ihrem Scrapbook auch einen edlen, langlebigen Touch. Es eignet sich hervorragend für besondere Projekte, bei denen jedes Detail perfekt sein soll, oder wenn Sie das Scrapbook verschenken möchten. 2. Sticker basteln mit Washi Tape Washi-Tape eignet sich nicht nur für Ränder oder Rahmen; es ist Ihr neuer bester Freund für die schnelle, einfache und dekorative Gestaltung von Aufklebern. So erstellen Sie in wenigen Schritten Ihre eigenen Washi-Tape-Aufkleber: Wählen Sie Ihre Washi-Tapes:Wählen Sie Washi-Tapes mit Farben und Mustern, die zum Thema Ihres Scrapbooks passen. Dank der Vielfalt der verfügbaren Designs können Sie Ihrer Kreativität freien Lauf lassen. Wachspapier aufkleben: Lege Washi-Tape-Streifen nebeneinander auf ein Stück Wachspapier. Durch leichtes Überlappen der Kanten kannst du Aufkleber in jeder beliebigen Form ausschneiden, ohne dass sie auseinanderfallen. Gestalten Sie Ihre Aufkleber: Sobald Sie ein Stück Wachspapier mit Washi-Tape bedeckt haben, können Sie mit Ausstechformen, Schablonen oder Freihandskizzen mit einem Stift Muster auf der mit Washi-Tape bedeckten Oberfläche erstellen. Schneiden und Schälen: Schneide deine Motive vorsichtig mit einer scharfen Schere oder einem Bastelmesser aus. Dank des Wachspapiers lassen sich deine neuen Washi-Tape-Sticker leicht abziehen und sind bereit für dein Scrapbook. Auf Ihr Sammelalbum anwenden:Ziehen Sie Ihre Washi-Tape-Aufkleber vom Wachspapier ab und kleben Sie sie direkt auf Ihre Scrapbook-Seiten.Sie eignen sich hervorragend, um farbenfrohe Akzente, Ränder oder sogar thematische Dekorationen hinzuzufügen. Mit dieser Methode lassen sich aus Washi-Tape vielseitige, dekorative Scrapbook-Aufkleber herstellen. Du benötigst dafür keine speziellen Materialien oder Werkzeuge, außer denen, die du vielleicht schon zu Hause hast. Perfekt, um deinen Seiten mit minimalem Aufwand und maximaler Kreativität einen Hauch von Farbe und Muster zu verleihen. 3. Drucken Sie Ihre Fotos mit einer selbstklebenden Rückseite: die Revolution der tragbaren Fotodrucker Die Umwandlung wertvoller Fotos in personalisierte Scrapbook-Aufkleber ist nicht nur ein kreatives Unterfangen, sondern dank der Innovation tragbarer Fotodrucker wie Liene Pearl. Diese Entwicklung verbindet das Digitale mit dem Physischen bei der Erinnerungsaufbewahrung und bietet einzigartige Vorteile, die das Scrapbooking-Erlebnis verbessern. Auswählen und Bearbeiten auf Ihrem Gerät: Wählen Sie Ihre Fotos zunächst auf Ihrem Mobilgerät aus und nutzen Sie die praktische App, um sie unterwegs zu bearbeiten. So können Sie Bilder optimieren, Text hinzufügen oder Filter anwenden, bevor Sie sie drucken. So stellen Sie sicher, dass jedes Foto die Erinnerung perfekt einfängt, die es repräsentiert. Überall und jederzeit drucken: Mit der Portabilität von Geräten wie Liene PearlSie können Ihren Drucker zu Familienfeiern und Outdoor-Abenteuern mitnehmen oder ihn für spontane Drucksitzungen zu Hause behalten. Diese Freiheit verbessert den Scrapbooking-Prozess erheblich und ermöglicht sofortiges Drucken ohne Wartezeit. Kostengünstig ohne Kompromisse bei der Qualität:Diese tragbaren Drucker produzieren lebendige, hochwertige Aufkleber zu geringeren Kosten als herkömmliche Druckdienste. Die Verwendung von Fotopapier mit selbstklebender Rückseite stellt sicher, dass jeder Druck nicht nur erschwinglich, sondern auch langlebig und bereit zum Einfügen in Ihr Sammelalbum ist. Langlebige, einfach zu verwendende Aufkleber:Das verwendete Fotopapier mit selbstklebender Rückseite ist besonders praktisch und langlebig. Nach dem Drucken können die Fotoaufkleber einfach in Ihr Scrapbook geklebt werden, wo sie sicher haften und Ihre Erinnerungen lange erhalten bleiben. Dieser Ansatz ist ideal für alle, die die Unmittelbarkeit digitaler Fotos mit der haptischen Freude des Scrapbookings verbinden möchten. Tragbare Fotodrucker wie der Liene Pearl Printer sind für Bastler und Scrapbooker gleichermaßen bahnbrechend und bieten eine unterhaltsame und innovative Möglichkeit, Erinnerungsbücher individuell zu gestalten. 4. Wachssiegelaufkleber basteln: Ein Hauch zeitloser Eleganz Wachssiegelaufkleber bieten eine einzigartige Mischung aus altem Charme und moderner Handwerkskunst und verleihen Ihren Scrapbook-Seiten ein besonderes Flair. So gestalten Sie diese bezaubernden Verzierungen: Sammeln Sie Ihre Materialien: Sie benötigen einen Wachssiegelstempel, Siegelwachsstifte (in unzähligen Farben erhältlich), Pergamentpapier und eine Heißklebepistole mit niedriger Temperatur oder einen Wachsschmelzlöffel. Das Wachs schmelzen: Wenn du eine Heißklebepistole verwendest, stecke den Siegelwachsstift hinein. Bei der Schmelzlöffelmethode hältst du den Löffel über eine Kerze oder eine kleine Flamme und gibst Stücke des Siegelwachses hinein, bis es schmilzt. Herstellung des Siegels:Gießen Sie das geschmolzene Wachs auf Backpapier und formen Sie es zu sauberen Kreisen. Drücken Sie Ihren Siegelstempel fest hinein, solange das Wachs noch warm ist, und warten Sie, bis es abkühlt und fest wird. Dieser Vorgang erzeugt einen eleganten Prägeeffekt. Umwandlung in Aufkleber: Nachdem die Wachssiegel ausgehärtet sind, lösen Sie sie vorsichtig vom Pergament. Befestigen Sie auf der Rückseite jedes Siegels einen Klebepunkt oder ein Stück doppelseitiges Klebeband und verwandeln Sie sie so im Handumdrehen in einzigartige Aufkleber. Auf Ihr Sammelalbum anwenden: Jetzt kommt der spaßige Teil: Platzieren Sie Ihre Wachssiegel-Aufkleber auf Ihren Scrapbook-Seiten. Sie eignen sich perfekt, um Titeln und Rändern eine raffinierte Note zu verleihen oder als eigenständige Dekoration, die ins Auge fällt. Wachssiegel-Aufkleber verleihen Ihrem Scrapbooking-Projekt ein unvergleichliches Maß an Raffinesse und Schönheit und verbinden den Reiz historischer Korrespondenz mit zeitgenössischem Handwerk. Ob Sie ein klassisches, romantisches oder sogar ein Fantasy-Scrapbook gestalten möchten – diese Aufkleber werden Ihre Seiten zweifellos aufwerten. 5. Alltagsgegenstände in einzigartige Aufkleber verwandeln Wer hätte gedacht, dass alltägliche Haushaltsgegenstände zu den Stars Ihres Scrapbooks werden könnten? Dieses DIY-Abenteuer verwandelt das Gewöhnliche in Außergewöhnliches und macht die Sticker-Erstellung nicht nur einfach, sondern auch unglaublich persönlich und einzigartig. Suchen Sie nach Ihren Vorräten:Beginnen Sie Ihre Schatzsuche zu Hause – suchen Sie nach allem, was eine selbstklebende Rückseite hat. Denken Sie an Etiketten, Klebeband und sogar alte Briefmarken. Haben Sie eine alte Zeitschrift oder ein Buch mit interessanten Bildern oder Texten? Das funktioniert auch hervorragend! Mit Kreativität anpassen: Jetzt lasst eurer Kreativität freien Lauf. Habt ihr ein Etikett? Dann macht daraus ein Namensschild für eure Scrapbook-Seite. Eine alte Briefmarke? Perfekt für einen Vintage-Touch. Aus Zeitschriftenausschnitten lassen sich lustige Sticker machen, indem man sie auf Klebefolien klebt oder doppelseitiges Klebeband verwendet. Schneiden, Abziehen, Aufkleben: Sobald du dich für deine Artikel entschieden und sie personalisiert hast, kannst du sie für dein Scrapbook vorbereiten. Wenn du nicht klebende Artikel verwendest, klebe sie auf eine klebrige Oberfläche oder benutze einen Klebestift, um sie klebend zu machen. Schneide sie dann in die gewünschten Formen, ziehe sie gegebenenfalls ab und klebe sie auf deine Seiten. Mischen und Anpassen:Das Schöne an Haushaltsgegenständen sind die endlosen Kombinationsmöglichkeiten. Kombinieren Sie Texturen, Farben und Größen, um beeindruckende Layouts zu erstellen. Ihr Scrapbook erzählt nicht nur Ihre Geschichte, sondern zeigt auch Ihre Kreativität und Ihren Einfallsreichtum. Diese Methode dient nicht nur der Wiederverwendung und Neuverwendung vorhandener Materialien – sie verleiht Ihrem Scrapbook auch eine persönliche Note und ein überraschendes Element. Sie ist eine hervorragende Strategie, um Ihren Seiten ein besonderes Flair zu verleihen und ein Mosaik der kleinen, aber bedeutsamen Momente Ihres Lebens durch die Materialien widerzuspiegeln, die diese symbolisieren. Abschließende Gedanken Entdecken Sie die Kunst, Scrapbook-Sticker zu gestalten und Ihre Erinnerungen individuell zu gestalten. Von professionellen Drucken bis hin zu bezaubernden Wachssiegeln – jede Methode lädt Sie ein, Ihrer Kreativität freien Lauf zu lassen. Ein Scrapbook ist nicht nur ein Archiv von Momenten, sondern eine lebendige Leinwand, die nur auf Ihre Kreativität wartet. Also, sammeln Sie Ihre Materialien und lassen Sie Ihrer Kreativität freien Lauf. Viel Spaß beim Basteln!
3 / 3